Laser Engraving Project Ideas: 30+ Builds by Material and Skill
The fastest way to get good on a laser is to stop reading and start cutting projects that force you to learn one new skill each time. A laser engraving project is any job that takes a flat blank — wood, acrylic, leather, slate, coated metal — and turns it into a finished object, and the ones that teach the most are the ones that combine a clean cut, a crisp engrave, and a finish step you have to get right. After running several hundred jobs across my diode, CO2, and fiber machines, the pattern is clear: the project picks the machine, the material picks the settings, and the finish is where most beginners lose the piece.
This guide is the hub for every project on the site. It groups the builds by material and difficulty, tells you which of my machines I reach for and why, and links out to the full step-by-step walkthroughs. Whether you want a food-safe cutting board, a batch of Christmas ornaments, or an edge-lit acrylic night-light, the workflow underneath is the same five steps — design, fixture, cut, engrave, finish — and once you internalise it every new project is just a variation on a theme you already know.
How to Choose Your First Laser Project
Pick a project that matches your machine and uses a material you already have on the bench. A diode owner should start with wood or leather coasters; a CO2 owner should start with cast acrylic; nobody should start with a job that needs a rotary or a fiber marker they do not own yet. The single biggest beginner mistake is choosing a project for the photo instead of for the machine, then fighting physics for an afternoon.
Difficulty in laser work is not about the artwork — it is about how unforgiving the material and the finish are. A wood sign tolerates a slightly hot engrave because char sands off. A clear acrylic edge-lit panel shows every stutter in the cut. Veg-tan leather burns differently from chrome-tan and smells worse if you push it. So before you fall in love with a design, ask three questions: do I own the right machine class, do I have the blank in a known-safe material, and can I recover the piece if the first pass is wrong? If the answer to any of those is no, pick a more forgiving project first. Every build linked below is tagged with the machine class it really wants and a realistic difficulty so you are not guessing.
The Five-Step Workflow Behind Every Project
Every project on this site follows the same five steps: design the file, fixture the blank, cut the outline, engrave the detail, and finish the surface. Master those once and you can build anything — the only thing that changes between a coaster and a finger-joint box is the artwork and the settings. Skipping a step is what produces the wobbly, scorched, half-finished pieces that fill beginner galleries.
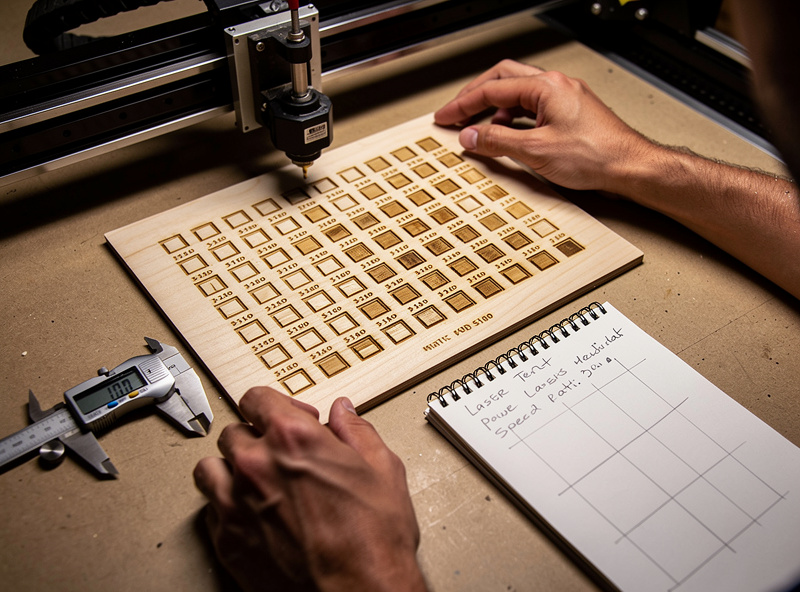
Design means a clean vector for cuts and a properly prepared raster for engraves; sloppy SVG preparation causes more failed cuts than any setting. Fixturing means the blank cannot move — a $12 set of hold-down pins or a 3D-printed jig saves more material than any other upgrade. Cutting is a power, speed, and pass decision you make from a materials test card, never by guessing. Engraving is about line interval, masking, and air assist for a clean, low-char result. Finishing — sanding, oiling, sealing, edge-flaming acrylic — is the step that separates a craft-fair piece from a kindergarten one. I run a fresh test card for every new material lot before any production batch, and it has saved me more ruined blanks than I can count.
Wood Projects: Boards, Signs, and Ornaments
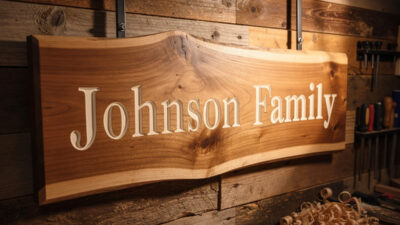
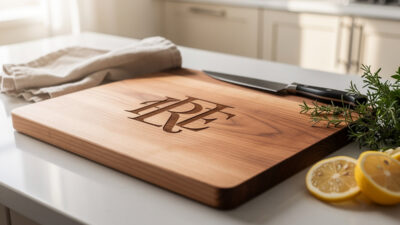
Wood is where almost everyone starts, and for good reason: it is cheap, forgiving, and a diode laser engraves it beautifully. The three highest-value wood projects are food-safe cutting boards, custom wood signs, and Christmas ornaments, and each teaches a different skill. Boards teach you food-safe material selection and finishing; signs teach you large-format alignment and depth; ornaments teach you batch production and tiny-detail engraving.
For boards I reach for the diode for the engrave and finish with a food-safe oil — the food-safe cutting board build covers which woods are safe, why you keep the engrave shallow, and the oil-and-wax routine that keeps the mark crisp through washing. Signs scale up: a custom wood sign build walks through tiling a design larger than the bed, choosing between engraved and cut-through lettering, and the paint-fill trick for contrast. Ornaments are the gateway to selling — the Christmas ornament project covers cutting thin ply cleanly, batching dozens per sheet, and the masking step that keeps the engrave soot off the face. For wood selection across all three, the best wood for laser engraving breakdown is the reference I keep open.
Acrylic Projects: Edge-Lit and Display Pieces
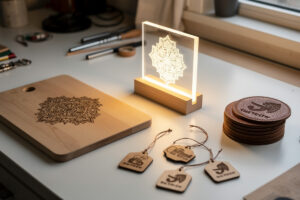
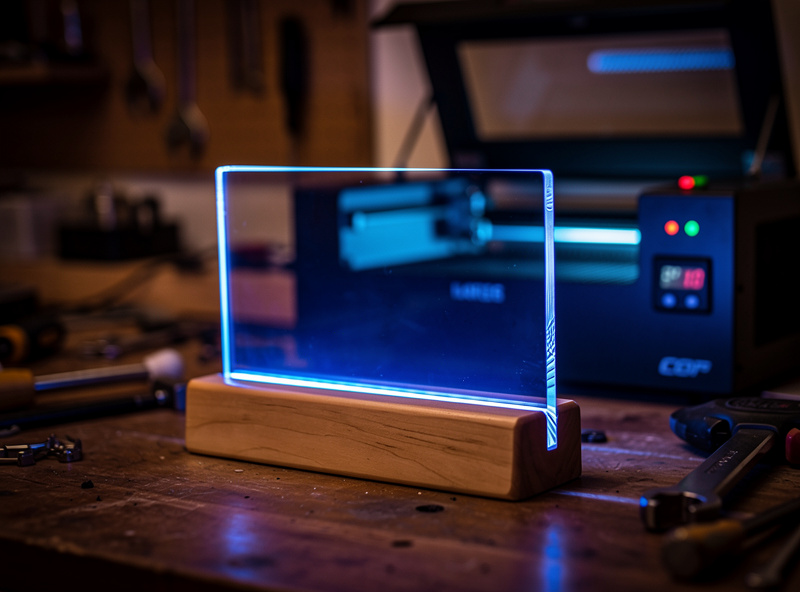
Acrylic is the material that makes a diode owner want a CO2. A blue diode beam barely couples with clear cast acrylic, so for anything optical you want the CO2 — and the payoff is the edge-lit night-light, the single most impressive beginner-accessible project on the list. An edge-lit panel is a sheet of clear acrylic engraved on one face; an LED base lights the engraved lines so the artwork glows while the sheet stays invisible.
The edge-lit acrylic night-light build covers why you use cast (not extruded) acrylic, how deep to engrave for an even glow, and how to cut the base slot to a press fit. Get the acrylic cutting settings right first — cast and extruded behave completely differently, and the flame-polished edge that makes acrylic look premium only happens at the correct power and speed. Acrylic is also where masking matters most: leave the protective film on for the cut, pull it for the engrave face, and you avoid the milky residue that ruins clarity.
Leather Projects: Coasters and Personalized Goods
Leather is my favourite crossover material — the same blanks feed both the laser and the hand-stitching bench. A diode marks veg-tan leather with a rich, dark burn that looks branded, and leather coasters are the perfect first leather project: small, cheap, and they teach you the most important leather lesson, which is that chrome-tan and veg-tan behave nothing alike under a beam.
The leather coaster build covers sourcing veg-tan blanks, the low-power settings that engrave without cutting through, and the edge-bevel-and-burnish finish that makes a coaster look bought rather than burned. Pair it with the deeper leather settings guide for the full vegetable-tan versus chrome-tan breakdown — and never laser chrome-tan or unknown bonded leather without testing a scrap first, because the tanning chemistry can outgas. Leather is also the project that teaches air assist: a dedicated air-assist pump keeps the char off the surface and the smell down, and I run it on every leather job without exception.
Tumblers and Metal: When You Need a Fiber Marker
Tumblers are the project everyone wants and the one that needs gear most beginners do not have. A powder-coated stainless tumbler is engraved on a fiber or diode marker spinning on a rotary, and the full build is a genuine project — design wrap, rotary fixture, settings, and finish — not just a settings tweak.
The tumbler project build walks the whole job from designing a wrapped layout to fixturing on a rotary to the finishing pass; for the raw power-and-speed numbers it points to the dedicated stainless tumbler settings reference rather than repeating them. Metal marking in general is where the fiber earns its place on the bench — coated tumblers, anodized aluminum tags, and the kind of permanent marks a diode cannot make. If you are buying for metal work specifically, the best fiber laser for metal comparison is the place to start. This is also the genuine edge of my own bench: I run a desktop fiber marker for tumblers and tags, but high-rep-rate industrial galvo work is a different beast and I flag it as such.
Scaling Up: Batch Production and Selling Your Work
The jump from making one piece to making twenty is its own skill, and it is where most of the people who want to sell their work stall. Batch production is not about a faster machine — it is about a repeatable fixture, a nested file, and a finishing routine you can run on an assembly line. Once you can cut twelve ornaments off a single sheet without re-homing the laser between them, you are producing, not tinkering.
The fixture is the foundation. A jig that locates every blank in the same spot means you set focus and origin once and run the whole batch without touching the machine, and a 3D-printed locator is the cheapest way to get there — the 3D-printed jig examples show exactly how I build mine. Nesting comes next: pack the artwork so a 300 by 300 sheet yields the most parts with the least waste, and cut all the engraves first, then all the through-cuts, so the parts stay anchored until the last second. Finishing in batches means setting up a single sanding, oiling, or burnishing station and running every piece through it in one pass rather than start-to-finish on each. I keep my power and speed numbers from the first good piece in a logbook so the second batch starts from a known-good setting instead of a fresh test card every time — though I still cut a quick test strip when the material lot changes, because plywood especially varies sheet to sheet.
One firm boundary: this site never talks income figures. How much a piece sells for depends entirely on your market, and any “make $X a month engraving” claim is guesswork dressed as advice. What I can tell you is which projects batch cleanly and which fight you — ornaments, coasters, and tags batch beautifully; large signs and edge-lit panels do not, because each one needs individual attention. Pick batch-friendly projects if volume is the goal.
Boxes and Joinery: The Finger-Joint Box
The finger-joint box is the project that makes you a real laser cutter. It uses kerf-aware design, press-fit joinery, and a living hinge if you want a lid — every skill that separates someone who cuts shapes from someone who builds objects. A box generator gets you a starting file, but the fit depends on you measuring your own kerf and tuning the joint to it.
The finger-joint box build covers measuring kerf on your machine, adjusting finger width for a snap fit, and gluing up square. It is the project I point people to when they are ready to stop making flat things and start making three-dimensional ones, and the kerf-measurement habit it teaches carries into every press-fit project after it. Once you can cut a box that closes with a satisfying click, inlays, trays, and enclosures are all within reach.
Project Comparison: Machine, Material, and Difficulty
This table is the quick-reference for picking your next build. Match it to the machine class you actually own — a project tagged CO2 will frustrate a diode owner, and a fiber project needs a marker most hobbyists add later.
| Project | Best Machine | Material | Difficulty | Key Skill Taught |
|---|---|---|---|---|
| Food-safe cutting board | Diode | Hardwood | Beginner | Food-safe finishing |
| Leather coasters | Diode | Veg-tan leather | Beginner | Low-power engrave control |
| Christmas ornaments | Diode / CO2 | Thin plywood | Beginner | Batch production |
| Custom wood sign | Diode / CO2 | Hardwood / ply | Intermediate | Large-format alignment |
| Edge-lit night-light | CO2 | Cast acrylic | Intermediate | Optical engrave depth |
| Finger-joint box | Diode / CO2 | Plywood | Intermediate | Kerf-aware joinery |
| Engraved tumbler | Fiber + rotary | Coated stainless | Advanced | Rotary fixturing |
Materials, Safety, and the One Hard Rule
Every project on this site obeys one non-negotiable rule: you never put PVC, vinyl, or unknown coated stock near a laser. PVC releases chlorine gas that corrodes your machine and harms your lungs, and it looks identical to safe acrylic until it is too late. If you cannot identify a material with certainty, you do not cut it — full stop. The PVC dangers explainer covers how to test for it and why this is the line that never moves.
Beyond materials, every project assumes the same workshop discipline: air assist on every cut, ducted exhaust to outside (not a box fan in a window), a fire extinguisher and blanket within arm’s reach, and the absolute rule that you never leave a running job unattended. Lasers genuinely start fires — the discipline is part of the craft, not a footnote to it. If your workshop ventilation is not sorted, fix that before your next project, not after.
The Five Mistakes That Ruin Beginner Projects
Almost every failed first project traces to one of five mistakes, and all five are avoidable once you know to watch for them. None of them are about the machine — they are about skipping a step in the workflow because it felt optional. It never is.
Guessing the settings instead of running a test card. The number-one cause of scorched wood and incompletely cut acrylic is starting a real job on settings copied from a forum post. Power, speed, and pass count depend on your exact machine, lens, and material lot. A two-minute test grid before the job is the single highest-return habit in laser work. Skipping fixturing. A blank that shifts mid-job ghosts the engrave or doubles the cut line, and it always seems to happen on the last good sheet. Pins, magnets, or a jig — pick one, use it every time. Wrong material for the machine. Trying clear acrylic on a diode, or bare stainless without a fiber or a marking spray, produces hours of frustration that the right machine class solves in minutes. Match the project to your bench. Forgetting masking. Engraving wood or acrylic without masking tape leaves soot smeared across the surface that no amount of wiping fully removes; mask first, engrave, peel, and the face stays clean. Treating the finish as optional. The cut and engrave are maybe sixty percent of the result — sanding, oiling, edge-burnishing, and flame-polishing are what make a piece look bought. Budget time for finishing or the project looks unfinished, because it is.
Project Supplies and Blanks I Keep on the Bench
Most of these projects need consumables more than they need machine upgrades, and blanks are where the money quietly goes. For wood projects I keep a stack of baltic birch plywood blanks in 3mm and 6mm — consistent, low-void ply cuts far cleaner than hardware-store sheet. For the finishing step that actually matters on boards and signs, a tin of food-safe board oil and wax is the difference between a mark that lasts and one that washes out. And the single best fixturing upgrade for any project is a set of hold-down pins and clamps so the blank cannot shift mid-job.
Disclosure: Some links above are affiliate links. If you buy through them I may earn a small commission at no extra cost to you. I only recommend blanks, materials, and accessories I actually keep on my own bench — it never changes which machine or method I tell you is right for the job.
More Projects to Build Next
These walkthroughs go deeper on specific builds — start with the one that matches the machine on your bench:
- Laser-Engraved Plant Tags: A Weekend Project
- Laser-Engraved Coop Signs and Leg Bands
- Laser-Engraved Smart-Home Switch Plates
- Laser-Etched Inlays Filled with Wood Veneer
- Laser-Cut Bus Bar Insulators for Battery Banks
- 3D-Printed Jigs for Laser Engraving
- 12 Practical Laser Projects That Build Skills
Frequently Asked Questions
What is the best first laser engraving project?
Leather coasters or a hardwood cutting board on a diode laser. Both use cheap, forgiving material, teach low-power engrave control, and finish in an afternoon without needing a rotary or fiber marker you may not own.
Do I need a CO2 laser for acrylic projects?
For clear cast acrylic like edge-lit night-lights, yes. A blue diode beam barely couples with clear acrylic, so the cut is slow and rough. CO2 cuts clear acrylic clean with a flame-polished edge.
Can a diode laser engrave metal tumblers?
A diode can mark coated or powder-coated tumblers, but bare stainless needs a fiber marker or a Cermark-style coating. Either way you need a rotary attachment to spin the cylinder evenly during the engrave.
Are laser-engraved cutting boards food safe?
Yes, if you use a food-safe hardwood, keep the engrave shallow, and finish with a food-safe board oil and wax. Never engrave painted or coated boards, and never laser any board you cannot identify the finish on.
What materials should I never laser cut?
Never cut PVC, vinyl, or any unknown coated stock. PVC releases chlorine gas that corrodes your machine and harms your lungs, and it looks identical to safe acrylic. If you cannot identify a material with certainty, do not cut it.
What does a finger-joint box teach that flat projects do not?
It teaches kerf-aware design and press-fit joinery. You measure the actual kerf your machine cuts, tune the finger width to it for a snap fit, and assemble a square three-dimensional object instead of a flat shape.