Engraving Inlays: Laser-Etched Cavities Filled with CNC-Cut Wood Veneer
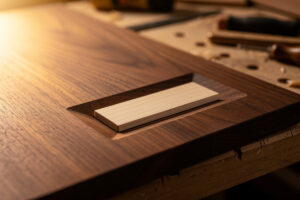
A laser-etched inlay cavity with a CNC-cut wood veneer plug produces tighter joints than either tool could achieve alone — the laser carves the pocket to 0.1mm precision while the CNC cuts the veneer to the exact same contour from the same vector file. Run both operations from one SVG, and the inlay piece drops into the cavity with a gap of less than 0.05mm, which closes completely with glue swelling. This hybrid workflow eliminates the tool-radius compensation that makes inlay work frustrating on either tool by itself: the laser’s zero-kerf cavity sidewalls match the CNC’s predictable 1-2mm end mill kerf on the plug, and the only calibration step is adjusting the plug’s contour offset by the end mill’s radius in the CAM software.
Why the Hybrid Workflow Beats Either Tool Alone
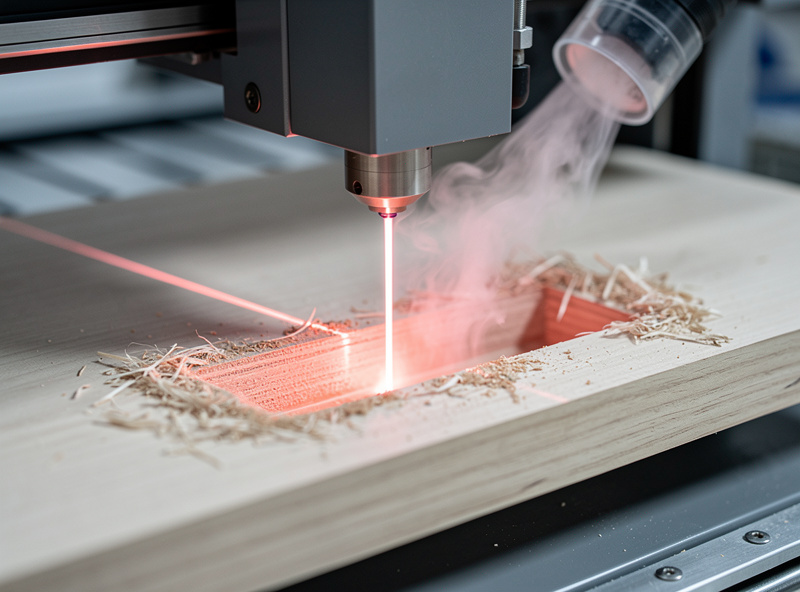
A laser engraver cutting an inlay cavity produces perfectly square internal corners — the beam width at focus is roughly 0.1mm, so the effective corner radius is 0.05mm, which is functionally zero for wood joinery. A CNC router cutting the same cavity with a 3.175mm (1/8-inch) end mill leaves a 1.6mm radius in every internal corner, which means the inlay plug needs matching rounded corners or you accept a visible gap. This is why pure-CNC inlays require the “V-carve inlay” technique, where the plug is cut oversized with beveled edges and driven into the cavity like a wedge — it works but requires precise Z-depth control and a separate cleanup pass that doubles the machining time.
The hybrid approach uses the laser for the cavity because zero-kerf gives sharp internal corners. It uses the CNC for the plug because a spinning end mill cuts a cleaner cross-grain surface on thin veneer than a laser, which burns the edge of 0.6mm veneer and leaves a dark char line that telegraphs through the finish. The CNC’s down-cut spiral bit shears the wood fibers cleanly rather than vaporizing them, and a clean shear line is what makes an inlay joint disappear after sanding. A char line from a laser-cut plug is typically 0.2-0.3mm wide — visible as a dark border around every inlay element under any clear finish — while a CNC-sheared edge has zero discoloration.
Veneer Selection and Preparation
The veneer for the CNC-cut plug needs to be flat, uniform thickness, and supported during cutting. Commercial veneer sheets sold in 0.6mm or 1.5mm thickness work best — the 0.6mm thickness matches the typical laser-engraving depth on a single fill pass. Softer veneers like maple and cherry cut cleanly with a 1.6mm down-cut spiral bit at 16,000 RPM and 800mm/min feed rate. Harder species like walnut and oak need the feed rate dropped to 500mm/min to prevent the bit from grabbing the thin veneer and tearing it. Always use a sacrificial spoilboard beneath the veneer sheet during CNC cutting — the bit must cut slightly past the veneer bottom to fully release the plug, and cutting into a spoilboard preserves the bit edge better than cutting into the CNC bed.
For the laser cavity, the base material should be flat within 0.1mm across the inlay area. A cupped or twisted board means the laser focus height varies, and the engraved depth varies with it — the cavity will be shallow at the high spots and too deep at the low spots, and the veneer plug will sit proud in some areas while sinking below the surface in others. If your base material is not dead flat, surface it with the CNC first, then laser the cavity. Running a surfacing pass with a 25mm facing bit at 0.5mm depth of cut across the entire workpiece takes 5-10 minutes and eliminates the flatness variable completely.

Workflow Step by Step
Start with one SVG containing the inlay shape as a closed path. Import it into LightBurn for the laser cavity: set the layer to Fill mode, dial the power to engrave 0.6-0.8mm deep into the base material (typically 20-30% power at 200mm/s on a 10W diode laser for birch plywood — test on scrap first), and run the cavity. The laser removes material inside the closed path, leaving sharp walls. The fill direction should alternate 90 degrees between passes — LightBurn’s default Cross-Hatch fill produces a flat cavity floor while single-direction fill creates subtle ridges that the veneer plug will not sit flush against.
Take the same SVG into your CAM software. For the plug, you want the exact same shape but cut from a sheet of contrasting veneer. Offset the toolpath outward by the radius of your end mill — for a 1.6mm bit, that is a 0.8mm outward offset on the contour. Cut the plug from the veneer sheet with tabs holding it in place, and the resulting piece will be slightly oversized by exactly the kerf width. Test-fit the plug dry before applying glue; if it does not drop in with light finger pressure, sand the edges of the plug on a flat surface with 320-grit paper — one pass on each edge is usually enough to remove the 0.05mm of excess.
For the full V-carve inlay technique that handles pure-CNC inlays, including the angled-plug method for larger projects where a laser is not available, the V-Carve toolpaths tutorial on DesktopCNCForge covers the CAM-side workflow that the laser cavity eliminates, but which still applies when the CAD file needs to produce both plug and pocket from one toolchain.
Frequently Asked Questions
Can you use a laser engraver and CNC for the same inlay project?
Yes. The laser etches the cavity with zero-kerf sharp internal corners, and the CNC cuts the matching veneer plug from the same SVG file. Offset the plug toolpath by the end mill radius, and the resulting piece drops into the laser-etched cavity with a gap under 0.05mm.
Why not use the laser for both cavity and plug?
A laser burning through thin veneer leaves a dark char line on the cut edges that telegraphs through the finish, especially on light-colored woods. The CNC’s down-cut spiral bit shears wood fibers cleanly. Clean shear lines make inlay joints invisible after sanding and finishing.
What software formats work for laser to CNC file sharing?
SVG is the universal format — LightBurn reads SVG layers directly, and most CAM software imports SVG paths as toolpath geometry. Export a single clean SVG from Inkscape or Illustrator with the inlay shape as one closed path. Use the identical file for both the laser cavity and the CNC plug.
How deep should I laser-engrave an inlay cavity?
Engrave the cavity to match the veneer thickness plus 0.2mm for glue. For 0.6mm veneer engrave to 0.8mm depth. Use Fill mode at 20-30% power on a 10W diode laser for birch plywood. Test depth on scrap before committing to the final piece — laser power settings vary between machines.
How do I handle glue squeeze-out in a tight inlay?
Apply a thin film of wood glue to the cavity bottom only, not the plug edges. The plug drops in and the glue squeezes upward into the 0.2mm extra depth, not outward into the visible seam. Wipe any squeeze-out immediately with a damp cloth before it skins over.
What woods work best for contrasting inlay pairs?
Walnut cavity with maple plug gives the strongest contrast. Cherry with holly veneer is traditional for fine furniture. Avoid pairing two open-pored woods — the grain textures compete and the inlay line blurs. Use closed-grain woods for both cavity and plug for the cleanest joint.
Related Articles
- Laser Engraving Project Ideas: Builds by Material and Skill
- Laser Engraving Leather Settings: Power, Speed, and Material Guide
- Laser Cutting Materials: Complete Guide
- Diode vs CO2 vs Fiber Laser: Which You Actually Need
- Laser Cut vs CNC: When Each Technology Wins
- Laser Engraved Plant Tags: Copper and Acrylic Gifts