Laser Cut vs CNC Router: Plywood, MDF, and Acrylic Compared
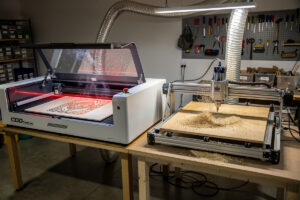
Laser cutters and CNC routers fight over the same set of materials — plywood, MDF, hardwood, acrylic — but cut them with different physics, different speeds, and different finish quality. The choice between them is rarely about which tool is “better”; it is about which trade-offs match the project. After running both side-by-side on identical material tests, the pattern is consistent: lasers win for thin sheets, fine detail, and speed-per-cut; CNC routers win for thick stock, three-dimensional carving, and parts requiring engineered tolerances.
This guide walks the head-to-head comparison on the four materials that drive the decision: 1/8″ plywood, 3/4″ plywood, MDF, and 1/4″ acrylic. The choosing-a-CNC side specifically is covered in the desktop CNC buyer’s guide; this article focuses on which tool to use once you know the project.
The Physics Difference: Heat vs Mechanical Force
Both tools remove material along a programmed path, but the mechanism is fundamentally different.
Laser cutters vaporize material with a focused beam of light. Cut width (kerf) is 0.1–0.3 mm depending on laser type. There is no contact, no clamping force, no tool wear in the traditional sense. The trade-off: heat-affected zones (HAZ) at cut edges leave brown scorch on wood, slight rounding on acrylic edges, and complete inability to cut metal except with industrial fiber lasers.
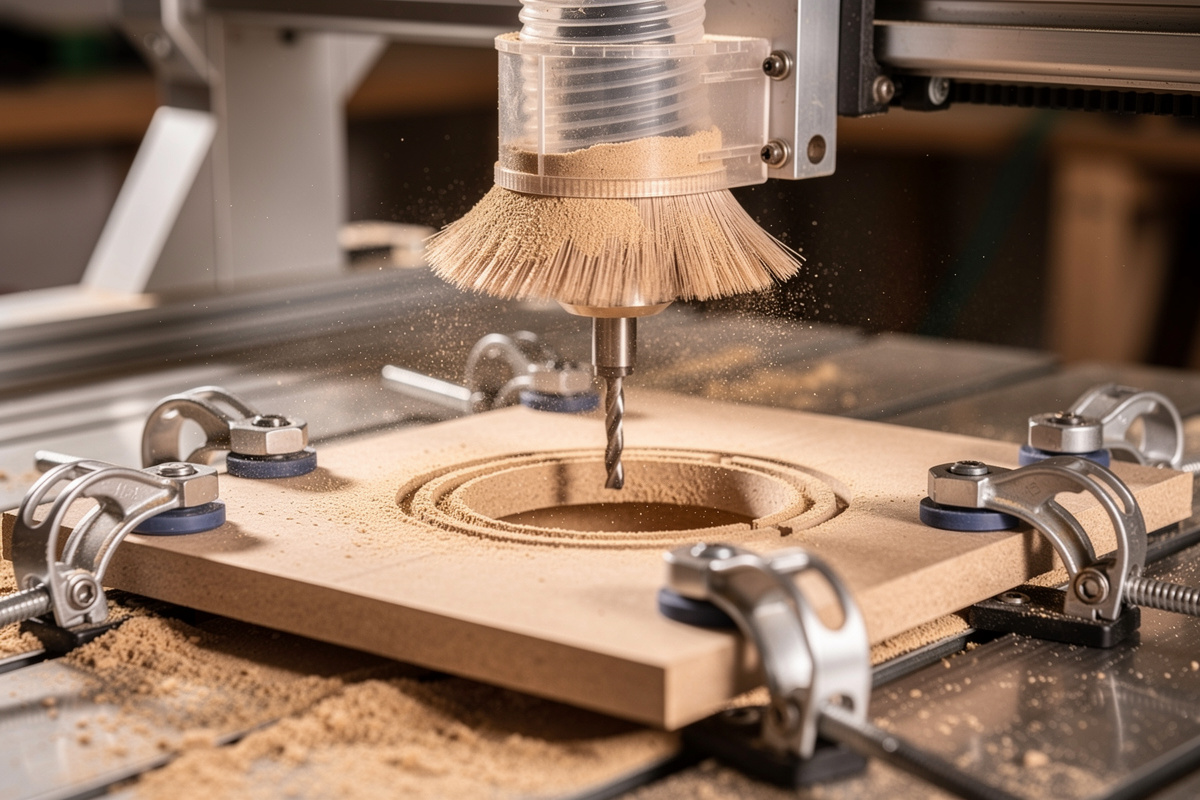
CNC routers remove material with a spinning cutting bit. Cut width depends on bit diameter, typically 1.6–6.35 mm. The bit makes physical contact with the material, requiring clamping, generating dust and chips, and producing tool wear over time. The trade-off: longer setup per project, but no heat damage, much thicker material capability, and the option to do 3D pocket cuts and chamfers.
This single difference — beam-of-light versus spinning-bit — drives every other decision in the comparison.
Material Capability: The Honest Comparison
Across the four materials that matter for most maker projects:
| Material | Diode Laser (10W–40W) | CO2 Laser (40W–100W) | Desktop CNC Router |
|---|---|---|---|
| 1/8″ plywood (3mm) | Cuts in 1–2 passes | Cuts in single pass | Cuts but slower; needs tabs |
| 3/4″ plywood (19mm) | Cannot cut | Marginal — multi-pass risky | Easy; standard task |
| 1/4″ plywood (6mm) | Cuts in 2–4 passes | Single pass at 60W+ | Easy; faster than laser |
| 1/4″ MDF | Cuts but heavy charring | Clean cut | Clean cut; less smell |
| 3/4″ MDF | Cannot cut | Cannot cut | Easy; standard task |
| 1/4″ acrylic | Marginal; edge frosting | Polished flame-cut edge | Sharp square edge; needs flute geometry |
| 1/2″ acrylic | Cannot cut | Marginal at 100W+ | Easy; clean cut |
| Hardwood (oak, walnut) | Engrave only | Cut up to 1/4″; engrave clean | Cut and 3D carve any thickness |
Two patterns dominate. First, lasers max out on cut depth at roughly 1/4 inch on most materials and become uneconomical above that thickness — the multi-pass cuts char heavily and slow dramatically. Second, CNC routers can cut everything in this table, but their setup-per-project time is 5–10× longer than laser. The complete laser cutting materials guide covers each material’s laser settings in depth.
Speed Comparison on Real Projects
Theoretical speed numbers from manufacturer specs do not match real shop time. Three identical projects measured tip-to-tip:
Project A: 12 phone-stand pieces from 1/8″ plywood, 3″×4″ each.
- Diode laser (40W): design 5 min, layout 5 min, cut 14 min total. Total: 24 min.
- CO2 laser (60W): design 5 min, layout 5 min, cut 7 min total. Total: 17 min.
- Desktop CNC (1/8″ endmill, single-flute): design 5 min, fixture/clamp 8 min, cut 28 min, swap stock 4× = 16 min, deburr edges 6 min. Total: 63 min.
Project B: One MDF speaker baffle, 12″×16″, 3/4″ thick.
- Diode laser: cannot cut.
- CO2 laser: cannot cut at this thickness.
- Desktop CNC (1/4″ upcut): design 8 min, fixture 5 min, cut 22 min, deburr 4 min. Total: 39 min.
Project C: Custom acrylic display case, 4 sides + lid, 1/4″ thick, 8″×8″ base.
- Diode laser: marginal — edge quality unacceptable for display use.
- CO2 laser (60W): design 8 min, layout 5 min, cut 18 min, edge polish 8 min. Total: 39 min.
- Desktop CNC: design 8 min, fixture 8 min, cut 35 min total (5 setups for 5 pieces), edge polish 12 min. Total: 63 min.
The pattern: CO2 laser is fastest for thin flat work, CNC is the only option for thick stock, diode laser is the cheapest tool that handles light-duty flat work but loses on edge quality and material range.
Edge Quality: The Finish Test
Edge appearance separates “looks like a hobbyist made it” from “looks retail-ready.”
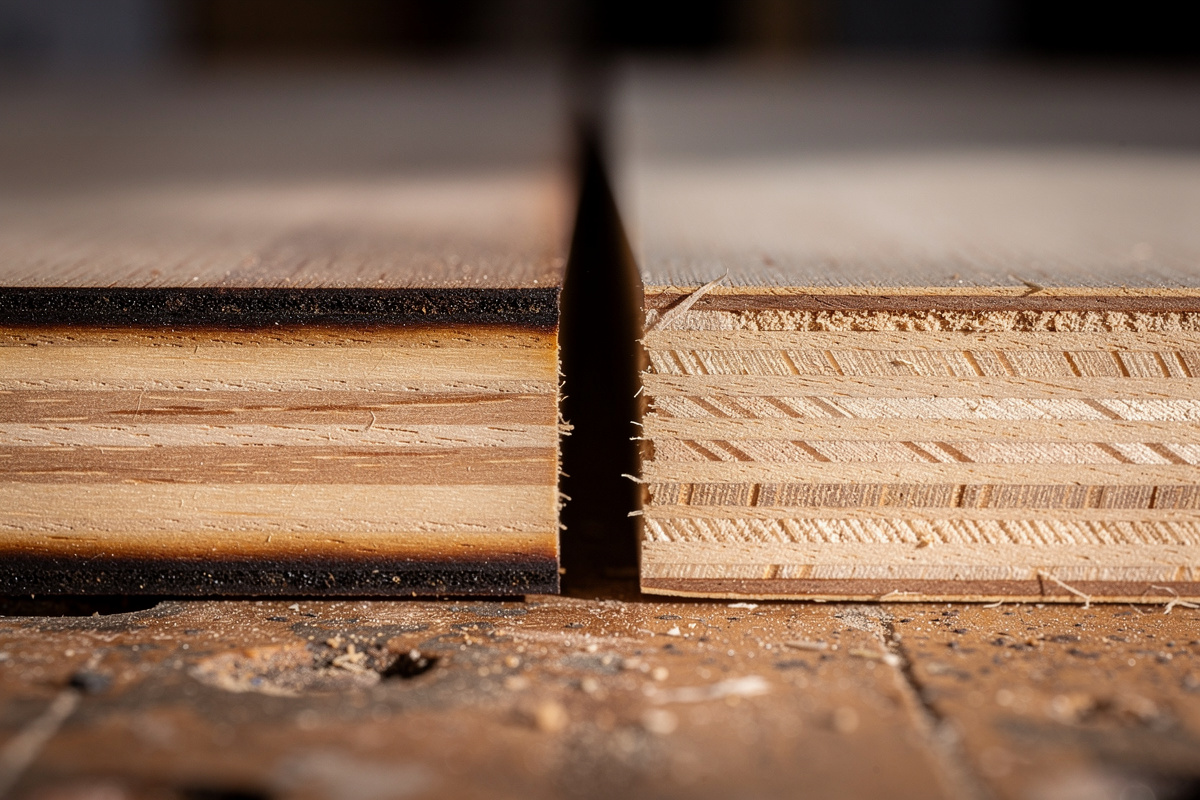
Laser-cut wood has dark brown to black scorched edges. Aesthetically, this is either a feature (rustic, signature laser look) or a flaw (looks burned). Light sanding removes most of it; for a clean unburned edge you need to mask the surface during cutting and remove the masking after.
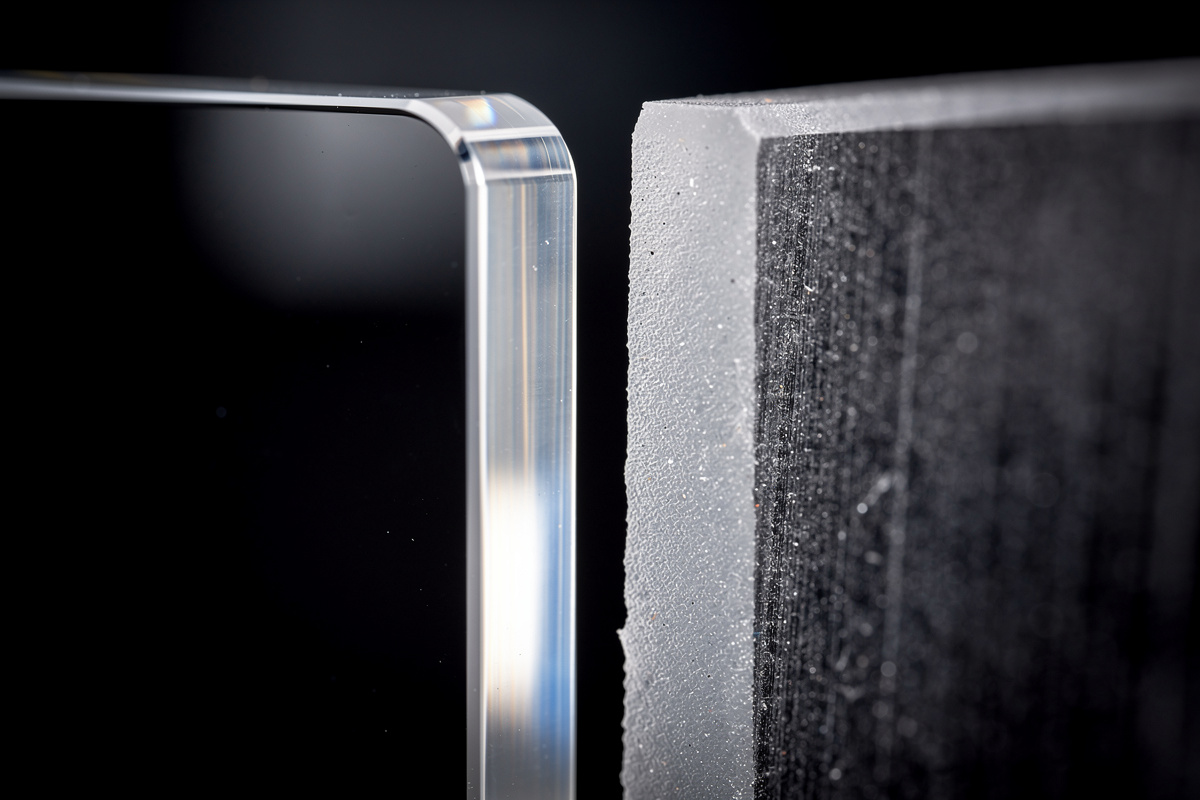
Laser-cut acrylic has a clear flame-polished edge that looks better than CNC-cut acrylic — the heat slightly melts and re-flows the cut edge to a smooth glossy finish. This is a real laser advantage for clear acrylic display work.
Laser-cut MDF has heavy charring with strong smoke smell. The dust is also unpleasantly fine. Most CNC operators prefer to cut MDF on a router for both finish and shop air quality reasons.
CNC-cut wood has clean unburned edges. With the right bit (single-flute upcut for plywood, downcut for chip-free top edge), the finish is comparable to a tablesaw cut. The tradeoff: tool marks visible on close inspection, requires deburring and light sanding.
CNC-cut acrylic has a frosted machined edge. Flame-polishing or buffing produces clear edges, but it adds 3–8 minutes per part. For frosted-finish display work, CNC is fine without further finishing.
CNC-cut MDF is clean with mild dust (manageable with shop vac). The smell is much less than laser MDF cuts.
For projects where a polished acrylic edge sells the piece (signage, awards, display cases), laser is the right tool. For wood projects where the customer expects unburned edges (most furniture, cabinetry, architectural work), CNC is the right tool.
Tolerance and Repeatability
Lasers cut to roughly ±0.1 mm tolerance with no thermal expansion concerns once the kerf width is calibrated. CNC routers cut to ±0.05 mm with a quality machine and proper feeds/speeds.
For mechanical assemblies — gears that mesh, joints that interlock, lids that fit precisely — CNC’s tighter tolerance matters. For decorative work and signage, laser tolerance is more than adequate.
The kerf-compensation issue is real on lasers. Cutting a 1.000-inch hole with a 0.2 mm kerf produces a hole that measures 1.008 inches because the laser’s cut-line is the centerline of the burn, not the edge. Most laser software auto-compensates; CNC software auto-compensates too but the offset is bit radius (much larger). For finger-jointed boxes and other interlocking work, the kerf math has to be right or the joints fall apart.
The SVG file preparation guide covers the kerf and offset settings that make the difference between “fits perfectly” and “off by 0.5mm.”
Setup Time: The Hidden Cost
Per-project setup is where lasers reveal their throughput advantage on flat work.
Laser cutter setup per project: 2–5 minutes — load material, focus, set origin, hit start.
CNC router setup per project: 8–20 minutes — load material, clamp securely, zero X/Y/Z origin, fixture for hold-down, install correct bit, run air-cut to verify, then start. The deeper the cut, the more critical the fixturing.
For one-off projects, the setup difference is offset by the cut speed (laser cuts the actual material faster). For batch projects of 10+ identical parts, both tools amortize setup well, but laser typically still wins because the per-part cut time is faster.
Where CNC’s longer setup pays back: dimensional 3D work where there is no laser equivalent. A 3D-carved sign with raised letters, a v-carved inlay, a bowl roughed and finished — these projects are CNC-only. For cost comparisons across CNC machines themselves, see the desktop CNC buyer’s guide.
Cost Comparison: Tool, Materials, and Per-Part Economics
Entry-level price points are similar but the operating economics differ:
| Aspect | Diode Laser (40W) | CO2 Laser (60W) | Desktop CNC |
|---|---|---|---|
| Entry-level price | $300–600 | $2,000–4,000 | $400–1,500 |
| Mid-range price | $700–1,200 | $4,000–8,000 | $1,500–4,000 |
| Working area | 16″×16″ typical | 20″×28″ typical | 15″×30″ typical |
| Consumables/year | Lens cleaning, $20 | Tube replacement at 2-5 years, $300–1,000; mirrors | Bits, $100–300; collets |
| Maintenance/year | Minimal | Mirror alignment, water cooling | Spoilboard resurfacing, lubrication |
| Skill curve | Low | Medium | Medium-high |
Per-part costs depend heavily on material. Plywood at $0.40 per square foot is the cheapest substrate either tool uses; resin-impregnated MDF is similar. Acrylic at $1.20–2.50 per square foot is mid-range. Hardwood at $4–10 per board-foot is the most expensive material that either tool routinely cuts. The wood selection guide covers which species engrave well and which char poorly.
The Decision Tree
Five questions resolve almost every laser-vs-CNC decision:
1. How thick is the material? Above 1/2 inch on any material, CNC. Below 1/4 inch on wood/acrylic/MDF, laser is faster.
2. Is the part flat or dimensional? 2D flat = laser. 3D carved (signs with raised letters, bowls, contoured shapes) = CNC.
3. How important is edge quality? Wood edges that need to look unburned = CNC. Acrylic edges that need to look polished = laser.
4. How many parts per session? 1–5 parts: either tool works, choice depends on geometry. 20+ identical flat parts: laser wins on throughput.
5. What materials do you cut most? Mostly plywood, leather, acrylic, paper: laser. Mostly thick wood, aluminum, foam, large signs: CNC.
For most maker shops, the right answer is “both” — they solve different problems. For first-tool decisions on a budget, default to CO2 laser if your work is flat and decorative; default to CNC if your work is structural or dimensional.
Hybrid Workflows: Combining Both Tools
The most powerful workshop pattern uses both tools on the same project.
- Sign making: CNC carves the 3D raised lettering on hardwood; laser engraves fine detail or QR codes on a separate plate that mounts to the carved sign.
- Box construction: CNC cuts the joinery and routes the lid recess; laser engraves the decorative face and cuts the inlay panel.
- Award plaques: CNC machines the wooden base with chamfered edges and inlay slot; laser engraves the brass plate that drops into the inlay.
- Architectural models: Laser cuts the walls and detail elements from 1/8″ plywood and acrylic; CNC routes the terrain base from 1″ foam.
The two tools are genuinely complementary, not redundant. Most professional fabrication shops have at least one of each, and many makers eventually buy the second tool 12–18 months after the first.
Should I buy a laser cutter or a CNC router first?
Buy a laser cutter first if your projects are flat, decorative, or batch-production craft items. Buy a CNC router first if your projects are structural, three-dimensional, or use thick wood. Most experienced makers eventually own both because they solve genuinely different problems on the same materials.
Can a laser cutter cut as deep as a CNC router?
No. Laser cutters max out at roughly 1/4 to 1/2 inch on wood and acrylic, with diminishing edge quality at the upper end. CNC routers cut any thickness limited only by Z-axis travel — typically 3 to 6 inches on desktop machines, much more on industrial.
Which has better edge quality on wood?
Depends on what you want. Lasers leave brown scorched edges (rustic look, or sand off if you do not want it). CNC routers leave clean unburned edges with mild tool marks. For unburned natural wood edges, CNC wins. For decorative scorched edges, laser wins.
Which tool is faster for batch production?
Lasers are 2-3x faster on thin flat work because there is no fixture/clamping setup per piece and the cut path is faster. CNC routers are faster on thick stock because lasers cannot cut beyond about 1/4 inch reliably. For 12+ identical thin parts, laser. For one thick part, CNC.
Can both tools cut the same materials?
Mostly yes for plywood, MDF, acrylic, and hardwood under 1/4 inch. The differences are in finish quality and speed, not capability. Above 1/4 inch, CNC handles material laser cannot. For metals, fiber laser and CNC handle different metals at different costs.
Do I need different design software for laser vs CNC?
Yes for the toolpath/CAM stage. Lasers use software like LightBurn or LaserGRBL that processes vector files into laser power and speed commands. CNC routers use CAM software like Carbide Create, VCarve, or Fusion 360 that generates G-code for the bit and toolpath. The original CAD design can be the same SVG or DXF file, but each tool needs its own CAM step.
Related Articles
- Laser Cutting Materials Guide 2026 — material capability and settings
- Diode vs CO2 vs Fiber Laser — laser type selection
- Best Wood for Laser Engraving — wood species comparison
- Laser Engraving Leather Settings — vegetable vs chrome tan
- Best Laser Engraver 2026 — buyer’s guide
- SVG Files for Laser Cutting — file preparation