SVG Files for Laser Cutting: Preparation, Conversion, and Common Mistakes

SVG file preparation is the most-overlooked source of laser cutting failures. In ~40 words: convert text to outlines, set stroke widths to hairline (0.001″), confirm closed paths, remove duplicate overlapping paths, and verify units are correct (mm not inches). These five steps prevent 80% of “it imported but won’t cut right” issues that plague new laser users importing SVGs from Etsy, Cricut Design Space, or random downloads.
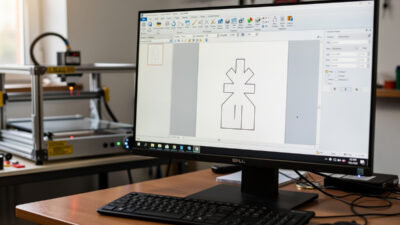
This guide walks through the SVG preparation workflow that production laser shops use, shows the most common SVG problems that ruin cuts, and covers the file conversion paths from common design tools to laser-ready SVGs. The same techniques apply whether you’re importing into LightBurn, xTool Creative Space, or LaserGRBL — the SVG itself is the source of most issues, not the laser software.
What Makes a Laser-Ready SVG
A laser-ready SVG has five properties: text converted to outlines (no font dependencies), strokes set to hairline width (or removed entirely with paths used instead), all cut paths closed, no duplicate or overlapping paths, and units explicitly set to millimeters. Any SVG missing one of these five properties will produce some kind of cutting issue — from minor (slightly wrong dimensions) to major (the laser cuts the same line three times).
The reason most SVG problems happen: SVG was designed for web display, not laser cutting. SVGs are rendered visually by browsers, which means many things that look correct visually fail on a laser. A 2-pixel red stroke renders fine in a browser but tells the laser to cut at twice the necessary speed because the laser sees a wide painted region instead of a thin path.
For background on how SVGs interact with laser cutting workflows generally, see our complete laser workflow guide.
Converting Text to Outlines
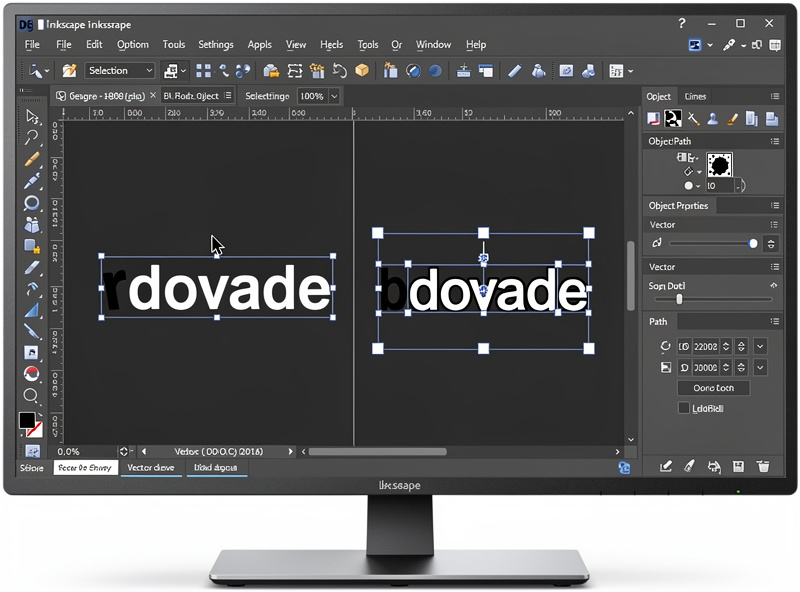
Text in an SVG is rendered using fonts. If the font isn’t installed on the laser computer, the text renders incorrectly or substitutes a different font. The fix is converting text to outlines — turning each character into a vector path that doesn’t depend on font availability.
In Inkscape: select the text → Path → Object to Path. The text becomes editable vector paths. Save the SVG. The new SVG renders identically on any computer regardless of installed fonts.
In Adobe Illustrator: select text → Type → Create Outlines. Same conversion, different menu name.
In Affinity Designer: select text → Layer → Convert to Curves.
In Cricut Design Space: text-to-outlines doesn’t exist as a single function. Workaround: select text, Weld, then Detach. Awkward but works.
Always convert text BEFORE exporting to laser software. Text-to-path is destructive in the sense that you can’t easily edit the wording afterward — keep a master design with editable text and an export-ready SVG with outlined text.
Stroke Widths: Hairline vs Painted Strokes
Strokes in SVGs have visible width. A 2pt stroke in Illustrator renders as a 2pt-wide line in laser software. The laser sees this as a region to fill (raster engrave) rather than a path to follow (cut), producing entirely the wrong operation.
The fix: set stroke widths to “hairline” (0.001 inch / 0.025mm) or remove strokes entirely and use only filled paths. LightBurn, xTool CS, and most laser software interpret hairline strokes as cut lines.
In Inkscape: select all paths → Object → Object Properties → Stroke → set to 0.025mm or 0.01px. Many laser users set up a custom Inkscape preset that creates hairline strokes by default.
In Illustrator: select paths → Stroke panel → set weight to 0.001pt. The line nearly disappears visually but the path data remains.
For laser cutting where you want a CUT (the laser follows the path): hairline stroke. For laser engraving where you want a FILLED REGION (the laser raster-engraves the inside): no stroke, just a filled shape. Confusing the two is the most common SVG mistake.
Closed vs Open Paths
A “closed” path returns to its starting point — like a complete circle or rectangle. An “open” path starts at one point and ends at another without joining. Closed paths can be filled (engraved); open paths cannot.
Many SVG downloads have unclosed paths where they should be closed. The visual rendering looks fine because browsers connect the ends visually. The laser software sees an open path and either refuses to fill it or fills it incorrectly.
Detect open paths in Inkscape: Edit → Find/Replace → Properties → check “Path is open.” Inkscape highlights all open paths. Close them: select the open path, Path → Reverse Path then Path → Combine, or use the Node Editor (N) to drag end nodes together.
For laser cutting (vector cuts), open paths usually still work — the laser cuts along the path even if it doesn’t close. For laser engraving (filling), closed paths are required.
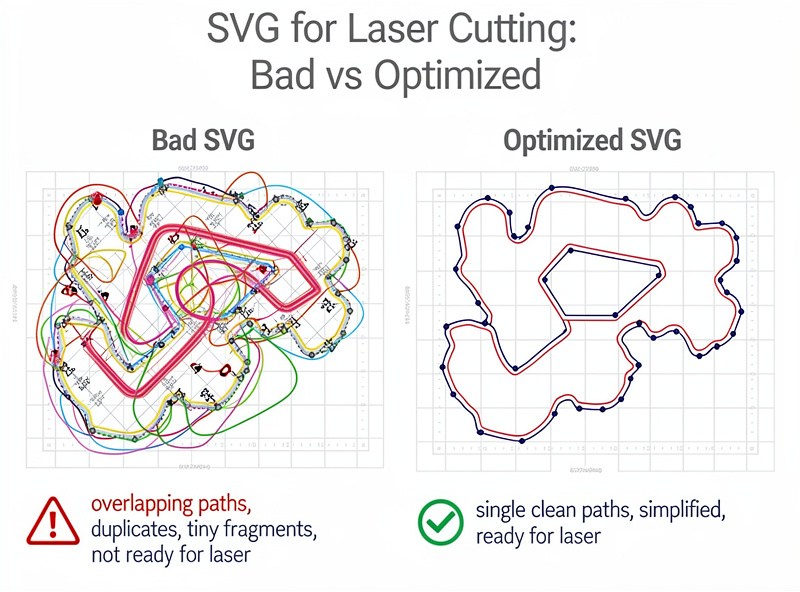
Duplicate Overlapping Paths
The single most expensive SVG problem in production: paths that look like one cut line but are actually two or three overlapping paths. The laser cuts each path separately. A “single” outline cut becomes 2-3 cuts of the same line, multiplying time and creating burned edges.
Detect overlapping paths: zoom in to 800%+ and look for visible thickness in lines that should be hairline. Or in LightBurn: Edit → Select Identical → Outline. Duplicates are highlighted.
Fix: in Inkscape, select all → Path → Combine, then Path → Break Apart. This consolidates overlapping segments into single paths. In Illustrator: Object → Path → Clean Up → Stray Points + Empty Paths. In LightBurn: select all → Tools → Delete Duplicates.
Paths from Cricut Design Space and Etsy SVG downloads frequently have this issue because the source software prioritizes visual rendering over clean paths. Always run a duplicate-cleanup pass on imported SVGs before sending to the laser.
Units: mm vs Inches vs Pixels
SVG files store dimensions in user-defined units. Web SVGs typically use pixels; laser-ready SVGs should use millimeters. Mixing units between source and laser software produces dimensional errors — a design measuring 100mm in Inkscape might import as 100 pixels in LightBurn (≈ 26.4mm).
Set units explicitly. In Inkscape: File → Document Properties → Units → millimeters. In Illustrator: Edit → Preferences → Units → General: Millimeters. Save the SVG with explicit unit tags in the XML header.
In LightBurn after import: select the design → check the dimensions in the size panel. If they don’t match your source design, the import scaled wrong — re-export from the source with explicit mm units.
For Cricut Design Space SVGs: the export tends to use pixels. Resize after import in laser software using known reference dimensions (e.g., resize to fit a 100mm reference square in the original design).
Exporting From Common Design Tools
The export workflow varies by source tool. Each has specific gotchas worth knowing.
Inkscape: File → Save As → Plain SVG. Inkscape’s “Inkscape SVG” includes Inkscape-specific metadata that some laser software doesn’t parse correctly. Plain SVG strips this. Always use Plain SVG for laser export.
Adobe Illustrator: File → Export → Export As → SVG. In the export dialog, set “Styling” to “Internal CSS” and “Decimal” to 2 places. Higher decimal precision creates larger files without measurable accuracy gain.
Affinity Designer: File → Export → SVG. The Affinity preset for “Web” works but includes unnecessary metadata; “Print” preset is cleaner for laser export.
Cricut Design Space: File → Save As → SVG. Cricut SVGs frequently have all five common problems — text not outlined, painted strokes instead of hairline, open paths, duplicates, wrong units. Plan for cleanup time on every Cricut SVG.
Online SVG sites (Etsy, Vexels, Free SVG): Variable quality. Established sellers (Etsy with 100+ reviews) usually produce laser-ready SVGs; random free downloads frequently need extensive cleanup. Test imports on small material before committing to expensive workpieces.
Pre-Cut Quality Check
Before sending an SVG to your laser, run this quick checklist:
1. Verify dimensions. The design’s size in laser software matches the size you intended.
2. Verify all text is outlined. Click on text — if you can edit it as text, it’s not converted yet.
3. Verify hairline strokes. All strokes should be 0.025mm or thinner. Wider strokes create unintended raster operations.
4. Verify no duplicates. Run the duplicate-detection in your laser software.
5. Preview cut order. The laser software shows the order operations execute. Verify the order makes sense (engrave first, cut last; internal features before external perimeters).
This 2-minute check prevents the most common laser failures. Skipping it means losing materials to issues that would have been visible before powering on the laser. Our laser materials guide covers material costs that make this check especially valuable on expensive substrates like leather or hardwoods.
Frequently Asked Questions
Why does my SVG cut every line twice?
The SVG has duplicate overlapping paths — a common issue with Cricut Design Space exports and many Etsy SVGs. Fix in Inkscape with Path → Combine then Path → Break Apart, or in LightBurn with Tools → Delete Duplicates. Always run a duplicate-cleanup pass on imported SVGs before laser cutting.
Should I use SVG, DXF, or AI files for laser cutting?
SVG is the universal standard supported by every laser software. DXF is more common for industrial CNC; some laser software accepts it but with import quirks. AI (Adobe Illustrator native) requires Illustrator on the laser computer — generally avoid. SVG is the right answer for almost every workflow.
Why does text in my SVG render incorrectly on the laser computer?
The font isn’t installed on the laser computer. Convert text to outlines before exporting (Path → Object to Path in Inkscape, Type → Create Outlines in Illustrator). After conversion, text becomes vector paths that don’t need the original font installed.
What’s hairline stroke and why does it matter?
Hairline stroke is 0.001 inch (0.025mm) — essentially invisible visually but defines the path for laser cutting. Without hairline (with painted strokes 1pt+), the laser sees the line as a region to engrave rather than a path to cut. Setting all strokes to hairline before export prevents this.
How do I fix open paths in an SVG?
Open Inkscape, select the path, look at the path nodes (press N). End nodes appear as squares; mid-path nodes as diamonds. Drag the two end nodes to the same point, or use Path → Combine then Path → Reverse to close the path automatically. Most laser software’s import flags open paths during import.
Can I edit a finished SVG without breaking it?
Yes — the standard workflow is keeping a master design with editable text and editable paths, then exporting laser-ready copies that have text outlined and strokes hairlined. Edit the master, re-export the copy. Don’t try to edit the laser-ready copy directly because text-to-outline is a one-way operation.
Why are some Etsy SVGs broken?
Etsy doesn’t enforce quality standards on SVG sellers. Some sellers create SVGs in tools designed for web display (Canva, basic Illustrator templates) without optimizing for laser cutting. Established Etsy sellers with 100+ reviews and laser-specific listings produce reliable SVGs; random low-cost downloads vary widely. Test small before committing to expensive material.