LightBurn Tutorial for Beginners: From Install to First Cut

This LightBurn tutorial walks new users from initial download through their first successful cut on plywood — typically 90 minutes from install to finished piece. In ~40 words: download LightBurn from lightburnsoftware.com, run the device-detection wizard for your laser, import a vector design (SVG), set up a layer with measured power and speed values, click Start, and verify the cut. The 30-day free trial covers all this plus the first weeks of learning.
The goal is producing a finished cut on day one — not mastering every feature. LightBurn has dozens of advanced capabilities that take months to learn, but the basic cut workflow takes about 90 minutes once you have a laser plugged in and ready. By the end of this tutorial you’ll have one finished piece in hand and a working setup for everything that follows.
Installation and Initial Setup
Download LightBurn from the official lightburnsoftware.com — never from third-party download sites where fakes have appeared. The 30-day free trial includes every feature; no separate “trial” or “free” version. After 30 days the software requires a $60 license purchase.
Install with default options. On first launch, LightBurn presents the device wizard. Pick the closest match to your laser hardware: GRBL for diode lasers (Atomstack, Ortur, Sculpfun, Two Trees), Ruida for CO2 lasers (OMTech, Boss, FSL), Trocen for older Chinese lasers, or specific manufacturer profiles for xTool, Glowforge alternatives, etc.
If your laser isn’t listed, pick the closest manufacturer model and edit the build size in the device settings panel. For example: a Sculpfun S30 owner whose specific model isn’t listed can pick “Sculpfun” generic and adjust the work area to 410×400mm to match.
Connect the laser via USB. LightBurn auto-detects the COM port; if it doesn’t, use the “Devices” panel to select manually. The laser’s status bar at the bottom should show “Ready” — if it shows “Not Connected,” check the USB cable and try a different port. Some hardware needs a specific driver installed first; LightBurn’s documentation lists driver requirements per manufacturer.
Set the work origin. Most diode lasers home to the front-left corner; most CO2 lasers home to the rear-left corner. In LightBurn → Edit → Device Settings, set the home position to match your hardware. This affects where designs are placed on the work area — wrong setting causes parts to be cut in the wrong location.
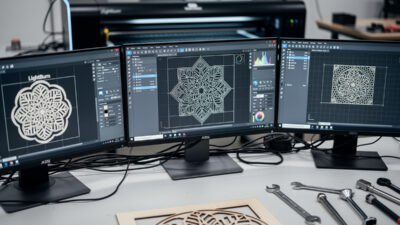
Importing Your First Design
For your first cut, use a simple SVG file — something with a clearly defined outline, no complex layers, and dimensions you can verify with a ruler. Free vector files are available on Etsy (search “free SVG laser cut”), MakerWorld, and Thingiverse. Pick something small (under 50×50mm) for the first attempt; small mistakes are cheap on small pieces.
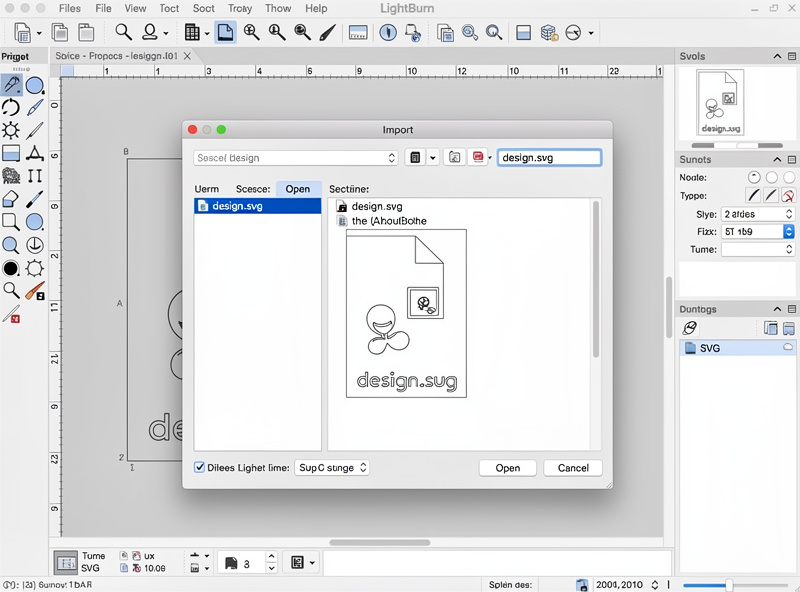
Import the SVG via File → Import (or drag-and-drop into the LightBurn canvas). The vector paths appear on the work area. If the design imports as a raster image (a single bitmap rather than editable vectors), the source file was a JPEG/PNG — use a vector source instead. SVGs preserve the editable paths that LightBurn needs for cutting.
Verify dimensions. LightBurn shows the imported design at its original size. Hover over a corner to see actual dimensions. If they don’t match what you expect, the SVG export from your design tool used wrong units; resize using LightBurn’s selection tool with proportional scaling enabled (the lock icon in the size panel).
Position the design within the work area. Drag it to the center of the work area, away from edges. The first cut should be at least 10mm from any edge — gives the laser head room to accelerate without hitting end stops.
Setting Up the Cut Layer
LightBurn organizes operations into color-coded layers. Each layer has its own settings (mode, power, speed, passes). For your first cut, you need just one layer — the cut operation.
Select all imported shapes (Ctrl+A) and assign them to a layer by clicking a color in the bottom palette. Black is the default first layer. The layer panel on the right shows the layer’s settings.
Set the layer mode to “Line.” Other modes are “Fill” (raster engraving), “Image” (photo engraving), and “Offset Fill” (engraving with parallel lines from the outline). For a basic cut, “Line” is the right choice — the laser follows the vector path without filling enclosed regions.
Set power and speed values. For 3mm plywood on a 5W diode: 100% power, 200mm/min, 4 passes. For 3mm plywood on a 10W diode: 80% power, 300mm/min, 2 passes. For 3mm plywood on a 40W CO2: 25% power, 1500mm/min, 1 pass. These are rough starting points; always run a test grid first (covered below).
Verify air assist is enabled in the layer settings. Air assist removes smoke and debris from the cut zone, dramatically improving edge quality and reducing fire risk. Most modern lasers have air assist hardware; the software just needs to be told to use it. The laser safety essentials guide covers why air assist matters for both quality and fire safety.
Running a Power/Speed Test Grid

The single most valuable thing LightBurn does for new users is the test-grid generator. Tools → Material Test creates a grid of small squares cut at varying power and speed combinations. Print the grid on a small piece of your target material, then visually identify which combination produces a clean cut (or clean engrave).
Grid setup: 5 power levels (e.g., 50%, 60%, 70%, 80%, 90%) × 5 speed levels (e.g., 100, 200, 300, 400, 500 mm/min) = 25 small squares. The grid takes 5-10 minutes to run. Once finished, examine each square: which combinations cut cleanly through, which cut partially, which barely mark the surface.
For your specific material and laser, the optimal cut settings are the lowest power and highest speed that still cuts cleanly through. Going higher than needed wastes time and can cause excessive charring; going lower than needed produces incomplete cuts. The grid finds the sweet spot.
Save the optimal settings to a custom material profile. In LightBurn, Material Library → Add → enter the material name, thickness, power, speed, and number of passes. Future jobs on the same material can reuse this profile in seconds.
Running Your First Cut
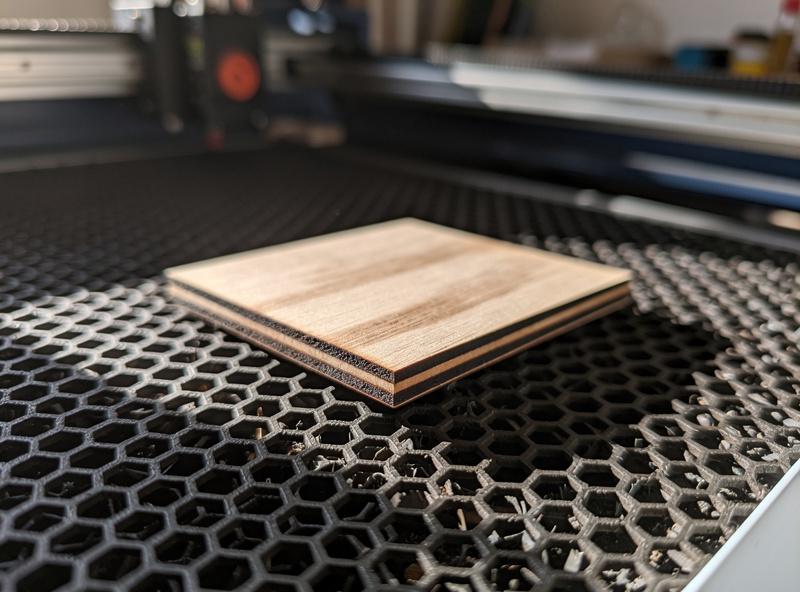
With layer settings dialed in via the test grid, place your material on the bed. Material flat is critical — uneven material produces inconsistent cuts. Use magnets, hold-down clips, or a honeycomb bed to keep the material from warping during the cut.
Click “Frame” in LightBurn (the rectangular preview button). The laser head moves around the perimeter of the design without firing. This shows you exactly where the cut will be on the material — verify the design is positioned correctly and the material extends past all four sides of the design.
Click “Start.” The job runs from the beginning. Watch the first 30-60 seconds to confirm the cut is progressing as expected. If you see flames, smoke, or the laser cutting through to the bed, stop the job (the red Stop button) and reduce power.
When the cut finishes, leave the laser on (fans running) for another 60 seconds. The cut zone is hot and may continue smoldering on porous materials. After cooling, remove the workpiece, examine the cut, and either celebrate the success or note what to adjust for the next attempt. Common first-cut adjustments are covered in our laser troubleshooting guide.
Next Steps After Your First Cut
With a successful first cut, the next learning curve goals are: photo engraving (different layer mode and dithering settings), multi-layer jobs (engrave + cut on the same workpiece), kerf compensation for fitted joints, and rotary work for cylindrical objects.
LightBurn’s documentation (linked from the Help menu) covers each of these in depth. The official LightBurn YouTube channel and Brandon Hall’s “LightBurn Software Help” YouTube channel are the highest-quality video tutorials. Plan 5-10 hours of learning over the first month to internalize the major features.
For broader context on how laser projects move from design through finishing, see our complete laser workflow guide. The full project chain — material selection, design, cut, post-process, finishing — uses LightBurn for the cut step but spans many other skills.
Frequently Asked Questions
Is the LightBurn 30-day trial fully functional?
Yes — the trial includes every feature with no watermarks, time limits per session, or feature locks. After 30 days the software requires a $60 license purchase to continue working. Most users decide within the trial period whether LightBurn fits their workflow; the 30 days is enough to produce many finished projects.
Why won’t LightBurn detect my laser?
Most common cause: missing USB driver for your laser’s controller. Install the driver from the laser manufacturer’s website (typically a CH340 driver for Chinese lasers, FTDI driver for some others). After driver install, restart LightBurn and re-run device detection. Also try a different USB cable — some cheap cables are charge-only without data lines.
What’s the difference between Line, Fill, and Image modes?
Line: laser follows the vector path (cuts and outlines). Fill: laser raster-engraves the area inside enclosed shapes. Image: laser engraves a bitmap image with dithering. Most cuts use Line; engraved logos use Fill; photos use Image. Each mode has different optimal settings — don’t reuse Line settings for Fill operations.
Can I use LightBurn with a Glowforge?
No — Glowforge has not opened their cloud-based software to third-party tools. Glowforge hardware works only with the Glowforge App. LightBurn supports virtually every other major laser brand but not Glowforge. If you own a Glowforge and want LightBurn’s features, the path is changing hardware, not software.
How long until I’m productive in LightBurn?
Basic cuts: 90 minutes (this tutorial). Photo engraving: 5-10 additional hours of learning. Multi-layer production work: 20+ hours. The learning curve is real but not steep — most users are doing meaningful work within the first week and producing custom orders within a month. The depth means there’s always more to learn.
Should I design in LightBurn or import from another tool?
Import from another tool. LightBurn’s vector design features are functional but not as polished as Inkscape (free) or Adobe Illustrator (paid). Standard workflow: design in Inkscape or Illustrator, export as SVG, import to LightBurn for laser-specific operations (layer setup, cut order, kerf compensation).
Why are my cuts not going all the way through?
Power too low, speed too high, or material thicker than expected. Run the LightBurn test grid on a small piece of the same material to find the right settings. Also check focus — the laser must be focused at the material surface. Misfocused cuts waste power on a defocused beam that cannot fully penetrate even with high settings.