The Complete Laser Workflow From Design File to Finished Piece
From Digital Design to Physical Reality
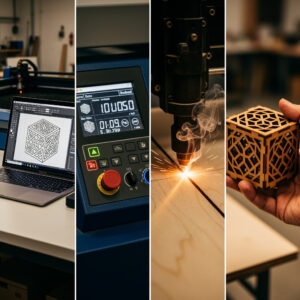
The laser workflow bridges creative vision and finished product through systematic steps that transform digital files into precisely cut or engraved physical pieces. Mastering this workflow separates operators who struggle with inconsistent results from those who produce professional-quality work reliably. Understanding each phase, from initial design through job execution to post-processing, creates a repeatable process that minimizes waste, prevents errors, and maximizes the quality of your finished pieces.
This guide presents the complete laser workflow comprehensively, covering design software selection and file preparation, power and speed optimization, focus distance setting, test cutting strategies, job monitoring, and post-processing techniques. Each step builds competence that carries into subsequent projects, gradually elevating your work from beginner experimentation to confident production.
Design Phase: Creating Laser-Ready Files
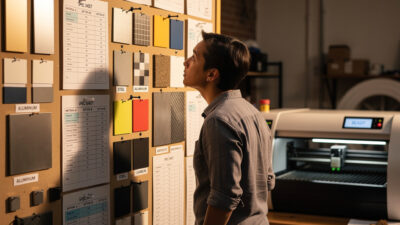
Effective laser work begins with properly prepared design files. The software you choose, the file formats you export, and the way you organize design elements all impact execution success. Spending time on thoughtful design preparation prevents job failures and opens creative possibilities impossible with hastily assembled files.
Design software options: Adobe Illustrator dominates professional laser workflows with robust vector tools and industry-standard file compatibility. Inkscape offers capable free alternatives with excellent laser community support. CorelDRAW maintains strong presence in certain regions and industries. CAD programs including Fusion 360 and SolidWorks serve users with engineering backgrounds requiring precise dimensional control. Raster programs like Photoshop work for photo engraving but require different preparation than vector-based cutting. Choose software matching your skills, budget, and design complexity needs.
Vector versus raster design: Understanding the distinction between vector paths (cutting) and raster fills (engraving) guides your design approach. Vector paths follow precise lines regardless of scaling, ideal for cuts and sharp outlines. Raster images comprise pixels that the laser interprets as varying power densities for engraving photographs or filled areas. Most laser jobs combine both: vector cuts defining piece boundaries with raster engravings adding detail and texture. Organize these elements on separate layers or colors in your design software for easy process separation in laser control programs.
File format selection: Export vectors in SVG, AI, DXF, or PDF formats depending on your laser control software requirements. SVG works universally with modern software including LightBurn. DXF serves older or specialized industrial controllers. PDF embeds both vector and raster data effectively. For raster engraving, PNG and BMP formats preserve image quality without compression artifacts. Avoid JPG for engraving due to lossy compression creating visible artifacts in engraved results.
Design for laser limitations: Account for material thickness in your designs, creating tabs or bridges that hold pieces in place during cutting if needed. Consider kerf width (the material removed by the laser beam, typically 0.1-0.2mm) when designing interlocking parts requiring precise fits. Avoid extremely fine details that approach your laser’s minimum spot size, as these may not reproduce cleanly. Test intricate designs on scrap material before committing to expensive stock.
Understanding your laser’s technical specifications helps you design within realistic capability boundaries rather than creating files your machine cannot execute effectively.
File Preparation and Organization
Well-organized design files streamline laser job setup and reduce errors during execution. Developing consistent organizational habits accelerates your workflow and prevents costly mistakes from disorganized files.
Layer and color coding: Assign specific colors to different operations: red for cuts, blue for engraving, green for scoring (light surface marks). Most laser control software interprets these color assignments automatically, applying different power and speed settings to each color group. This organization enables complex multi-operation jobs with single file imports rather than managing multiple separate files.
Path optimization: Simplify vector paths by removing unnecessary anchor points that slow processing and increase file size. Combine connected paths where possible to reduce the number of separate operations. Ensure closed paths actually close properly, as open paths may not cut completely or engrave as intended. Most design software offers path simplification and cleanup tools, use them before exporting.
Resolution and scaling: Maintain appropriate resolution for raster images, typically 300 DPI for detailed engraving work. Higher resolutions create unnecessarily large files without improving results, as laser spot sizes limit effective detail resolution. Ensure designs scale correctly when imported into laser control software by using real-world units (inches or millimeters) rather than pixels or arbitrary units. Verify dimensions match your intended physical piece sizes before cutting.
Nesting and material efficiency: Arrange multiple design pieces efficiently on your material sheets to minimize waste. Rotate pieces to fit irregular spaces. Leave adequate spacing between pieces (typically 2-3mm) to prevent heat transfer between adjacent cuts. For production runs, create templates with standardized spacing that you reuse across jobs. Material costs often exceed machine time, so efficient nesting directly impacts profitability.
Power and Speed Optimization
The interplay between laser power percentage and head movement speed determines cut depth, engraving darkness, edge quality, and production efficiency. Finding optimal combinations for each material and thickness requires systematic testing and documentation, but the principles guiding these tests remain consistent across applications.
Understanding power and speed: Power percentage controls the laser tube’s output intensity, typically adjustable from 0-100 percent of the machine’s rated wattage. Speed controls how fast the laser head moves across the material, measured in millimeters per minute (mm/min) or millimeters per second (mm/s). Higher power increases energy delivered to the material. Slower speed increases dwell time, effectively concentrating more energy at each point. The combination determines whether you achieve clean cuts, light surface marks, or charred disasters.
Test cutting methodology: Create test matrices on material scraps by varying power and speed across small squares or circles. Start with manufacturer-recommended baselines or community-shared settings for your material type. Adjust in 5-10 percent increments for power and 10-20 percent for speed. Document results with photos and notes about edge quality, char levels, and cut-through reliability. This library of tested settings accelerates future projects and provides starting points for new materials.
Cutting optimization: For clean through-cuts, use the minimum power required to cut through consistently at the fastest speed that achieves reliability. Excessive power creates wider kerf, more char, and heat distortion. Insufficient power requires multiple passes that compound char issues. Aim for single-pass cutting whenever possible, as multiple passes rarely produce cleaner results than optimized single-pass settings.
Engraving optimization: Surface engraving requires much less power than cutting, typically 10-30 percent depending on material and desired depth. Faster speeds (300-600 mm/s) produce lighter marks suitable for photographs or subtle texturing. Slower speeds (100-300 mm/s) create deeper, more visible engravings. For photo engraving, the software converts image tones to varying power percentages or dot densities, requiring different optimization approaches than uniform engraving.
When cuts or engravings produce unexpected results, our troubleshooting guide helps diagnose whether power, speed, focus, or material issues cause problems.
Focus Distance: The Critical Setting
Laser beams diverge as they travel from the source, converging to a focal point where energy density peaks, then diverging again. The focal point’s position relative to the material surface determines cut width, edge quality, and effective power delivery. Setting focus correctly represents one of the most impactful adjustments for achieving quality results.
Understanding focal length: Laser lenses come in different focal lengths (typically 1.5 inch, 2.0 inch, or 4.0 inch for CO2 lasers). Shorter focal lengths produce smaller spot sizes with higher power density but narrower depth of field. They excel at fine engraving and detailed cutting. Longer focal lengths offer larger spot sizes with lower power density but greater depth of field, better for cutting thicker materials or uneven surfaces. Most general-purpose work uses 2.0 inch lenses as a balanced compromise.
Setting focus height: Focus is set by adjusting the distance between the lens and material surface so the focal point falls exactly at the surface (for engraving) or slightly within the material (for cutting). Methods vary by machine: manual focus gauges that set the nozzle height, autofocus systems that probe the surface automatically, or simple ruler measurements from a known reference point. Consistent focus setting dramatically affects result repeatability.
Focus effects on cut quality: When properly focused, cuts exhibit narrow kerf with clean edges. When focus is too high (focal point above the material), the beam spreads before reaching the surface, creating wider cuts with tapered edges and reduced power density. When focus is too low (focal point below the surface), similar spreading occurs with additional problems from hitting the material bed or honeycomb. Small focus errors significantly degrade edge quality, making this adjustment critical for professional results.
Multi-pass focus adjustment: For thick materials requiring multiple passes, adjust focus downward between passes so the focal point tracks through the material thickness. If the focal point remains at the surface, later passes operate out of focus within the kerf, producing tapered cuts and excessive char. Advanced operators track optimal focus depths for each material thickness and adjust systematically between passes.
Job Setup and Execution
Translating prepared files into physical pieces requires careful job setup in your laser control software, proper material positioning, and attentive monitoring during execution. Rushing these steps invites errors that waste material and time.
Software job configuration: Import your design file into the laser control software (LightBurn, LaserGRBL, or proprietary alternatives). Assign power and speed settings to each layer or color based on your test cut documentation. Set the job origin point (where the laser starts) appropriately for your material positioning. Preview the toolpath visualization to verify that cut order and movements match expectations. Load the job to the machine controller when satisfied with configuration.
Material preparation and positioning: Clean the material surface to remove oils, dust, or debris that affect results. Secure the material firmly to prevent movement during cutting, using hold-down pins, tape, or vacuum tables depending on your machine. Position the material square to the machine axes, aligning edges with the machine’s reference edges when precision matters. Apply masking tape to protect surfaces from smoke staining if needed. Set focus height using your machine’s method.
Test firing and alignment: Before committing to the full job, perform test firings to verify focus and positioning. Most software offers a “frame” or “test” function that traces the job boundaries at low power, showing you exactly where the laser will operate without cutting. Verify the frame aligns with your material placement and fits within the material boundaries. Make positioning adjustments if needed. For expensive or irreplaceable material, cut a small test piece first to verify settings.
Active job monitoring: Never leave operating lasers unattended. Watch for ignition, excessive smoke, or mechanical issues. Keep the fire extinguisher accessible and be prepared to pause or stop the job immediately if problems arise. For long jobs, periodic visual checks confirm normal operation. Some operators use cameras or monitoring systems for remote observation, but physical presence remains the safest practice.
Post-Processing and Finishing
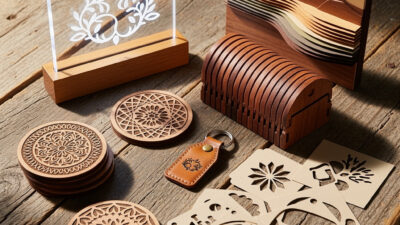
The laser’s work completes only the initial fabrication. Post-processing transforms rough-cut pieces into finished products ready for use or sale. These steps vary by material and application but consistently separate amateur results from professional quality.
Removing parts from the material: After cutting completes, carefully remove pieces from the surrounding material. Small parts may require tweezers or picks to release from tiny attachment points. Avoid breaking delicate features during removal. Save reusable scrap material for small test cuts or future projects. Document material usage for inventory and cost tracking if operating commercially.
Cleaning and de-charring: Laser-cut edges accumulate soot and residue requiring cleaning. For wood, light sanding with fine-grit paper removes surface char without affecting dimensions. Denatured alcohol, mineral spirits, or soapy water clean many materials effectively. Acrylic cuts may need flame polishing with a torch or hot air tool to restore edge clarity if cutting produced frosting. Remove masking tape carefully to avoid pulling surface material or leaving adhesive residue.
Assembly and finishing: Assemble multi-piece projects using appropriate adhesives, fasteners, or joinery. Test fit before applying permanent attachment. Apply finishes (oil, varnish, paint, lacquer) to protect surfaces and enhance appearance. For engraved pieces, finishes may darken engraved areas differently than surrounding material, creating attractive contrast. Allow adequate curing time before packaging or use. On engraved stone the same principle applies at a finer level — rubbing acrylic paint into the recess and wiping back creates crisp coloured lettering on slate and tile. The stone engraving paint fill technique guide covers fill, wipe, and seal steps for clean results on porous and polished stone.
Quality inspection: Examine finished pieces against quality standards before declaring completion. Check dimensions against design specifications. Verify cut edges meet smoothness requirements. Confirm engravings have appropriate depth and clarity. Reject pieces that fail quality standards, either reworking them or discarding to scrap depending on defect severity. Consistent quality inspection builds reputation and customer satisfaction for commercial operations.
Workflow Documentation and Improvement
Systematic documentation transforms individual project learning into accumulated expertise that accelerates future work. Record settings, issues encountered, and solutions applied. Review documentation periodically to identify optimization opportunities.
Job logs: Maintain records of each significant project including material type and source, thickness, design file references, power and speed settings, focus information, cutting time, and post-processing steps applied. Note any issues encountered and how they were resolved. Photograph finished pieces for portfolio development. These logs become invaluable references when repeating similar projects or troubleshooting variations.
Settings libraries: Compile tested settings for your most commonly used materials into reference sheets or digital libraries. Organize by material type, thickness, and desired outcome (cut versus engrave). Update these libraries as you discover improved settings. Share proven settings with the laser community while noting your specific machine configuration, as optimal settings vary between machines.
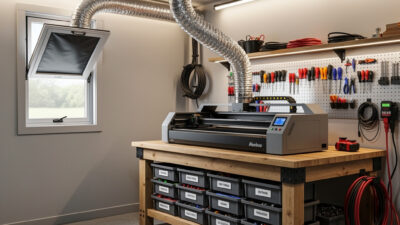
Mastering the complete workflow from design to finished piece elevates you from laser operator to laser craftsperson. Combine this workflow knowledge with proper workshop setup to create an efficient, safe production environment. When ready for specific project guidance, explore our progressive skill-building projects that apply these workflow principles to practical creations.