Best Laser Engraving Software 2026: LightBurn vs xTool vs Free Tools
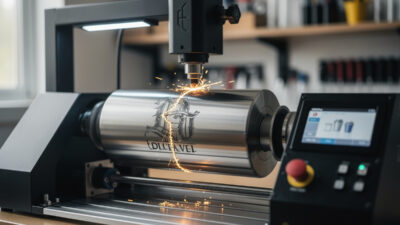
The right laser engraving software changes results more than upgrading from a cheap diode to a premium fiber laser. The software decides every burn time, every line direction, every fill pattern, every photo dithering algorithm — and bad software choices waste hardware potential. This guide compares the four laser engraving applications that matter in 2026 (LightBurn, xTool Creative Space, Glowforge App, and free alternatives like Inkscape + Beambox), shows which one fits your laser, and walks through the settings that produce sharper engravings, cleaner cuts, and faster jobs.
Most laser owners use whatever software came with their machine. That’s fine for the first month. Once you start engraving photos, doing rotary work, or running production jobs, software differences become the difference between a finished piece and a piece that needs to be redone. The four applications covered here represent over 90% of desktop laser usage and each excels at a different workflow.
What Laser Software Actually Does
Laser software converts vector or raster designs into machine instructions: every move, every power level, every speed change. In ~40 words: the software decides line ordering, fill patterns, photo dithering algorithm, kerf compensation, and air-assist control. The same hardware running different software produces visibly different results — sometimes 50%+ faster jobs with cleaner edges from better software alone.
Modern laser software handles three classes of decision: vector path planning (cut order, line direction, lead-ins/lead-outs), raster engraving (dithering, line interval, bidirectional vs unidirectional), and machine coordination (air assist on/off per job, focus height, rotary axis control). The differences between applications are largely in how aggressive each is at automating these decisions.
If you’re new to laser cutting entirely, see our complete beginner guide to laser cutting and engraving for context on how laser power, speed, and material interact before diving into software-specific settings below.
LightBurn vs xTool CS vs Glowforge vs Free Tools (2026 Comparison)
The four major laser software ecosystems serve overlapping but distinct use cases. LightBurn is the universal commercial standard. xTool Creative Space is the manufacturer-tied option for xTool hardware. Glowforge App is closed-ecosystem for Glowforge users only. Free tools (Inkscape + LaserGRBL, Beambox, etc.) cover budget setups.
| Feature | LightBurn 1.7 | xTool Creative Space | Glowforge App | Free (LaserGRBL/Beambox) |
|---|---|---|---|---|
| Best for | Any GRBL / Ruida laser | xTool S1, P2, F1, M1 | Glowforge users only | Budget diodes (Atomstack, Ortur) |
| Price | $60 once + updates | Free | Free with hardware | Free |
| Photo engraving (dithering) | Excellent (8 algorithms) | Good (preset modes) | Good (auto only) | Basic to moderate |
| Rotary attachment | Native, fully configurable | xTool RA2 only, native | No rotary support | LaserGRBL: yes; others: no |
| Layer management | Strong (color-coded) | Strong (per-shape) | Limited | Basic |
| Vector design tools | Built-in (basic) | Built-in (better) | Built-in (basic) | Use Inkscape externally |
| Camera alignment | Yes (any USB camera) | Yes (xTool camera) | Yes (built-in Glowforge) | Limited / DIY |
| Material library | Community + custom | xTool-curated | Glowforge “Proofgrade” only | Manual entry |
| Learning curve | Moderate | Easy | Easy | Steep |
The single most important factor: software that matches your hardware. xTool’s S1 owners get more out of xTool Creative Space than LightBurn because the manufacturer’s profiles include calibrated power values, optimized cut sequences, and rotary attachment integration. Conversely, anyone running OMTech, Atomstack, Ortur, or generic GRBL hardware should default to LightBurn — its profile coverage and feature depth lead the market.
LightBurn: The Universal Commercial Standard
LightBurn is the laser engraving equivalent of Adobe Photoshop — paid commercial software that supports almost every laser hardware on the market and offers depth no free alternative matches. As of 2026 the price is $60 for a perpetual license with one year of free updates ($30/year for continued updates).
LightBurn’s strength is breadth. Native support for GRBL machines (Atomstack, Ortur, Sculpfun, Two Trees), Ruida controllers (OMTech, Boss Laser, FSL), Trocen controllers, and most diode lasers covers 95% of desktop laser hardware. The community library has tested settings for thousands of hardware-and-material combinations.
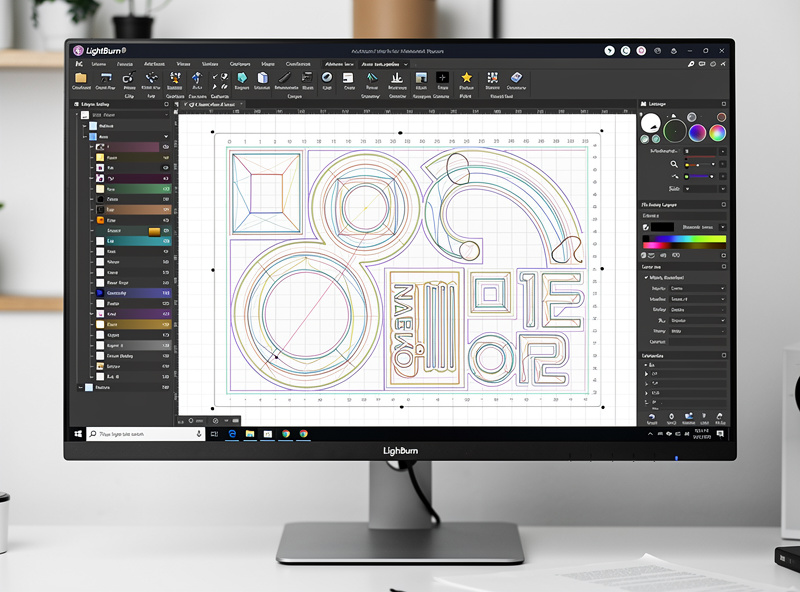
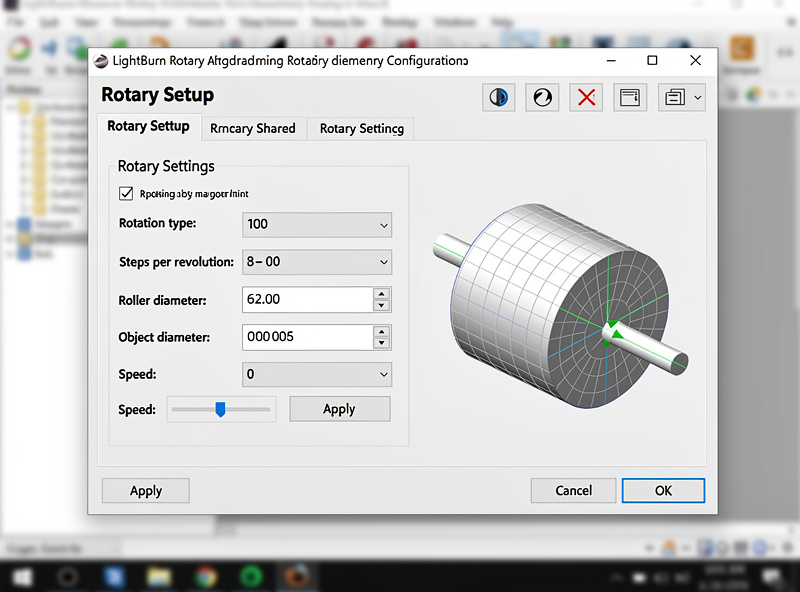
LightBurn’s killer features in 2026: 8 photo dithering algorithms (each suited to different image types), full rotary axis support for any rotary hardware, color-coded layer management, kerf offset for precision cuts, and the most polished vector design tools of any laser-specific software. Camera alignment works with any standard USB camera, not just proprietary hardware.
The trade-offs: LightBurn requires more configuration than xTool CS or Glowforge App. New users typically spend 2-4 hours learning before producing finished pieces — our LightBurn beginner tutorial walks through that learning curve from install to first finished cut. The vector design tools, while improving, lag dedicated software like Inkscape — most users design in Inkscape or Illustrator and import to LightBurn for laser-specific operations. See our laser materials guide for which materials reward LightBurn’s deeper control most.
xTool Creative Space: Built for xTool Hardware
xTool Creative Space is the laser software xTool ships with every S1, P2, F1, M1, and recent xTool laser. It’s a closed-ecosystem application — only xTool hardware works fully (limited support for some third-party lasers). For xTool owners, it’s free, polished, and tightly integrated.
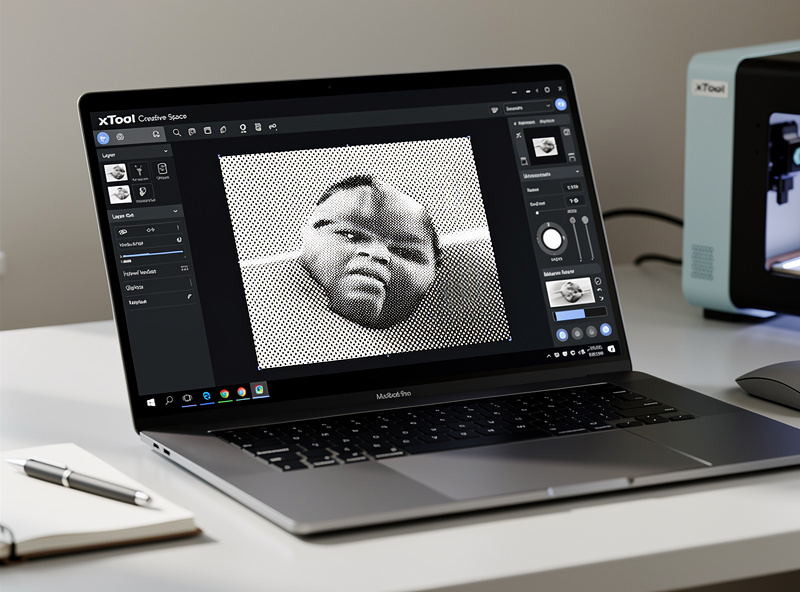
xTool Creative Space’s biggest advantages over LightBurn for xTool users: factory-calibrated material profiles for over 200 materials with measured power/speed values, native xTool RA2 Pro rotary support with one-click configuration (covered in our LightBurn rotary setup guide for users running RA2 Pro on third-party hardware), automatic camera alignment using xTool’s built-in cameras, and tight integration with xTool’s “smart” features like the F1 fiber laser’s IR + diode combo or the S1’s 40W laser module.
The cost: xTool Creative Space loses to LightBurn on advanced photo engraving (fewer dithering options), depth of vector tools, and any non-xTool hardware. If you’re locked into the xTool ecosystem, CS is the right default. If you’re flexible on hardware, LightBurn provides more long-term flexibility. Our LightBurn vs xTool CS deep-dive compares them feature-by-feature.
The single xTool CS feature that consistently surprises new users is the “Test” button — a one-click power/speed test that runs a small grid of cuts at varying parameters on whatever material you’ve placed. LightBurn requires manual setup for the equivalent test. For users who frequently switch materials, this saves significant calibration time.
Glowforge App: The Closed Ecosystem
The Glowforge App is the only software that works with Glowforge hardware (Aura, Plus, Pro). It’s cloud-based — designs upload to Glowforge servers, the server processes the laser path, and the printer downloads instructions. Glowforge does not allow third-party software for their hardware.
The advantages: extremely simple workflow (drag-and-drop a design, select material from Glowforge’s curated list, click Print), automatic camera alignment using the Glowforge’s built-in lid camera, and “Proofgrade” certified materials with pre-tested settings. New users can produce finished pieces within 30 minutes of unboxing.
The disadvantages: complete dependence on Glowforge’s cloud servers (no offline mode, no local processing), inability to use third-party materials with confidence (their settings aren’t pre-tested), no rotary attachment support, and limited control over cut parameters compared to LightBurn or xTool CS.
For users who value workflow simplicity over flexibility, the Glowforge App fits the use case Glowforge is sold for: easy entry into laser cutting without learning complex software. For users who want production capability or third-party material support, Glowforge hardware (and the App) is the wrong choice — LightBurn-compatible alternatives like the OMTech Polar 350 cost similar or less and offer dramatically more flexibility.
Free Tools: LaserGRBL, Beambox, Inkscape
For users on tight budgets or running entry-level diode lasers, free software covers basic needs surprisingly well. The trade-off is more setup time and fewer advanced features.
LaserGRBL (Windows only) is the most-used free laser software. It works with any GRBL-compatible hardware (most Atomstack, Ortur, Sculpfun, Two Trees). Photo engraving uses 4 dithering modes; vector cutting handles SVG and DXF imports. The interface is dated but functional.
Our free laser engraving software guide compares LaserGRBL, Inkscape, and Beambox in depth. Beambox (the free version) is the open-source ancestor of FlashForge’s Beambox software. Cross-platform, simpler than LightBurn, but limited to specific hardware models.
Inkscape + extensions is the path many users take: design in Inkscape (free, professional vector editor), then export to LightBurn or LaserGRBL for laser-specific operations. Our SVG file preparation guide covers the five export-time fixes that prevent most laser cutting failures. The Inkscape extension “Inkscape-Lasertools” outputs G-code directly for some hardware, though tuning is manual.
Use free tools when: budget is tight, the hardware is entry-level (under $300 diode), and feature depth isn’t critical. Switch to LightBurn when: production work begins, photo engraving becomes important, or rotary work is needed. Our laser safety guide covers safety basics that apply regardless of software.
How to Choose: Decision Framework
The choice usually comes down to your specific hardware:
xTool S1, P2, F1, M1, D1 Pro: xTool Creative Space. Don’t switch unless you have a specific feature need (e.g., advanced rotary work) — the factory profiles and integration are too valuable to leave behind.
Glowforge Aura, Plus, Pro: Glowforge App. No alternative exists for Glowforge hardware.
OMTech, Boss Laser, FSL Muse, generic Ruida controllers: LightBurn. The Ruida integration is unmatched, and these CO2 lasers benefit hugely from LightBurn’s depth.
Atomstack, Ortur, Sculpfun, Two Trees, generic GRBL diodes: LightBurn for serious users; LaserGRBL for budget setups. Above ~$300 hardware, LightBurn pays back its $60 cost within 5-10 hours of use through faster setup and better results.
Anyone considering rotary engraving (tumblers, glasses, cylindrical work): LightBurn or xTool CS only. Free tools rarely support rotary attachments well.
The Laser Settings That Actually Matter
Across all four applications, the same handful of settings drive 80% of result quality. Tuning these well in any software beats running another application with defaults.
Power and speed: Always run a power/speed grid test on every new material. Cuts depend on material thickness, density, and color. Generic “100% power, 30mm/s” advice is wrong for many materials. The grid test (5 power levels × 5 speed levels = 25 small squares on the material) takes 10 minutes and saves dozens of failed jobs.
Number of passes: For materials over 4mm thick (plywood, hardwood, acrylic), multiple lighter passes produce cleaner edges than a single high-power pass. 3-5 passes at 60% power often beats 1 pass at 100% power.
Air assist: Always-on for cuts. Air assist removes smoke and debris from the cut zone, dramatically improving edge quality. The improvement on plywood between no air assist and proper air assist is night and day.
Line interval (engraving): 0.05-0.1mm for high-quality engravings. Tighter intervals look better but take longer; 0.05mm is the standard for photo work, 0.1mm for line art.
Dithering algorithm (photo engraving): Match the algorithm to the photo type. Floyd-Steinberg for general photos. Jarvis for portraits. Stucki for landscapes. Atkinson for high-contrast images. Our photo engraving deep-dive compares all 8 LightBurn algorithms across photo types. Test 3-4 algorithms on the same photo to find which renders the subject cleanest.
Cut Order and Layer Sequence Optimization
Cut order — which paths the laser executes first, which second — can save 20-40% job time on complex designs through smart sequencing. Modern software handles this automatically with varying levels of intelligence; understanding the principles helps you override the auto-sequence when needed.
The basic rule: engrave first, cut last. Engraved details on a cut piece survive better when the piece is still attached to the surrounding material. Cutting first risks the engrave-pass disturbing parts that have detached. LightBurn and xTool CS auto-sequence this way; free tools often require manual layer ordering.
For multi-color material (e.g., two-tone acrylic): engrave the top layer first, then cut the outline. Reversing the order produces ragged engrave edges where the cut pass damages the engraved surface.
For framed pieces with internal cutouts: cut internal features first while the outer frame still anchors the piece, then cut the outer perimeter last. Otherwise small interior cuts can drop and shift, ruining the alignment of subsequent operations. The complete laser workflow guide covers this sequence in detail.
Common Software Mistakes That Waste Material
Five mistakes appear repeatedly across all four software ecosystems and waste more material than any hardware limitation.
Mistake 1: Skipping the test grid. Every new material needs a power/speed test. Skipping it produces under-cuts (incomplete cuts requiring rework) or over-cuts (charred edges, wider kerf, fire risk). The 10-minute test investment saves hours of failed cuts. The laser materials guide shows what test grids should look like for common materials.
Mistake 2: Wrong DPI for photo engraving. Photos engraved at 254 DPI look fine; the same photo at 600 DPI takes 3x longer with no visible improvement. Match DPI to the laser’s spot size — most diodes top out at 250-300 effective DPI; CO2 lasers reach 500-600 DPI. Cranking higher just wastes time.
Mistake 3: Forgetting kerf compensation. Laser cuts remove material (the kerf, typically 0.1-0.3mm wide). Designs that need to fit together (boxes, joints) require kerf compensation in the software. LightBurn does this with offset settings; xTool CS auto-compensates with material profile data.
Mistake 4: Wrong material selection in profile library. Selecting “3mm plywood” when you have “3mm cherry hardwood” produces wrong cuts. Plywood and hardwood have different densities and burn characteristics. Always verify the material profile matches the actual material — or run a test.
Mistake 5: Ignoring air assist settings per layer. Engrave operations don’t always need air assist; cuts always do. LightBurn and xTool CS allow per-layer air assist control. Engraving with air assist on some materials (slate, some woods) actually makes engraving worse by cooling the material and reducing contrast. Tune per material. See our laser safety guide for fume management when air assist is off.
When to Upgrade Your Laser Software
The right time to switch software depends on what you’ve outgrown rather than what’s “best.”
Switch from LaserGRBL to LightBurn when: Photo engraving becomes important (LightBurn’s algorithms beat LaserGRBL’s by a wide margin), rotary work starts (LaserGRBL rotary support is limited), or production volumes increase (LightBurn’s library and layer management save real time on repeat jobs).
Switch from xTool CS to LightBurn when: You add a non-xTool laser (LightBurn supports both; xTool CS doesn’t), you need advanced photo dithering options xTool CS doesn’t expose, or you outgrow the closed xTool ecosystem.
Don’t switch from Glowforge App: Glowforge hardware works only with Glowforge software. The path is changing hardware, not software. If Glowforge limitations frustrate you, the alternative is replacing the Glowforge with a LightBurn-compatible CO2 laser like the OMTech Polar 350.
For setup help on any laser hardware before software decisions matter, see our decision framework for first laser purchase.
Frequently Asked Questions
Which laser engraving software is best for beginners?
xTool Creative Space if you have an xTool laser, the Glowforge App if you have a Glowforge, and LightBurn for everyone else (with a 30-day free trial to learn before purchase). All three offer guided workflows; LightBurn requires more learning but provides more growth room as skills develop.
Is LightBurn worth $60 for a hobby diode laser?
Yes, after the first 5-10 hours of use. Free alternatives like LaserGRBL get you started, but LightBurn’s photo engraving algorithms, layer management, and material library save measurable time on every project. The break-even point is roughly 10 hours of use; serious hobbyists pass that in the first few weeks.
Can I use Adobe Illustrator for laser cutting?
Yes for design — Illustrator’s vector tools are best-in-class. But Illustrator does NOT send jobs to lasers directly. Design in Illustrator, export as SVG, import into LightBurn or xTool CS for laser-specific operations (cut order, power, speed, dithering). This is the standard professional workflow.
Does Glowforge work with LightBurn?
No. Glowforge has not opened their cloud-based software to third-party tools. Glowforge hardware works only with the Glowforge App. This is a major limitation for users who want production capability or rotary work — both unavailable on Glowforge.
What’s the best free laser engraving software in 2026?
LaserGRBL for Windows users on GRBL hardware (most diode lasers). Inkscape + Inkscape-Lasertools for cross-platform users comfortable with manual G-code workflow. Both produce competent results on simple cuts and basic engravings; both lose to LightBurn or xTool CS on photo work, rotary, and material libraries.
Can I switch laser software without losing my designs?
Yes — vector designs (SVG, DXF, AI) transfer between applications. Photo engraving settings (dithering, line interval) reset on import and need to be reconfigured. Material profiles do NOT transfer between applications because the parameter formats differ; rebuild material profiles in the new software through testing.
Why does my laser software produce different results than the same job did last week?
Most likely cause: the laser tube or diode has aged. Lasers lose 5-15% of power output over their first 1000 hours, then continue to degrade slowly. Re-run your power/speed grid test on a known material every 200-500 hours of use to catch power drift before it ruins production work.