LightBurn Rotary Setup: Roller, Chuck, and xTool RA2 Pro
Rotary engraving (tumblers, glasses, rings, wine bottles) is one of the highest-margin laser businesses, and rotary setup in LightBurn is straightforward once you know which two settings actually matter. In ~40 words: pick the right rotary type (roller vs chuck) for your workpiece, measure circumference accurately, configure LightBurn’s rotary settings to match, run a test square, and verify dimensions. The 30-minute setup process is the same for $200 hobby rotaries and $500 production rotaries.
This guide covers all three rotary types — roller, chuck, and xTool’s RA2 Pro — and walks through LightBurn configuration for each. The same setup process applies whether you have a basic 4040 diode laser with an aftermarket roller or a 60W CO2 with a precision chuck. Successful rotary work depends more on calibration than on hardware quality.
The Three Rotary Types
Laser rotaries split into three categories: roller (two parallel cylinders that the workpiece rests on), chuck (a 3-jaw or 4-jaw clamp that grips the workpiece), and hybrid systems like the xTool RA2 Pro that switch between modes.
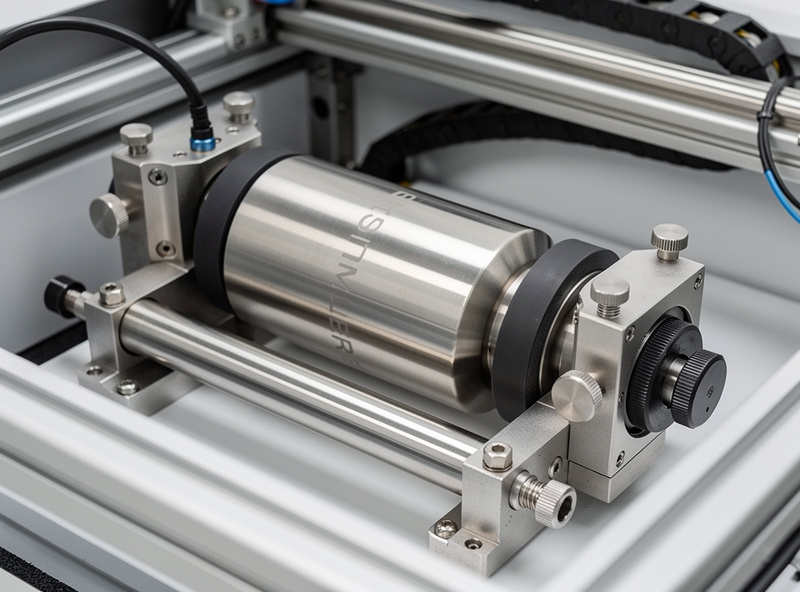
Roller rotaries are simpler and cheaper. The workpiece rests on two parallel rollers and rolls along when one roller turns. Best for: tumblers, mugs, glasses, anything with a smooth cylindrical surface. Limitations: cannot rotate tapered objects (wine glasses, certain bottles) without slipping, and cannot grip very small or oddly-shaped objects.
Chuck rotaries grip the workpiece with three or four jaws. Best for: rings, small bottles, tapered objects, anything where the workpiece needs to be held tightly rather than just rolled. Limitations: setup takes longer per workpiece, and large smooth cylinders (wide tumblers) sometimes mount imperfectly.
The xTool RA2 Pro and similar hybrid rotaries switch between roller and chuck modes via attachments. Best for: users who do mixed work and don’t want two separate rotaries. Cost is higher than dedicated single-mode rotaries but the flexibility justifies the price for production use.
Hardware Setup
Most laser rotaries connect to the laser’s Y-axis stepper motor port, replacing the Y-axis movement with rotation. Disconnect the laser’s Y-axis motor cable and plug the rotary’s cable into the same port. Some rotaries (xTool RA2 Pro) connect to a dedicated rotary port instead.
Mount the rotary inside the laser’s work area. Roller rotaries need flat positioning so the workpiece doesn’t drift; chuck rotaries need to align so the chuck’s rotation axis is parallel to one of the laser’s axes (X is typical).
Position the workpiece. For rollers, the workpiece sits between the two rollers with the engraving area facing up. For chucks, the workpiece is gripped at one end with the engraving area extending out from the chuck. Use the laser’s preview to verify the workpiece is properly positioned before powering on.
Disable Y-axis homing in your laser firmware. Rotary mode means the Y-axis is rotating, not moving linearly. If the firmware tries to home the Y-axis, the rotary spins endlessly. Most lasers have a “rotary mode” toggle in the controller; the LightBurn rotary panel also disables homing automatically when rotary mode is enabled.
LightBurn Configuration
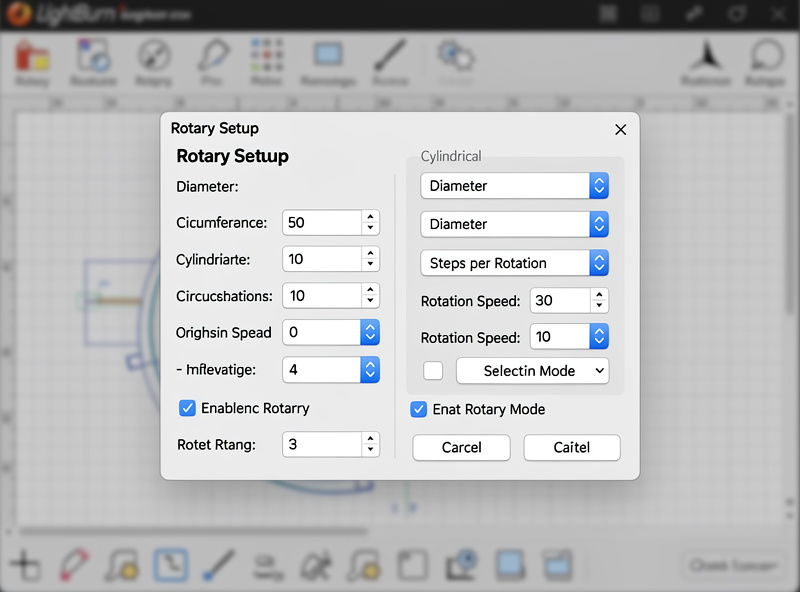
Open LightBurn → Tools → Rotary Setup. Two critical settings: rotary type (Roller or Chuck) and circumference measurement.
For roller rotaries: enter the roller diameter (typical: 12-15mm) and the workpiece circumference. The slicer math: how far does the workpiece rotate per millimeter of roller movement? LightBurn calculates this from the roller-to-workpiece ratio.
For chuck rotaries: enter the workpiece circumference at the engraving point. The chuck rotates 360° per full Y-axis “step” cycle; LightBurn maps engraving width to circumference accordingly.
Measure circumference accurately. Wrap a strip of paper around the workpiece at the engraving location, mark where the strip overlaps, then measure the marked length with calipers. Don’t trust visual estimates — even a 5% circumference error produces visibly skewed engravings on tumblers.
Save the rotary configuration as a preset. Each workpiece type (12oz tumbler, 20oz tumbler, ring, wine glass) gets its own preset with the correct circumference. LightBurn remembers presets per device, so switching between rotaries is one click.
The Critical Test Square
Before engraving expensive workpieces, run a test cut on a piece of cardboard or scrap material wrapped around a similar-circumference object. Engrave a 50×50mm square. Measure the actual cut dimensions on the cardboard.
If the square engraved at 50×50mm: rotary configuration is correct. If the square came out at 50×60mm or 50×40mm: circumference measurement is off by 20%. Recalibrate by adjusting the LightBurn circumference setting, then re-run the test.
The test square is 5 minutes of work that prevents 50 minutes of failed expensive workpieces. Always run it on a new rotary, after firmware updates, after changing workpiece types, and any time results look “off.”
For a deeper troubleshooting framework when test results don’t match expectations, see our laser troubleshooting guide — many rotary problems trace back to the same calibration issues that affect flat-bed work.
xTool RA2 Pro Specifics
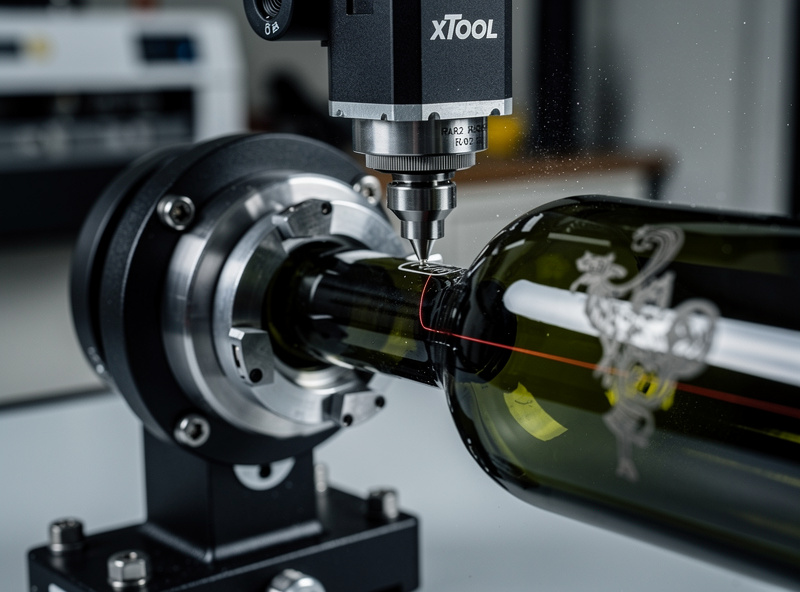
The xTool RA2 Pro is a hybrid rotary with three modes: roller (for tumblers), chuck (for rings and small workpieces), and ring jig (specifically for inside-ring engraving). It connects to xTool S1, P2, F1, M1, and D1 Pro hardware via a dedicated rotary port.
For RA2 Pro on xTool hardware, xTool Creative Space integration is significantly smoother than LightBurn integration. The RA2 Pro auto-detects which mode it’s in (roller vs chuck), the correct workpiece settings load automatically, and tapered-object engraving uses xTool’s specific tapered-rotary profile that LightBurn doesn’t replicate.
For RA2 Pro on non-xTool hardware: LightBurn supports it as a generic chuck rotary, but you lose the auto-detection and tapered-object handling. Most users who own RA2 Pro on non-xTool lasers eventually buy a different rotary (OMTech, Atomstack, dedicated chuck rotaries) for non-xTool work and keep the RA2 Pro for xTool.
For users who do significant rotary work and run multiple laser brands, owning two rotaries is normal — one optimized per ecosystem. The hardware investment ($300-500 total) pays back quickly in production efficiency. See our best laser engraving software guide for context on when xTool CS beats LightBurn for specific workflows.
Materials and Coatings for Rotary Work
Most rotary engraving is done on coated metal tumblers, glass, and powder-coated workpieces. The laser doesn’t engrave the metal directly — it removes the coating to reveal the metal underneath, creating a contrast effect. Properly chosen tumbler blanks make rotary work much easier.
Stainless steel tumblers (powder-coated): The standard for rotary engraving. Polar Camel, Maars, and many other brands sell laser-friendly powder-coated tumblers. The coating ablates cleanly, leaving a high-contrast engraving. Available in dozens of colors.
Aluminum tumblers (anodized): Works similarly to powder-coated steel. Anodized coating ablates cleanly. Sometimes preferred for high-volume production because aluminum is lighter and more forgiving in shipping.
Glass tumblers and wine glasses: Works with roller rotaries. The laser frosts the glass surface, creating a white engraving. CO2 lasers excel at glass; diode lasers handle it but require slower speeds and multiple passes.
Wood and bamboo tumblers / cups: Works directly without coating. The laser burns the wood surface for natural-tone engravings. Slower than coated metal tumblers but produces a distinctive look.
Our laser materials guide covers power and speed values for each of these material types specifically for rotary work.
Frequently Asked Questions
Do I need a special laser for rotary engraving?
No — most lasers (diode, CO2, fiber) support rotary attachments. The rotary connects to the laser’s Y-axis or a dedicated rotary port. Hardware costs run $150-500 depending on rotary type and quality. Any laser with a working Y-axis stepper motor can run rotary mode.
Why does my engraving look stretched on the tumbler?
Circumference measurement is wrong in LightBurn rotary settings. Wrap a paper strip around the tumbler at the engraving location, mark the overlap, measure with calipers, and update LightBurn’s circumference value. Even 5% error produces visibly stretched results. Re-run the 50×50mm test square after recalibrating to verify.
Can I use a chuck rotary with a roller rotary’s settings?
No — the math is fundamentally different. Roller rotaries use roller-diameter to circumference ratio; chuck rotaries use 360° per Y-axis cycle. Each rotary type needs its own LightBurn rotary settings. Switching between rotary types requires reconfiguring the rotary panel each time.
What’s the best tumbler brand for laser engraving?
Polar Camel is the most-used brand for laser-engraved tumblers — wide color selection, consistent powder coating, and fair pricing. Maars and ETC tumblers are also popular for production use. Avoid generic Amazon tumblers without verified coating quality; the coatings are often too thin or too thick to engrave consistently.
Why does the laser pause between lines on rotary engravings?
The rotary needs time to rotate the workpiece between scan lines. This pause is normal and is set by the laser’s acceleration profile. Reducing acceleration in LightBurn machine settings makes pauses longer (smoother) at the cost of total time; raising acceleration shortens pauses but can cause stepper motor skipping on heavy workpieces.
Can I engrave the inside of a ring?
Yes with the right rotary attachment. The xTool RA2 Pro has a specific ring jig mode for inside-ring engraving. Most chuck rotaries can hold rings for outside engraving; inside engraving requires the ring positioned with the inside surface facing the laser, which not all chucks support. Verify your specific rotary’s capabilities before assuming inside engraving works.
Should I buy a roller or chuck rotary first?
Roller for tumblers and mugs (the most common rotary work). Chuck for rings and small precision parts. If you’ll do mostly tumblers, start with a roller — it’s cheaper ($150-200) and the workflow is faster per workpiece. Add a chuck or upgrade to a hybrid like RA2 Pro when production volume justifies the second purchase.