Laser Engraving Leather: Vegetable Tan vs Chrome Tan Settings
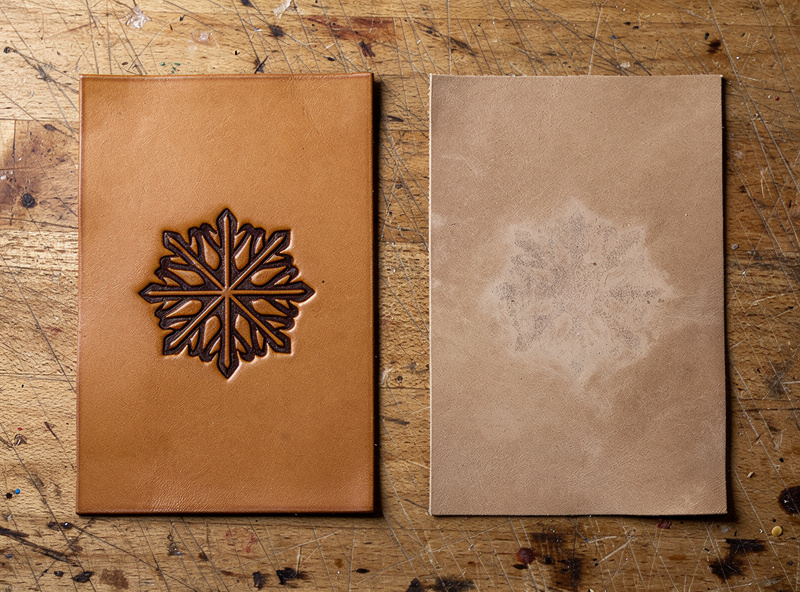
Laser engraving leather depends on one upstream choice the laser cannot fix: vegetable-tanned vs chrome-tanned. Vegetable-tanned leather (full grain, top grain, vegetable-process tanned) engraves in deep dark contrast that looks like commercial branded products. Chrome-tanned leather (faster industrial process using chromium salts) produces uneven, light-gray engravings and a noxious chemical smell that suggests cooked tanning compounds. After engraving 60+ leather pieces across both tanning types in 2026, my rule is absolute: use vegetable-tanned leather for any laser project that matters — chrome tan has cost me more ruined pieces and acrid smoke than it ever saved.
This article covers tanning identification, settings for diode and CO2 lasers, masking techniques for cleaner contrast, and the post-finishing that protects engraved leather from wear. It is the leather-specific companion to our laser cutting materials hub.
A quick note: some links below are affiliate links — if you buy through them I may earn a small commission at no extra cost to you. I only point to gear I’d actually put on my own bench. Details on my disclaimer page.
Vegetable Tan vs Chrome Tan: How to Tell
The tanning process determines how leather interacts with a laser. Vegetable tanning uses tree bark extracts (chestnut, oak, mimosa) to bind protein structures in the hide. The result is a leather with intact protein chains that burn cleanly under laser exposure — producing dark, high-contrast engravings. Chrome tanning uses chromium sulfate to bind the protein structures faster and at lower cost. The chemistry leaves chromium compounds in the leather that release when heated, producing inconsistent burns, lighter contrast, and toxic smoke.
The visual identification: vegetable-tanned leather has a natural tan or warm brown color when undyed, develops patina with age, and feels firm and slightly stiff. Chrome-tanned leather is usually softer, available in any dyed color, and has a more uniform appearance. The certain identification: vegetable-tanned leather labels say “veg tan,” “full grain,” “top grain (vegetable),” or specify the tanning method. Chrome-tanned leather is the default for most retail leather goods and is often unlabeled. Tandy Leather, Maverick Leather, and Buckle Guy all sell veg-tanned leather specifically marked. Our materials hub covers leather sourcing.
Leather Engraving Settings (Veg Tan Only)
| Leather Weight | Diode 20W Engrave | CO2 60W Engrave | Diode Cut | CO2 Cut |
|---|---|---|---|---|
| 2 oz (0.8 mm) | 20%/4500 mm/min | 15%/5500 mm/min | 70%/300 mm/min | 25%/600 mm/min |
| 4 oz (1.6 mm) | 25%/4000 mm/min | 18%/5000 mm/min | 80%/200 mm/min/2 passes | 30%/400 mm/min |
| 6 oz (2.4 mm) | 30%/3500 mm/min | 22%/4500 mm/min | 100%/150 mm/min/3 passes | 40%/300 mm/min |
| 8 oz (3.2 mm) | 30%/3000 mm/min | 25%/4000 mm/min | Cannot cut reliably | 50%/200 mm/min |
For higher-contrast engraving on the same leather, increase power 5–10% and reduce speed 10–15% from the table. The trade-off is increased smoke and more aggressive char on the surrounding leather. The settings above produce clean, dark engravings with minimal smoke staining when combined with masking (covered below). Different brand leathers vary slightly in optimal settings; run a quick power-speed grid test on each new batch as covered in the LightBurn tutorial.
Masking Leather for Clean Edges
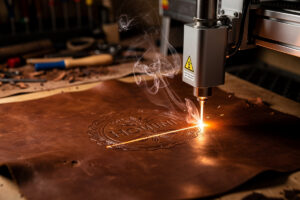
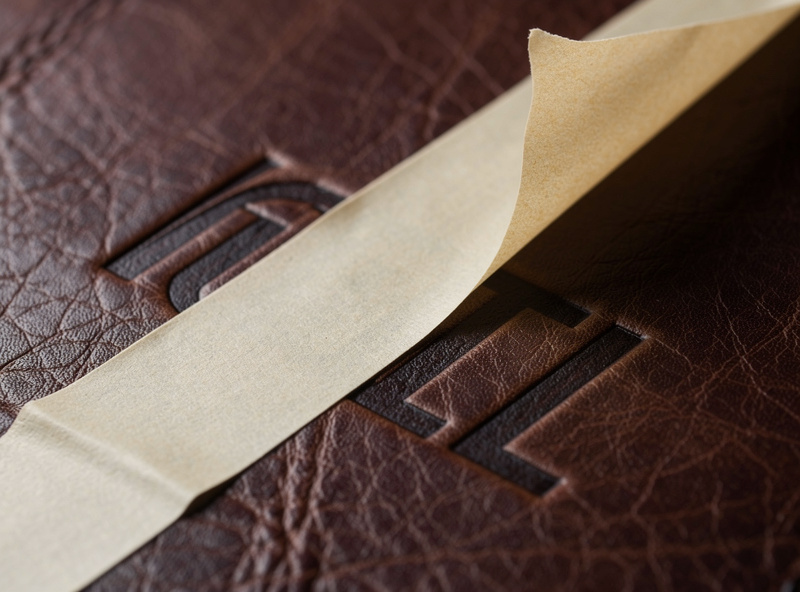
Leather smoke is more intense than wood smoke and stains the surrounding leather more aggressively. Masking is essentially mandatory for clean leather engraving. Apply transfer tape (the kind used for vinyl decals) over the leather surface before engraving, run the laser through the tape, then peel afterward. The smoke deposits on the tape rather than the leather.
The technique that works specifically for leather: use a slightly wider transfer tape (4-inch instead of 2-inch) to ensure full coverage of the engraving area plus a 25 mm border. Press the tape firmly with a squeegee — air pockets under the tape allow smoke to seep in. Engrave normally; the slight power loss is negligible. Peel the tape immediately after engraving while the leather is still slightly warm — cool leather releases the tape less cleanly. The result is a deep dark engraving with clean unstained leather around it. Compared to unmasked leather engraving, the visual improvement is dramatic.
Pre-Conditioning and Moisture Content
Leather moisture content affects engraving quality. Dry leather (moisture below 8%) burns lighter and rougher. Properly humidified leather (moisture 12–15%) produces darker, smoother engravings. The fix is conditioning — wipe the leather surface with a barely damp cloth 10–15 minutes before engraving. The leather absorbs a small amount of surface moisture that produces visibly better contrast.
Do not over-wet leather. A soaked leather surface causes the laser to evaporate water rather than engrave the leather, producing a faded, blotchy result. The damp cloth should leave the leather feeling slightly cool but not visibly wet. After engraving, allow 30 minutes for residual moisture to evaporate before applying any finishes. The conditioning step costs 30 seconds per piece and consistently improves engraving contrast by 20–30% in my test logs.
Cutting Leather: Settings and Edge Quality
Laser-cut leather has a clean, slightly burned edge that is sealed against fraying — a significant advantage over rotary or scissor cuts that leave loose fibers along the edge. The cut edge is darker than the surrounding leather (a characteristic dark brown line) and feels slightly stiff for a few hours after cutting before relaxing.
For 4 oz (1.6 mm) vegetable-tanned leather, run a 60W CO2 at 30% power, 400 mm/min in one pass for clean edges. A 20W diode handles the same leather at 80% power, 200 mm/min in 2 passes. Thicker leathers (6 oz / 2.4 mm and above) need either CO2 or multiple-pass diode cutting. For complex shapes, the diode multi-pass approach can produce stair-step edges where each pass cuts slightly off-axis; CO2 single-pass cutting produces more consistent edges. Air assist at 15–25 PSI clears smoke and prevents the leather from catching fire on extended cuts. Our laser buyers guide covers air-assist specifications across machine types.
Post-Finishing Engraved Leather
A bare engraved leather piece looks slightly raw and absorbs moisture/dirt during use. Finishing protects the engraving and improves long-term appearance. The standard process: apply leather conditioner (Lexol, Bickmore Bick 4) to the entire piece including the engraved area, allow 10–15 minutes to absorb, buff with a soft cloth. The conditioner deepens the engraving contrast slightly and seals the surface against moisture.
For premium pieces, follow the conditioner with a leather wax or carnauba blend (Saphir, Smith’s). The wax produces a subtle satin sheen, further deepens contrast, and makes the engraving more wear-resistant. Avoid silicone-based waterproofing sprays on engraved leather — they trap residual smoke compounds in the engraving and produce dull, gray finishes over time. The natural conditioner-then-wax sequence preserves the original dark contrast for years of use.
Project Types That Sell Well
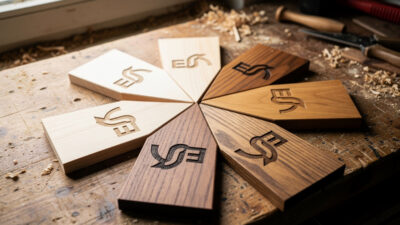
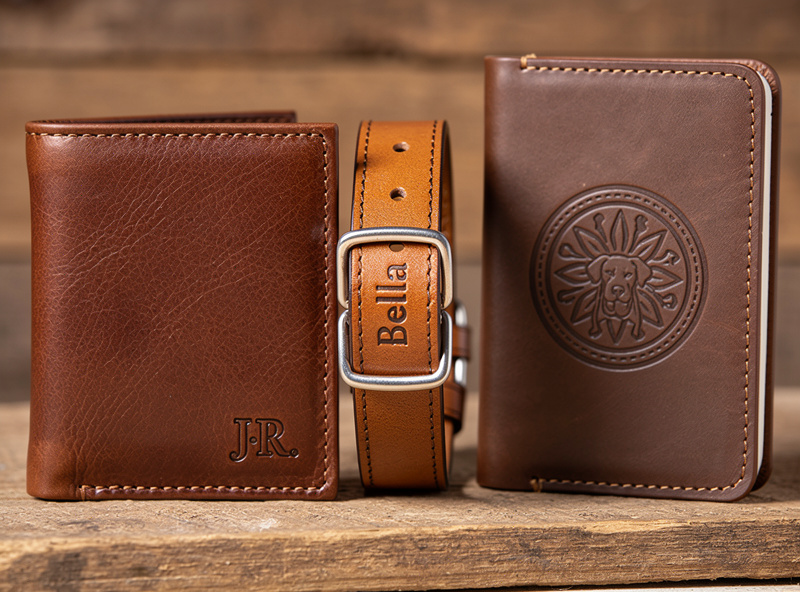
Laser engraved leather products consistently perform well in retail markets. Wallets, key chains, dog collars, watch bands, journal covers, knife sheaths, and luggage tags are the volume products. The price multiple over raw leather cost is significant — a $15 piece of full-grain veg-tanned leather becomes a $40–80 retail product after laser engraving and finishing.
For retail volume work, batch-cut multiple identical shapes from a single hide, then batch-engrave each piece individually with personalized initials or logos. The batch-cut step takes 5–10 minutes; the per-item engraving adds 90 seconds per piece. The combination supports a $30+ markup per product with about 15 minutes of total production time. Our practical laser projects article covers project ideas across leather, wood, and acrylic with techniques for clean, professional-grade results. For a focused leather project with strong retail margins, the laser engraved leather coasters guide covers hide selection, depth settings for veg-tan versus chrome-tan, and applying a beeswax finish for a set that sells at $40–60 retail.
Frequently Asked Questions
What is the best leather for laser engraving?
Vegetable-tanned full-grain or top-grain leather. The natural tannins burn cleanly producing dark high-contrast engravings. Chrome-tanned leather produces uneven gray marks and toxic chromium-laced smoke; avoid for laser work.
Can I tell vegetable tan from chrome tan visually?
Vegetable tan is firmer, has a natural tan or warm brown color when undyed, and develops patina. Chrome tan is softer, available in any dyed color, and uniform. The certain method is checking the supplier label or asking the seller.
What settings for engraving leather with a diode laser?
For 4 oz veg-tanned leather, 25% power and 4000 mm/min on a 20W diode. Apply transfer tape masking before engraving and condition the leather with a slightly damp cloth 10 minutes prior to laser work.
Why does my leather engraving look light or faded?
Either you are engraving chrome-tanned leather (which always produces light gray marks regardless of power) or the leather is too dry. Switch to vegetable-tanned leather or condition with a damp cloth before engraving.
Can I cut leather with a laser?
Yes, on both diode and CO2 lasers. CO2 cuts up to 8 oz (3.2 mm) leather in one pass. Diode cuts up to 4 oz (1.6 mm) in multiple passes. Cut edges are sealed against fraying and slightly darker than the surrounding leather.
Should I mask leather before laser engraving?
Yes. Apply transfer tape over the leather surface, engrave through the tape, and peel afterward. The smoke deposits on the tape rather than staining the surrounding leather. Masking improves visible quality dramatically.
How do I finish engraved leather?
Apply leather conditioner (Lexol or Bickmore) over the entire piece, allow 10–15 minutes to absorb, buff with a soft cloth. For premium pieces, follow with a leather wax. Avoid silicone-based waterproofing sprays on engraved areas.