Laser-Engraved Leather Coasters: A Diode Build
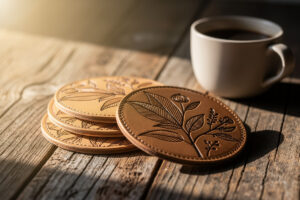
Laser-engraved leather coasters are the best first leather project there is: cheap, fast, and they teach the one lesson that matters most in laser leatherwork — vegetable-tan and chrome-tan leather behave nothing alike under a beam. I cut and engrave coasters on my diode laser, and a set of six veg-tan blanks turns into finished, edge-burnished coasters in an evening. Get the leather type and the low-power engrave right, and they look branded rather than burned.
This build covers sourcing the right leather, the diode settings that engrave a rich dark mark without cutting through, cutting clean circles, and the bevel-and-burnish edge finish that makes a coaster look bought. It is one of the most beginner-friendly walkthroughs on the laser project ideas hub, and it pairs naturally with a food-safe cutting board if you are building a matching kitchen gift set.
Veg-Tan vs Chrome-Tan: Use Veg-Tan
Use vegetable-tanned leather for engraved coasters. Veg-tan engraves a rich, dark, branded-looking mark and smells like toasted leather; chrome-tanned leather contains chromium salts that can release unpleasant and potentially harmful fumes under a laser, so it is the wrong choice here. If you cannot confirm the tanning method, treat it as unknown and test a scrap with full extraction running before committing.
The difference is dramatic in practice. Veg-tan darkens to a clean caramel-to-brown engrave that contrasts beautifully against the natural tan surface, which is exactly the look people associate with quality leather goods. Chrome-tan, by contrast, tends to give a grey, ashy, less attractive mark — and more importantly its tanning chemistry is not something you want to vaporise in your workshop. This is the same material-safety discipline that governs the whole site: the deeper leather settings guide breaks down the full veg-tan versus chrome-tan behaviour, and the rule is simple — known veg-tan, or you do not run it. Never laser bonded or “genuine leather” of unknown composition, because you have no idea what binders and coatings are in it.

Low-Power Settings to Engrave Without Cutting Through
Engrave leather at low power and high speed — you want to mark the surface, not cut into it. On my 40W-class diode I run a light raster fill with air assist on, dialing power down until the mark is dark and crisp but the leather underneath is still full thickness. Leather marks at far lower power than wood, so wood settings will scorch straight through it.
As always, you do not guess — you run a small power-and-speed grid on an offcut of the same leather first, because thickness and finish change the result. I look for the lowest power that gives a solid dark engrave without a hard charred ridge, then back off slightly if the edges look crusty. Air assist matters here as much as on any material: it clears the smoke off the surface so the char does not smear into the surrounding leather, keeping the mark sharp. The cut is a separate operation — once the engrave is done, a single higher-power vector pass cuts the coaster circle. For 3-4mm veg-tan a diode usually needs a couple of passes to cut clean through, so build that into your file as a separate cut layer.
Cutting Circles and Finishing the Edge
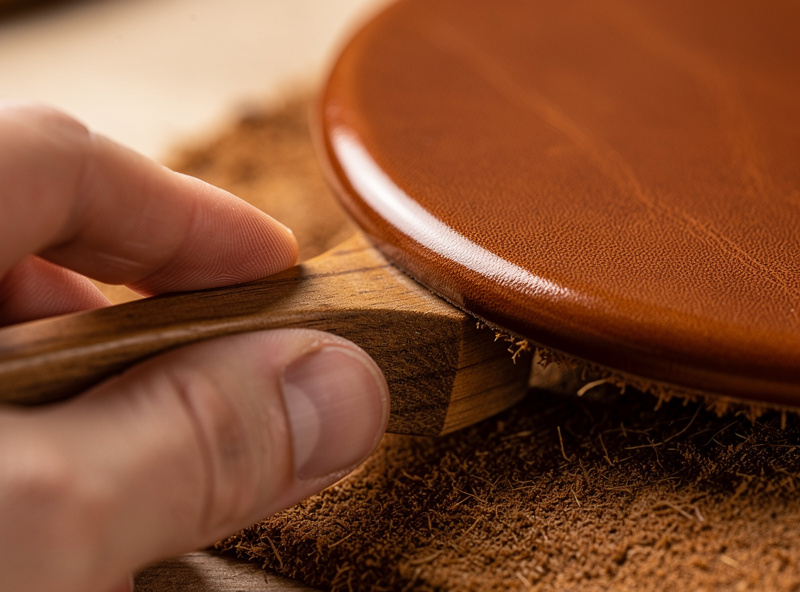
Cut the coaster outline as a vector circle after engraving, then finish the edge by bevelling and burnishing — this single step is what separates a coaster that looks handmade from one that looks burned out of a sheet. A bevelled, burnished edge is smooth, rounded, and slightly darker, exactly like a quality leather good.
After the laser cuts the circle, the cut edge is square and slightly charred. Knock the char off with a quick wipe, then run an edge beveller around both faces to take the sharp corner off. Dampen the edge lightly, then burnish it — a wooden or canvas slicker rubbed briskly along the edge generates heat and friction that polishes the fibres into a smooth, glossy round. A touch of edge paint or gum tragacanth makes it even cleaner if you want a finished retail look. This is the leathercraft crossover I love about the laser: the machine does the engrave and the cut, but the hand-finishing is pure traditional leatherwork, and it is the part that makes the piece. A light coat of leather conditioner or a matte sealer at the end protects the surface from rings and keeps the engrave crisp.
Why Air Assist Is Non-Negotiable on Leather
Run air assist on every leather job, full stop. Leather produces dense, smelly smoke, and without air assist that smoke settles on the surface as a greasy soot film that dulls the engrave and stains the leather around it. The air stream blows it clear as you go, so the mark stays sharp and the surface stays clean.
Beyond surface quality, the fume side matters: leather smoke is unpleasant and you want it pulled straight out through ducted exhaust, not recirculated into the room. My bench runs a dedicated air-assist pump and ducted extraction to outside on every cut, and leather is one of the materials that proves why — engrave a coaster without extraction and the smell lingers in the workshop for hours. Air assist on the lens also protects it from the greasy residue leather throws off, which means fewer lens cleanings and more consistent cuts over a batch. It is the cheapest upgrade that most improves leather results.
Design Ideas That Engrave Well on Leather
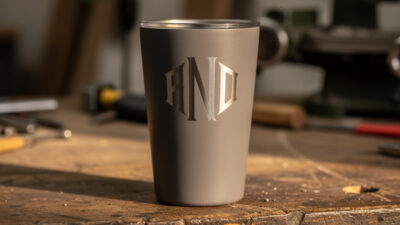
Leather rewards bold, simple artwork. Monograms, geometric patterns, a clean logo, line-art botanicals, and short text all engrave with the rich contrast that makes leather look premium. Fine photographic detail does not translate — leather’s surface texture swallows the subtle tonal steps a photo needs, so a high-contrast line design beats a grayscale image every time.
Think in terms of the natural tan background and the dark engrave working as a two-tone design. A single bold motif centred on the coaster usually beats a busy full-coverage fill, both because it looks cleaner and because less engraving means less smoke and a faster batch. If you are making a matched set as a gift, engrave each coaster with a variation on a theme — four botanicals, four constellation patterns, four initials — so the set reads as intentional rather than repetitive. Round is the classic coaster shape, but square coasters with slightly rounded corners cut cleanly too and stack more neatly, which matters if you are boxing a set. Keep the design clear of the very edge so the bevel-and-burnish step does not clip into your artwork.
Disclosure: Some links below are affiliate links. If you buy through them I may earn a small commission at no extra cost to you. I only point to materials and tools I actually use on my own bench.
For blanks, a pack of vegetable-tanned leather coaster blanks saves cutting your own and guarantees you are starting with known veg-tan. For the edge finish that makes them look retail, a basic edge beveller and burnisher set is all you need, and it carries straight over into every other leather project.
Related Builds
- Laser Engraving Project Ideas: The Project Hub
- Laser Engraving Leather: Veg-Tan vs Chrome-Tan Settings
- Food-Safe Laser-Engraved Cutting Board
- Laser Cutting Materials Guide
Frequently Asked Questions
What leather is best for laser-engraved coasters?
Vegetable-tanned leather. It engraves a rich dark mark and smells of toasted leather. Avoid chrome-tanned leather, whose chromium salts can release harmful fumes, and never laser bonded or unknown leather.
Can a diode laser engrave leather coasters?
Yes. A 40W-class diode engraves veg-tan leather beautifully at low power with air assist on. It can also cut the coaster circle, usually needing a couple of passes through 3 to 4mm leather.
Why should I not laser chrome-tanned leather?
Chrome-tanned leather contains chromium salts that can release unpleasant and potentially harmful fumes under a laser, and it engraves a dull grey mark. Use vegetable-tanned leather, which marks cleanly and smells of toasted leather.
How do I keep leather coasters from cutting through when engraving?
Engrave at low power and high speed so you mark the surface rather than cut into it. Run a test grid on an offcut first, since leather marks at far lower power than wood and wood settings will burn through.
How do I finish the edge of a laser-cut coaster?
Bevel both edges to remove the sharp corner, dampen lightly, then burnish with a wooden or canvas slicker until smooth and glossy. Edge paint or gum tragacanth gives a retail-quality finished edge.