Laser Engraved Cutting Board: Food-Safe Build Guide
A laser-engraved cutting board is food-safe when you start with a food-safe hardwood, keep the engrave shallow, and finish it with a food-safe board oil and wax — never a painted, coated, or unknown board. That is the whole rule, and getting it wrong is the difference between a board someone chops on for years and one that should never touch food. I engrave boards on my diode laser, and after running dozens of them the method that survives daily washing is simpler than most tutorials make it.
This build covers choosing a safe wood, designing a mark that stays crisp through dishwashing-by-hand, the diode settings that engrave without gouging, and the oil-and-wax routine that locks it in. It is one of the most beginner-friendly projects on the laser project ideas hub precisely because wood is forgiving — but a cutting board is also a food-contact item, so the material and finish discipline matters more than on a decorative piece.
Which Woods Are Food-Safe to Engrave
Use closed-grain, food-safe hardwoods: hard maple, walnut, cherry, and beech are the classics, and bamboo engraves with a beautiful dark contrast. Avoid open-grain woods like red oak that trap food in the pores, anything resinous, and absolutely any board with an unknown factory finish. The grain structure matters as much as the species — closed grain cleans up and resists bacteria far better.
The reason closed-grain woods win is that the engrave itself opens the surface slightly, and on an open-grain wood that combines with the natural pores to create crevices food can lodge in. Hard maple is my default for exactly this reason: tight grain, light colour for high contrast, and it takes a food-safe oil evenly. Bamboo is technically a grass but behaves like a dense closed-grain wood under the laser and gives the darkest engrave of anything on this list, which is why so many commercial engraved boards are bamboo. If you are buying blanks specifically for engraving, the broader best wood for laser engraving rundown covers contrast and char behaviour across species. Whatever you choose, it must be a raw or oil-finished board — never engrave a board with a glossy factory coating, because you have no way to know what that coating outgasses or leaves behind in the food-contact surface.
Diode Settings That Engrave Without Gouging
Keep the engrave shallow — a clean surface mark, not a deep groove. On my 40W-class diode I run a moderate-power raster fill at a fast speed with air assist on, aiming for a crisp dark line rather than a carved trench. A shallow engrave is easier to keep clean, holds the oil finish better, and looks more like a brand than a gouge.
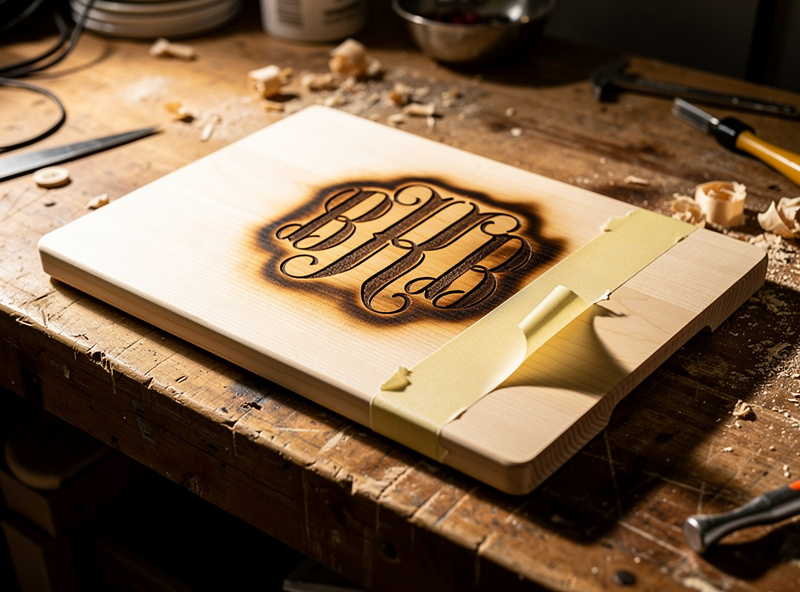
Exact numbers depend on your machine, lens, and the specific board, which is why you never copy settings blind — you run a materials test card on an offcut or the back of the board first. I cut a small power-and-speed grid, pick the cell that gives a dark, sharp mark with minimal char ridge, and only then run the real design. Air assist is non-negotiable here: it blows the smoke off the surface as it engraves, which keeps the char from staining the surrounding wood and gives you a cleaner line that needs less sanding afterward. Masking the board with low-tack transfer tape before engraving keeps soot off the face entirely — engrave through the tape, then peel it, and the wood around the mark stays clean.
Designing a Mark That Survives Washing
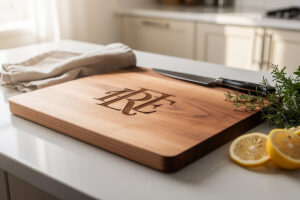
Simple, bold designs survive years of hand-washing; fine hairline detail does not. A monogram, a name, a clean logo, or a recipe in a readable weight all hold up. Photo-realistic engraves and tiny serif text wear and blur as the board is washed, oiled, and re-sanded over its life, so design for durability, not for the unboxing photo.
Think about where the engrave sits, too. Keep it toward an edge or a corner rather than dead-centre where the knife does most of its work — an engrave in the chopping zone wears faster and can collect food. Many makers engrave one face as the “presentation” side and leave the other as the working surface, which is a genuinely good practice for a board that will see real use. Keep stroke weights reasonably heavy so that when the board is re-sanded and re-oiled down the line, the mark is deep enough to survive a light sanding without vanishing.
The Food-Safe Oil-and-Wax Finish
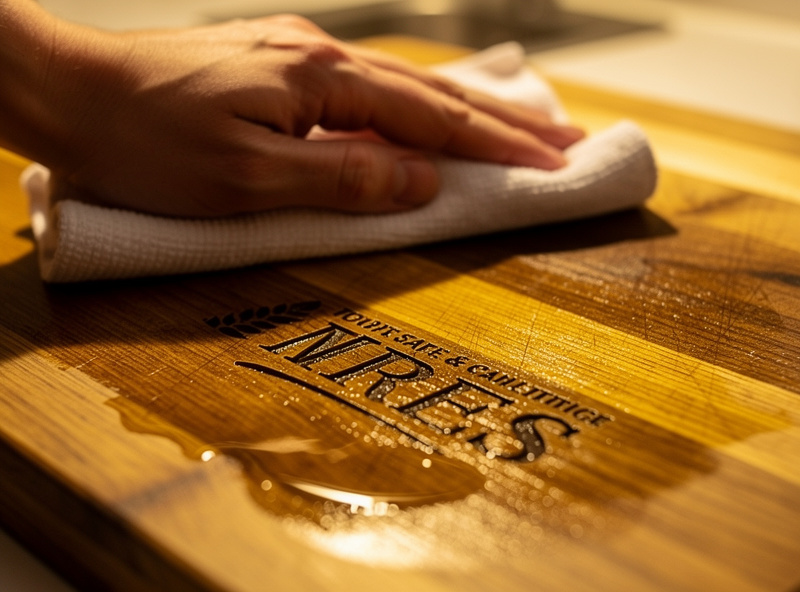
Finish with a food-safe board oil followed by a board wax — this is the step that makes the engrave food-safe and keeps the wood from drying and cracking. Apply a generous coat of food-safe mineral oil or a dedicated board oil, let it soak in, wipe the excess, then seal with a board-cream or beeswax-based wax. Re-oil whenever the board looks dry.
The finish does two jobs: it conditions the wood so it does not crack, and it fills the slightly opened surface of the engrave so food and water do not sit in it. A board-specific oil-and-wax combination is worth keeping on the bench because it is formulated for food contact and goes on cleanly. After engraving I give the board a light sanding with fine grit to knock down any raised grain around the mark, wipe it clean, then oil it heavily — end grain especially drinks oil, so do not be shy on the first coat. Wipe the excess after it soaks, repeat once, then finish with wax for a soft sheen and a water-beading surface. Tell whoever uses the board to hand-wash only, never dishwasher, and to re-oil when it looks dry, and an engraved board lasts for years.
Wood Choices for Engraved Cutting Boards
| Wood | Grain | Engrave Contrast | Best For |
|---|---|---|---|
| Hard maple | Closed | Good (light wood, dark mark) | Everyday all-rounder |
| Walnut | Closed | Subtle (dark on dark) | Premium presentation boards |
| Cherry | Closed | Good | Warm-toned gift boards |
| Bamboo | Dense | Excellent (darkest mark) | High-contrast logos |
| Beech | Closed | Good | Budget blanks |
Disclosure: Some links below are affiliate links. If you buy through them I may earn a small commission at no extra cost to you. I only point to blanks and finishes I actually use on my own bench.
For blanks, a set of hard maple cutting board blanks sized for a diode bed saves you milling your own, and they arrive flat and ready to engrave. The finish that actually matters is a food-safe board oil and wax set — buy the combo so the oil conditions and the wax seals in one routine.
Related Builds
- Laser Engraving Project Ideas: The Project Hub
- Best Wood for Laser Engraving
- Laser Cutting Materials Guide
- Laser-Engraved Plant Tags
- Materials You Must Never Laser
Frequently Asked Questions
Are laser-engraved cutting boards food safe?
Yes, if you start with a food-safe hardwood, keep the engrave shallow, and seal it with a food-safe board oil and wax. Never engrave a painted, coated, or unknown board, and hand-wash only.
What wood is best for an engraved cutting board?
Hard maple is the best all-rounder: tight closed grain, light colour for high contrast, and it takes oil evenly. Bamboo gives the darkest engrave; walnut and cherry suit premium boards.
How deep should I engrave a cutting board?
Keep it shallow, a crisp surface mark rather than a deep groove. A shallow engrave stays cleaner, holds the oil finish better, and survives the periodic light sanding a working board needs over its life.
Can I engrave a cutting board with a diode laser?
Yes. A 40W-class diode engraves hardwood boards beautifully with air assist on and a shallow raster fill. Run a test card on an offcut first, since power and speed vary by machine and board.
What finish do I use after engraving a board?
Food-safe board oil followed by a board wax. The oil conditions the wood and fills the opened engrave surface; the wax seals it and beads water. Re-oil whenever the board looks dry.
Can I put an engraved cutting board in the dishwasher?
No. Dishwasher heat and prolonged water exposure crack the wood and blur the engrave. Hand-wash, dry promptly, and re-oil periodically, and an engraved board lasts for years.