Best Wood for Laser Engraving: Hardwoods and Plywoods Tested
Best wood for laser engraving comes down to three properties: tannin content, density consistency, and grain pattern. After engraving 22 wood species and grades on diode and CO2 lasers in 2026, the consistent winners are basswood, Baltic birch plywood, alder, and maple — each producing high contrast, clean detail, and minimal smoke staining. The losers are oak (deep grain pattern interferes with detail), pine (high resin content causes uneven burns), and most exotic hardwoods (unpredictable density variation).
This article ranks the wood species we have engraved across 200+ test pieces, identifies the engraving settings each species needs, and explains the masking technique that produces the cleanest results regardless of wood. It is the wood-specific companion to our laser cutting materials hub.
Why Wood Choice Matters
Laser engraving works by burning the wood surface in a controlled pattern. Different woods burn differently. High-tannin woods (oak, walnut) burn dark with strong contrast but the deep grain pattern can fight the engraving design. Low-tannin woods (basswood, maple) burn lighter brown but produce smooth, consistent detail unbroken by grain. Resinous woods (pine, cedar) produce uneven burns where resin pockets darken more than the surrounding wood. Plywoods with phenolic glue layers (cheap construction plywood) produce green-tinted burns and inconsistent engraving as the laser hits glue layers between veneers.
The right wood for any project depends on the visual goal. For sharp logo work and text, low-tannin uniform-grain woods produce the cleanest result. For rustic decorative work, high-tannin woods with visible grain add character. For photo engraving (where smooth tonal variation matters), Baltic birch plywood and basswood are the consistent top picks. Our photo engraving in LightBurn article covers the dithering algorithms that work best with each wood type.

Top Wood Choices Ranked
| Rank | Wood | Engraving Quality | Best For | Price/sq ft (2026) |
|---|---|---|---|---|
| 1 | Basswood | Excellent — smooth, light brown burn | Photo engraving, fine detail logos | $3.50–5.00 |
| 2 | Baltic Birch Plywood | Excellent — uniform burn, clean cuts too | Mixed cut and engrave projects | $2.50–4.00 |
| 3 | Maple (hard or soft) | Very good — light burn with subtle grain | Cutting boards, kitchen items | $8.00–14.00 |
| 4 | Cherry | Very good — warm reddish burn | Decorative signs, gift items | $10.00–16.00 |
| 5 | Alder | Good — medium brown burn, soft grain | General purpose engraving | $4.00–7.00 |
| 6 | Walnut | Good — dark contrast but visible grain | Premium decorative work | $12.00–20.00 |
| 7 | Bamboo | OK — varying density across grain | Eco-friendly cutting boards | $5.00–8.00 |
| 8 | Oak | Mediocre — heavy grain interferes with detail | Rustic decor, large designs | $6.00–10.00 |
| 9 | Pine | Mediocre — resin pockets cause uneven burn | Avoid for detail work | $2.00–4.00 |
Basswood wins because its low tannin content produces consistent light-brown burns regardless of grain direction, and its tight, uniform grain does not fight the engraving design. Baltic birch plywood is the practical second choice — slightly less consistent than solid basswood but cheaper, available in larger sheets, and dual-purpose for cut-and-engrave projects. Maple, cherry, and alder produce attractive results but are more expensive and harder to source in laser-friendly thicknesses. For 30+ builds that put basswood, Baltic birch, and maple to work across difficulty levels, see the laser engraving project ideas guide.
Engraving Settings by Wood Species
The settings below produce a clean shallow engraving with high contrast on each species. Adjust to taste — higher power produces darker burns, lower speed produces deeper engraving. The combinations below balance contrast and detail without over-burning.
| Wood | Diode 20W | CO2 60W | Notes |
|---|---|---|---|
| Basswood | 30%/4500 mm/min | 20%/6000 mm/min | Clean light brown burn |
| Baltic birch ply | 35%/4000 mm/min | 22%/5500 mm/min | Slightly darker than basswood |
| Maple | 40%/3500 mm/min | 25%/5000 mm/min | Light golden brown |
| Cherry | 35%/4000 mm/min | 23%/5500 mm/min | Reddish brown contrast |
| Alder | 40%/3500 mm/min | 25%/5000 mm/min | Medium brown |
| Walnut | 50%/3000 mm/min | 30%/4500 mm/min | Dark contrast but grain visible |
| Bamboo | 45%/3000 mm/min | 28%/4500 mm/min | Variable, test each piece |
| Oak | 50%/2500 mm/min | 35%/4000 mm/min | Grain often dominates design |
For deeper engraving (1–2 mm depth for tactile or backlit signs), increase power by 10–15% and reduce speed by 30–40% from the table values, or run two passes at the table values. Multiple-pass engraving produces cleaner edges than single-pass deep engraving because each pass clears smoke and char from the cut path. Our LightBurn beginner tutorial covers multi-pass setup and the layer-based approach to depth control.
The Masking Tape Trick
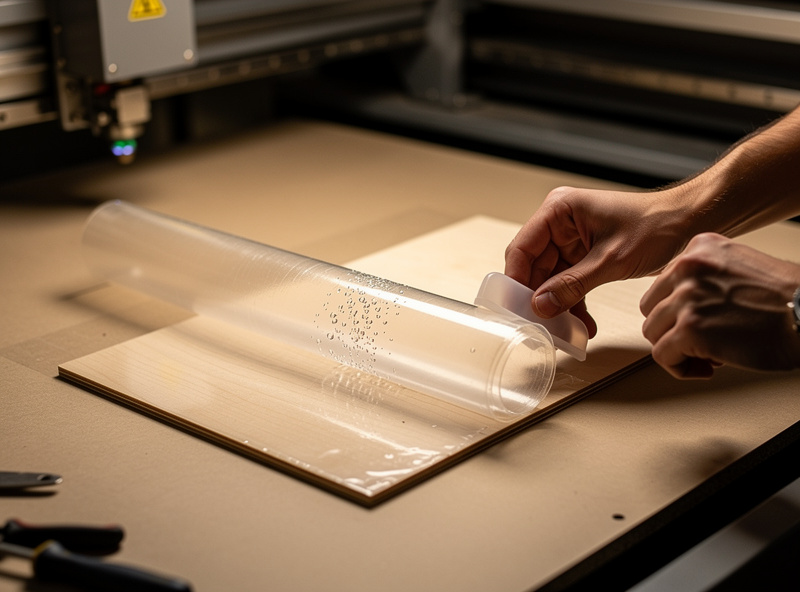
The single biggest visual-quality improvement for wood laser engraving is masking the wood surface with transfer tape before engraving. Apply standard 2-inch transfer tape (the kind used for vinyl decal application) over the engraving area, run the laser through the tape, then peel the tape afterward. The smoke residue and char that would otherwise stain the surrounding wood ends up on the tape instead of the wood. The result is a clean engraving with no smoke ghosting around the edges.
The technique works on every wood species and is essentially free — a $5 roll of transfer tape masks 200+ engraving projects. Apply the tape with a squeegee or scraper to ensure full surface contact (gaps under the tape allow smoke to seep in). Engrave normally; the slight power loss to burning through the tape is negligible. Peel slowly after the engrave finishes and the wood underneath should be clean. For deep engravings or photo work, masking is the difference between gallery-quality and amateur-quality results.
Plywood Glue and Quality Tiers
Not all plywood works in a laser. Construction-grade plywood from a hardware store often uses formaldehyde-bonded interior layers, which release toxic fumes when cut. Cheap import plywood may use phenolic glues that produce green-tinted burns and uneven engraving. Always specify “laser plywood” or “Baltic birch” — the former is often labeled by craft suppliers (Inventables, Glowforge Proofgrade), the latter is a specific Russian/Finnish manufacturing standard with consistent veneer thickness and tested-safe glue.
The quality tiers: Glowforge Proofgrade ($15–25/sheet, calibrated and certified safe) is the premium option with auto-detected settings and known-good glue. Inventables EasyMaker Wood ($8–12/sheet) and other dedicated laser plywood vendors fill the mid-tier. Genuine Baltic birch from Edensaw, Maker Stock, or similar specialty suppliers ($4–8/sheet) is the value option for users willing to dial in settings manually. Avoid anything labeled “ACX,” “CDX,” or generic construction plywood — the glue chemistry is unpredictable and often hazardous. Our materials hub covers material sourcing across vendors.
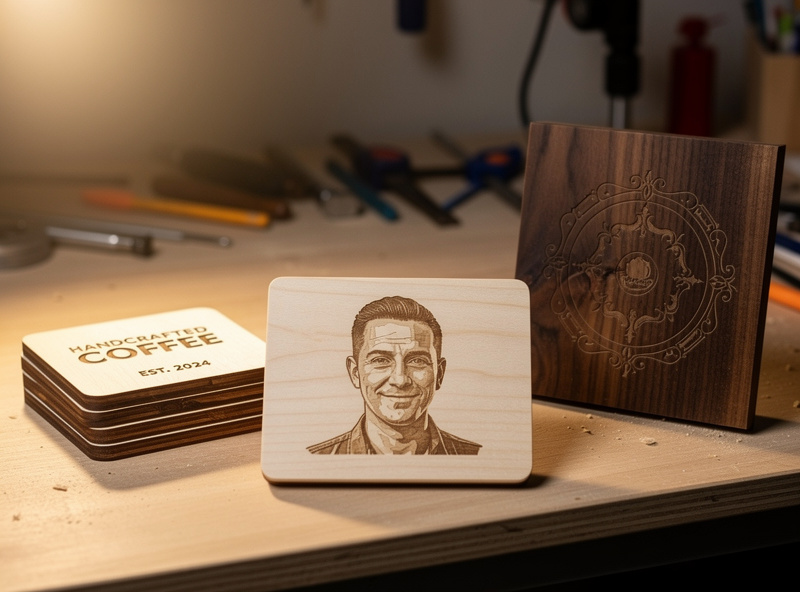
Wood Selection for Photo Engraving
Photo engraving is where wood choice matters most. The dithering algorithms in LightBurn translate grayscale image tones into varying laser power across the engraving — a smooth tonal range requires a wood that burns smoothly across the same range. Basswood is the consistent winner for photo work because its uniform low-tannin grain produces a continuous range from light brown (low power) to dark brown (high power) without grain-pattern interference.
Baltic birch plywood is the second-best for photo work but with one caveat: avoid sheets where the top veneer has visible grain darkening or knots — these darken disproportionately under laser exposure and break the photo’s tonal smoothness. Maple is a tertiary choice with subtle, attractive results but lower contrast than basswood. Walnut and oak should not be used for photo engraving — the grain pattern dominates and breaks the tonal flow. Our photo engraving deep-dive covers the dithering algorithms that work with each wood and the masking that preserves photo-quality results.
Post-Finishing Wood Engravings
A bare wood engraving looks slightly raw in person — the engraved wood absorbs moisture and dust over time, slowly losing contrast. The fix is finishing: a thin coat of wood oil (mineral oil for cutting boards, Danish oil for decorative work) or a clear wood sealer applied after engraving. The oil deepens the contrast between burned and unburned wood and seals the surface against moisture and handling damage. For a full cutting-board build walkthrough covering material choice, power settings, and food-safe finishing, the laser engraving project cutting board guide details every step from design file to finished board.
The application: wait 24–48 hours after engraving for residual moisture in the burned wood to evaporate. Apply oil with a clean cloth in the direction of the grain. Wipe off excess after 5 minutes. The treated wood holds its contrast for years instead of fading within months. For food-contact items (cutting boards, serving boards), use mineral oil or food-safe beeswax — never Danish oil or polyurethane on surfaces that touch food. Our practical laser projects article covers finishing techniques for the project types most users tackle first.
Frequently Asked Questions
What is the best wood for laser engraving?
Basswood for fine detail and photos. Baltic birch plywood for mixed cut and engrave projects. Maple, cherry, and alder for premium decorative work. Avoid pine (resin pockets) and oak (heavy grain) for detail engraving.
Can I use any plywood in a laser cutter?
No. Construction plywood often uses formaldehyde or phenolic glues that release toxic fumes when laser-cut. Use Baltic birch, Glowforge Proofgrade, or Inventables EasyMaker — products specifically tested for laser safety.
Why does my wood engraving have smoke staining around the edges?
Smoke deposition during the engraving. The fix is masking — apply transfer tape over the wood before engraving, run the laser through the tape, then peel afterward. The smoke ends up on the tape instead of the surrounding wood.
Is oak good for laser engraving?
Only for rustic decorative work where heavy grain pattern is desired. Oak’s deep tannin grain interferes with detailed designs and photo engraving. Stick with basswood or Baltic birch for any work that needs fine detail.
What settings should I use for engraving basswood?
30% power and 4500 mm/min on a 20W diode. 20% power and 6000 mm/min on a 60W CO2. Both produce a clean light-brown engraving with high contrast and minimal char.
Can I engrave bamboo with a laser?
Yes, but with caveats. Bamboo has variable density along the grain that produces uneven burns. Each piece needs a power-speed grid test before committing to a final design. Settings are similar to maple at 45% diode or 28% CO2.
How do I prevent yellow burn marks on wood?
Apply transfer tape masking before engraving and use the lowest power setting that produces visible engraving. Yellow marks are typically caused by excessive heat or smoke deposition; both are addressed by masking and tighter power tuning.