Glass Laser Engraving: The Frost Technique That Looks Sandblasted
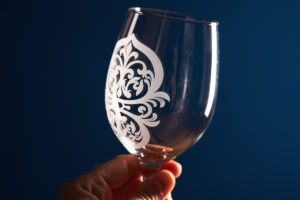
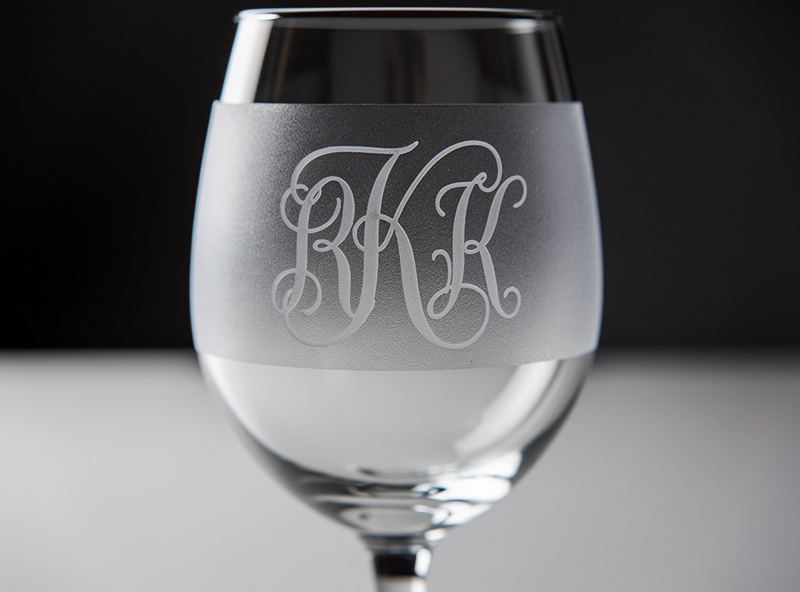
Glass laser engraving produces white frosted designs on clear and tinted glass that look like commercial sandblasting at a fraction of the cost. The trick most beginners miss: glass does not engrave smoothly without help. Bare glass on a CO2 laser produces a chipped, flaky finish that looks rough up close. Apply a thin layer of dish soap or wet newspaper before engraving and the same laser produces a velvet-smooth white frost. After engraving 50+ glass pieces in 2026 across pint glasses, wine glasses, vases, and mirror surfaces, the soap technique consistently produces gallery-quality results.
This article covers glass-specific settings, the wet-newspaper and dish-soap techniques, glass type compatibility, and the rotary setup for cylindrical glassware. It is the glass companion to our laser cutting materials hub.
Why Laser Engraving Glass Produces Frost (Not Cuts)
Glass cannot be cut with consumer lasers. The laser energy creates micro-fractures in the glass surface — the white frost you see is technically thousands of small fractures that scatter light differently than the surrounding clear glass. The technique is fundamentally about controlled surface fracture, not material removal. Push the power higher in an attempt to “engrave deeper” and the result is a chipped, flaky surface that looks worse, not better.
Diode lasers struggle with clear glass because the wavelength passes through transparent material — same problem as clear acrylic. Diodes can frost-engrave colored or tinted glass but not clear. CO2 lasers (10,600 nm) interact with glass directly regardless of color or transparency, which is why CO2 is the practical requirement for glass engraving. Fiber lasers (1064 nm) reflect off glass surfaces without depositing energy and cannot engrave glass at all. Our laser type comparison covers the wavelength interactions.
Glass Engraving Settings
| Glass Type | CO2 60W | CO2 40W | Notes |
|---|---|---|---|
| Clear flat glass (mirror, picture frames) | 40%/2000 mm/min, 0.1 mm interval | 60%/1500 mm/min, 0.1 mm interval | Most common starting point |
| Tumbler/pint glass (clear) | 40%/2000 mm/min, 0.1 mm interval | 60%/1500 mm/min, 0.1 mm interval | Apply soap before engraving |
| Wine/champagne glasses | 35%/2200 mm/min, 0.1 mm interval | 55%/1800 mm/min, 0.1 mm interval | Slightly lower power for thin walls |
| Tinted/colored glass | 45%/1800 mm/min, 0.1 mm interval | 65%/1400 mm/min, 0.1 mm interval | Slightly higher power needed |
| Mirror surface (back-engrave) | 50%/1800 mm/min, 0.1 mm interval | 70%/1500 mm/min, 0.1 mm interval | Engrave the back side, design appears reversed |
For most users, “40% power, 2000 mm/min, 0.1 mm interval” on a 60W CO2 is the universal starting point. If the engraving looks chipped or flaky, drop power 5%. If it looks faint or barely visible, increase 5%. Each glass batch can have slightly different mineral composition affecting the optimal settings. Run a 25 mm test square on each new glass type before committing to a final design.
The Dish Soap Technique
The single biggest visual upgrade for glass laser engraving is applying a thin layer of dish soap to the surface before engraving. Same technique as slate engraving, same reason — the soap absorbs heat evenly across the engraving area, reducing the chip-and-flake variation that produces uneven results on bare glass. The soap also keeps small glass particles attached during the laser pass, producing a smooth velvet finish instead of a rough fractured one.
The application: squeeze a few drops of standard dish soap (Dawn, Palmolive) onto the glass surface and spread thin with a paper towel until the entire engraving area is lightly coated. Do not over-apply — heavy soap layers absorb too much energy. The right amount is barely visible after spreading. Engrave normally; the soap evaporates during the laser pass. After engraving, rinse the glass under cool water to remove residual soap and glass particles, then air-dry. The result is a clean, smooth white frost that looks like commercial sandblasting.
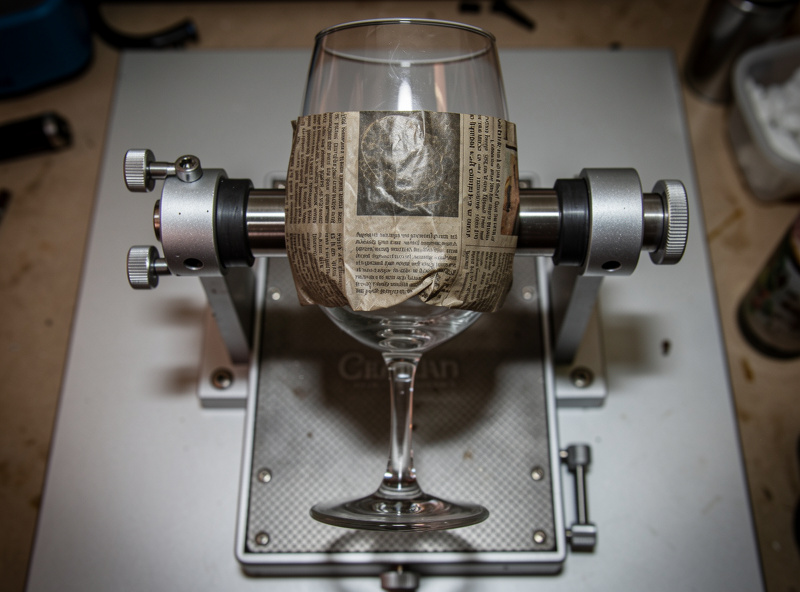
The Wet Newspaper Method (Better for Cylindrical Glass)
For cylindrical glassware (wine glasses, pint glasses, vases), wet newspaper is the alternative to dish soap. Cut a piece of newspaper to cover the engraving area, dampen it with a spray bottle until it is uniformly wet but not dripping, and press it onto the glass surface. The wet paper conforms to the curve and provides the same heat-distribution benefit as soap.
The advantage of wet newspaper over soap on cylindrical glass: the paper stays in place during rotary engraving, while soap can drift down the side of a tumbler under gravity during long engravings. The newspaper also provides slightly more even heat distribution than soap on highly curved surfaces. After engraving, remove the newspaper, rinse the glass, and the engraving has the same velvet-smooth finish as soap-treated flat glass. The technique adds 30 seconds per piece to the workflow but consistently produces commercial-quality results on tumblers, wine glasses, and vases.
Rotary Setup for Glassware
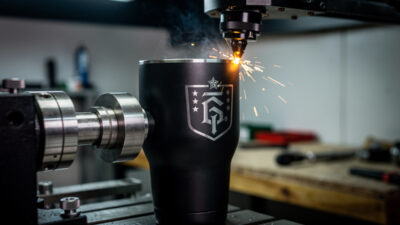
Wine glasses, pint glasses, and tumblers need a rotary attachment to engrave the curved surface. The xTool RA2 Pro, OMTech rotary chuck, and Atomstack R3 Pro all support standard glassware up to 110 mm diameter. The setup is similar to stainless tumbler engraving but with one important difference: glass is more fragile and the chuck must hold it firmly without crushing. Use the rubber-padded chuck mode (most rotary attachments have this option) instead of metal-clamping mode.
Wine glass setup is the trickiest because the stem and base prevent flat clamping in standard chucks. Use a “roller-style” rotary attachment for wine glasses — the glass rests on two parallel rollers that rotate to spin the bowl under the laser. The xTool RA2 Pro and Atomstack R3 Pro both have roller modes for stemmed glassware. The bowl must be level (horizontal) during rotation; tilt-checking with a small spirit level is the standard verification step. Our LightBurn rotary tutorial covers chuck vs roller setup.
Mirrors and Glass Tile
Mirrors engrave from the back side, not the front. The back of a mirror has a thin reflective coating (silver or aluminum) on top of the clear glass. Engrave through the back, the laser ablates the reflective coating in a controlled pattern, and the engraving appears as a clear-or-frosted area visible from the front when illuminated. Set design files horizontally mirrored before engraving (since you are working from the back side); most slicers have a mirror checkbox for this purpose.
Glass tile (subway tile, bathroom tile) engraves like flat glass but with the additional consideration of glaze. Glazed tile engraves more cleanly than unglazed tile because the glaze provides a uniform heat-distribution layer, similar to dish soap. Settings for glazed tile mirror flat glass settings; unglazed tile needs the soap or wet-paper technique. For decorative tile work (custom kitchen backsplashes, personalized bathroom tile), engrave on plain colored glazed tile and the engraving appears as crisp white-on-color designs.
Post-Finishing Glass Engravings
Engraved glass looks slightly rough immediately after engraving — fine glass particles cling to the engraved area. Rinse under cool running water, gently scrub with a soft toothbrush if needed, and air-dry. For permanent display use, no further finishing is required — glass is naturally non-porous and the engraving holds its appearance indefinitely.
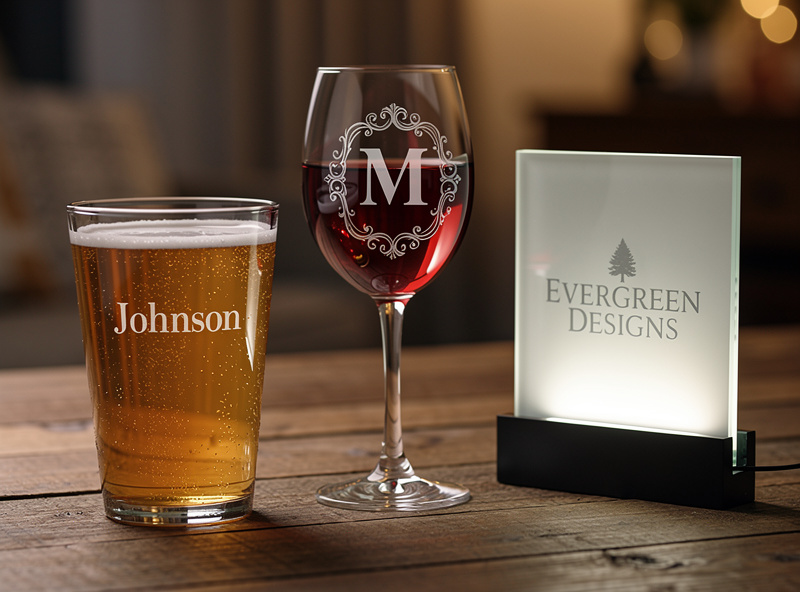
For colored or backlit glass projects, optionally fill the engraved area with paint, glitter, or epoxy to create a contrasting fill. Apply paint with a fine brush, wipe excess off the surrounding glass with a damp cloth, and the engraved area retains the fill while the surrounding glass stays clean. The paint-fill technique works particularly well on wine glasses and decorative pint glasses where a colored fill emphasizes the engraved design. For backlit signs (popular for restaurant/bar logo work), engrave on flat glass and place an LED strip behind — the engraving glows brightly while the surrounding glass remains dark.
Frequently Asked Questions
What laser settings for engraving glass?
40% power and 2000 mm/min on a 60W CO2 with 0.1 mm line interval. The result is a white frosted engraving on clear glass. Apply dish soap or wet newspaper before engraving for smoother results. Diode lasers cannot engrave clear glass.
Why does my glass engraving look chipped or flaky?
Either the laser power is too high or you skipped the dish soap technique. Drop power 5–10% and apply a thin layer of dish soap to the glass before engraving. The soap absorbs heat evenly and produces a smooth velvet finish.
Can a diode laser engrave glass?
Only colored or tinted glass. Clear glass is transparent to diode wavelengths and produces no engraving. CO2 is the practical requirement for clear glass engraving. Fiber lasers reflect off glass and cannot engrave it at all.
How do I engrave a wine glass with a laser?
Use a roller-style rotary attachment that supports the stem and bowl. Apply wet newspaper to the engraving area for smooth frost. Set CO2 to 35% power and 2200 mm/min for thin glass walls. Run from the bowl while the stem rotates above the rollers.
Can I cut glass with a laser?
No. Consumer lasers cannot cut glass. The laser produces surface fractures that appear as frosted engravings. For cut glass shapes, use traditional glass-cutting tools or specialty water-jet cutting services.
How do I engrave a mirror?
Engrave from the back side where the reflective coating sits on top of the clear glass. The laser ablates the reflective coating in a controlled pattern. Mirror the design horizontally before engraving since you are working from the back.
Does dish soap really improve glass engraving?
Yes, dramatically. The soap absorbs heat evenly across the engraving area, reducing the chip-and-flake variation that produces uneven results on bare glass. Apply a thin even layer with a paper towel before engraving and rinse afterward.