Laser-Engraved Plant Tags: A Weekend Project for Gardeners
A weekend laser-engraving project produces 30-50 weatherproof cedar plant tags for under $8 in materials, lasts 4-6 outdoor seasons, and replaces the $1.50-each commercial tags that fade and split within a year. The total active build time is 90 minutes plus engraving — roughly 12 minutes per tag on a 5W diode laser at recommended settings. This guide walks through the wood and software choices, the LightBurn settings that actually engrave deep enough to survive weather, and the finishing step most gardeners skip that doubles tag lifespan.
Plant tags are the perfect first or second project for a new laser owner. The geometry is simple, the failure modes are forgiving, and the result is something you actually use every week. The catch is that “laser engraved” alone does not equal “weatherproof” — depth, wood choice, finish, and whether the tag spends its life in soil versus in a planter all change which approach succeeds. Get those four right and the tags outlast everything else in the garden.
Why Engrave Plant Tags Instead of Buying Them
Three failure modes drive most gardeners away from store-bought tags. Plastic tags fade in UV in 6-9 months and the sharpie writing washes off in the first heavy rain. Painted-pencil aluminum tags last longer but cost $1.50-$3 each and never look right. Pre-printed cedar tags from gardening retailers are $4-$6 each and rarely cover the herbs, varietals, or microgreens you actually grow. A laser-engraved tag stack solves all three at $0.20-$0.30 per tag in materials.
The weekend payoff is also non-trivial. 50 tags engraved in advance means you label every transplant, every direct-sow row, and every starter pot in the cold frame without rationing tags or relying on memory. Garden organization improves; so does the ability to keep variety records year over year — the part of seed-saving and crop rotation that most gardeners abandon because the labelling is too painful.
Wood Choice: The Three That Actually Work
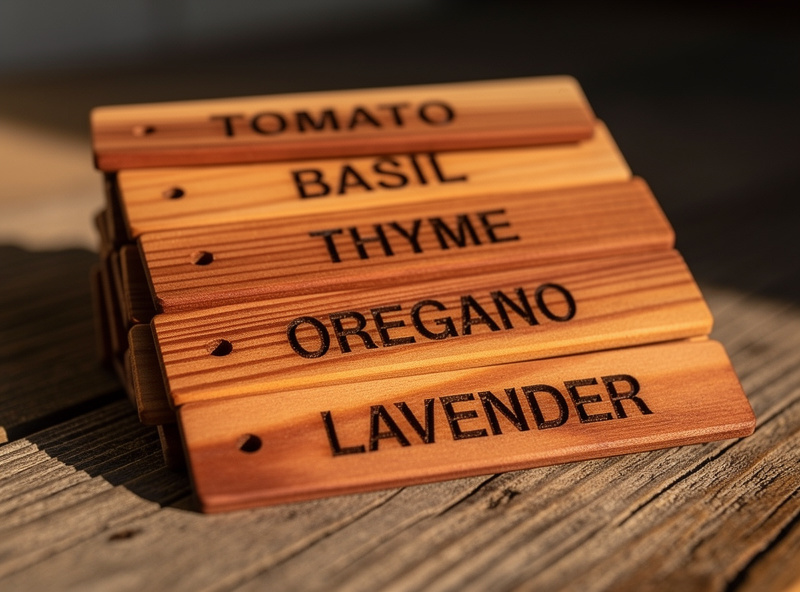
Cedar is the default and the right answer 80% of the time. The natural oils make it weather-resistant, it engraves at a deep contrast on diode lasers, and a 4 ft x 6 inch x 1/8 inch cedar plank from a hardware store yields 60-80 tag blanks for $6-$10. Western red cedar engraves cleaner than eastern red cedar; either works.
The two alternatives are pine and bamboo. Pine is half the cost of cedar but rots in 1-2 outdoor seasons unless sealed. Bamboo plywood (1/8 inch) engraves at higher contrast than cedar but warps slightly in wet soil — better for hanging tags on plants in pots than for tags driven into a raised bed. Avoid plywood with any visible glue lines (the glue burns at different settings and produces uneven dark smudges) and absolutely avoid pressure-treated lumber, which off-gases toxic compounds when laser-cut.
For deeper coverage of which woods engrave best at what laser power, our best wood for laser engraving guide tests 14 woods at 5W and 10W diode and 40W CO2 settings.
Tag Sizes and Templates
Three tag sizes cover almost every garden need:
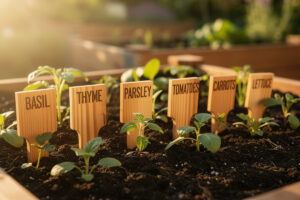
- Stake tags (4 in x 1 in x 1/8 in): The default for direct-sow rows and transplants. Pointed bottom slides into soft soil easily.
- Hanging tags (2.5 in x 1 in with a 5 mm hole): For potted herbs, hanging baskets, and containers. Twine through the hole.
- Bed-marker plaques (6 in x 3 in with two corner holes): Larger labels for raised beds, marking the whole crop section rather than individual plants.
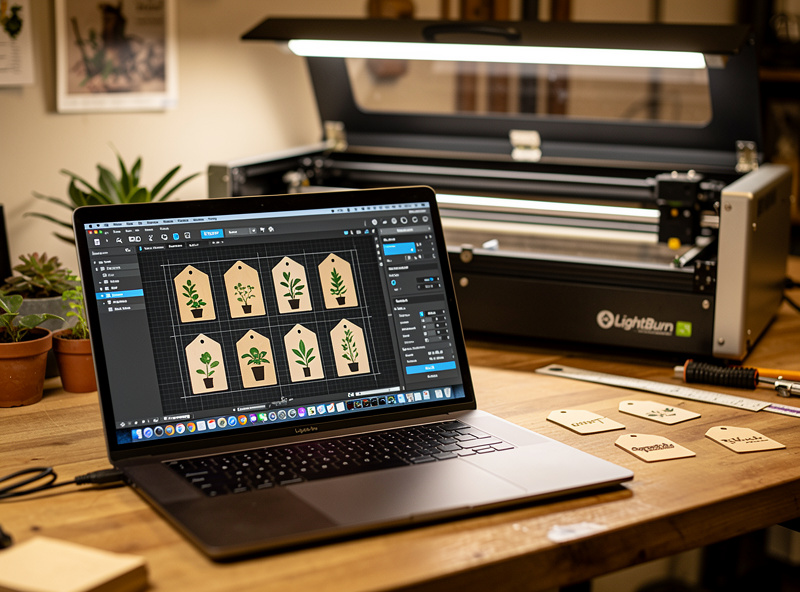
Free templates for each size are available on Printables (search “laser engrave plant tag”) and in the LightBurn library. Drawing your own takes 5 minutes — a rectangle, a pointed end (for stake tags), and a text frame is the entire CAD requirement. SVG templates also exist in the GitHub gardening-tools community repos.
LightBurn Settings That Actually Hold Up Outdoors
The single biggest mistake new laser owners make on plant tags is engraving too shallow. A surface-only burn fades within one season; a tag engraved at 0.3-0.5 mm depth lasts 4-6 years. The depth comes from one or two factors depending on laser type.
Diode laser (5W to 20W): Use Fill mode at 100% power, 1500-2500 mm/min, 0.10 mm line interval. Run two passes for visible depth on cedar. A 5W diode at 1500 mm/min hits 0.3 mm depth on cedar; a 10W at 2500 mm/min hits 0.4 mm at higher quality.
CO2 laser (40W to 80W): Use Fill mode at 30% power, 350 mm/sec, 0.10 mm line interval. Single pass is sufficient. Avoid running CO2 at higher than 40% on 1/8 inch cedar — the tags burn through the back face.
For full LightBurn fundamentals, our LightBurn tutorial for beginners walks through every setting in this profile from install. Photo engraving (e.g., a small icon next to the herb name) requires a different dithering approach — see our photo engraving in LightBurn guide.
Finishing: The Step Most Gardeners Skip
An unfinished cedar tag will last 18-24 months in soil before the engraving fades from weathering. A finished tag lasts 4-6 years. The finishing step is also the easiest one to skip because the tag looks “done” when it comes off the laser.
Three finish options work. Boiled linseed oil (BLO) is the cheapest — wipe a thin coat onto the engraved face, let it dry 24 hours, repeat once. The oil darkens the engraving slightly and seals the wood against moisture. Tung oil (raw or pure) is a slight upgrade with better water resistance. Spar urethane (matte finish) is overkill for stake tags but the right choice for bed-marker plaques that face direct sun all season.
For tags going into vegetable garden soil specifically, the BLO finish is the safest food-adjacent option. Avoid varnishes containing zinc or other heavy metals if any tag will be in direct soil contact long-term.
The Garden Use Case: Why This Project Pays Off Year After Year
Made well, laser-engraved tags become a permanent garden tool, not a seasonal expense. We re-use the same 50 tags across 4-6 seasons — pull them at end of season, brush off the soil, store in a dry box, deploy in spring. The cost of the project amortizes to under $1 per growing season.
Pair the tags with a small notebook listing varieties planted, sow date, and germination notes. The combination of permanent labels and a notebook is the foundation of the kind of variety records that turn a garden from “what did I plant last year?” into a year-over-year improvement project. CityRooted’s raised beds and planters guide covers the bed layouts these tags integrate into; the herb garden guide is the natural pairing for herb-tag-heavy projects.
Time and Cost Breakdown
| Phase | Time | Cost |
|---|---|---|
| Materials sourcing (cedar plank, BLO) | 30 min | $8-$12 |
| Cutting blanks (table saw or laser cut) | 30 min | $0 (own equipment) |
| LightBurn template prep | 15 min | $0 |
| Engraving 30 tags | 6 hours laser, 5 min hands-on | $0 |
| Sanding and finishing | 45 min | $0 (BLO bottle reuses) |
| Drying time (overnight) | 0 active | $0 |
| Total | ~2 hours active | $8-$12 |
Scaling Up: From 30 Tags to 500
If you grow for a community garden, a CSA, or a local seed-library, the same workflow scales to hundreds of tags with one process change: switch from individual file engraving to nested batches. LightBurn’s array tool replicates a single tag design in a 6 by 10 grid, engraves all 60 in one pass, and cuts your hands-on time by 80%. For 500-tag scales, also consider switching to bamboo plywood for cleaner contrast at higher engrave speeds.
For broader laser project ideas (signs, jigs, custom hardware), our 12 practical laser projects hub covers what to build after you have the plant tags down.
Frequently Asked Questions
What is the best wood for laser engraving plant tags?
Western red cedar is the default and the right choice 80 percent of the time. Natural oils make it weather-resistant, it engraves with deep contrast on diode lasers, and a single 4 foot plank yields 60 to 80 tags for under 10 dollars. Bamboo plywood is a high-contrast alternative for hanging tags in pots.
How long do laser-engraved cedar plant tags last outdoors?
With a boiled linseed oil or tung oil finish, 4 to 6 outdoor seasons. Without finish, 18 to 24 months before engraving contrast fades enough to be hard to read. The finishing step doubles to triples lifespan and takes 5 minutes per tag plus overnight drying.
What laser power do I need to engrave plant tags?
5W diode is enough for cedar, with 2 passes at 1500 mm per minute and 100 percent power. 10W diode is faster (single pass at 2500 mm per minute). 40W CO2 is overkill but works at 30 percent power and 350 mm per second. Anything above 5W diode is sufficient.
How deep should I engrave for outdoor durability?
0.3 to 0.5 mm minimum. Surface-only burns fade within one season; 0.3 mm engravings hold contrast through 4 to 6 seasons. Use Fill mode in LightBurn rather than Line mode for any tag that will spend time in direct sun or rain.
Can I use pressure-treated wood for plant tags?
No. Pressure-treated lumber off-gases toxic compounds when laser-cut, contaminating the workshop air and potentially the soil where the tag is buried. Use untreated cedar, untreated pine, or natural bamboo plywood only.
What finish is safe for tags in vegetable garden soil?
Boiled linseed oil is the safest food-adjacent finish for tags going into vegetable beds. Tung oil is a slight upgrade with better water resistance. Avoid varnishes containing zinc or other heavy metals if any tag will be in direct long-term soil contact.