Laser-Engraved Smart-Home Panels: Custom Light Switch Plates
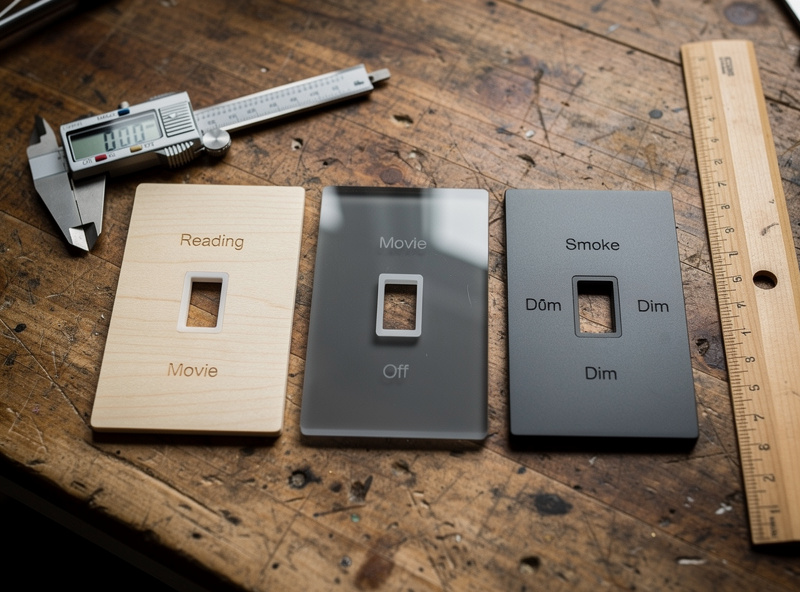
A laser-engraved switch plate replaces the generic plastic cover that ships with every smart light switch with a 3mm wood, acrylic, or anodized-aluminum panel that names the room, the scene, or the schedule it controls. Five minutes on a 5W diode laser produces the engraving; total cost runs 1-3 USD per plate in material. The plates fit any standard Decora-style smart switch (Lutron Caseta, Leviton, Inovelli, Kasa) with the original screws.
This guide covers material picks, engraving settings, design templates, and the few traps that ruin a plate (warped wood, melted acrylic, illegible fonts at small sizes). The setup target is a hobby-grade diode laser like a xTool D1 Pro or Atomstack X20 — anything 5W or higher cuts through 3mm basswood and engraves anodized aluminum cleanly.
Why Engraved Plates Beat the Plastic OEM Cover
Smart switches solve technical problems but introduce a usability problem: nobody remembers what each scene button does. The OEM plate is white plastic with no labeling, so the four-button “Lights” rocker becomes a guessing game between dimmer, scene 1, scene 2, and motion-sensor toggle. An engraved plate names each function in the same place every time, which removes the friction that kills smart-home adoption inside families.
The aesthetic upgrade matters too. White plastic next to a stained-walnut accent wall looks rented; a walnut-veneer engraved plate looks built. The cost difference between OEM and laser-engraved is under 4 USD per plate, and homeowners notice the upgrade immediately. For broader smart-light room planning, the best smart lights buyer guide on Home Auto Central covers which brands have removable plates that accept third-party covers without warranty issues.
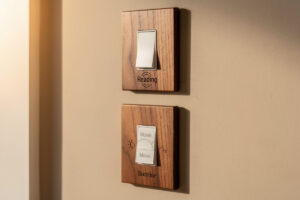
The third reason is the documentation effect. When you label scene buttons “Movie,” “Reading,” and “Sunrise,” the smart home stops being a tech project and becomes a household appliance. Family members use scenes they remember; partners stop reverting to the wall toggle they cannot find. The labels become the user manual.
Material Choice: Wood, Acrylic, or Anodized Aluminum
Three materials cover 95% of switch-plate use cases. Basswood and birch plywood are the wood defaults for warm interiors. Cast acrylic in white or smoke gives a cleaner modern look and engraves with high contrast. Anodized aluminum is the premium pick for kitchens and bathrooms where humidity and grease destroy wood. Each material has a separate set of laser settings — never mix them up.
| Material | Thickness | Laser Power | Engrave Speed | Notes |
|---|---|---|---|---|
| Basswood | 3mm | 15-20% | 3000mm/min | Cleanest engrave, soft burn lines |
| Birch plywood | 3mm | 20-25% | 2500mm/min | Watch for glue layers |
| Cast acrylic | 3mm | 40-60% | 800mm/min | White acrylic engraves clean |
| Walnut veneer MDF | 3mm | 30% | 2000mm/min | Richer color, hides MDF core |
| Anodized aluminum | 1-2mm | 80-100% | 1500mm/min | Diode lasers only, no fiber needed |
Avoid extruded acrylic — it turns gummy under a diode laser and leaves a sticky residue that dulls the bit. Cast acrylic is what you want; the manufacturer label usually says “cast” explicitly. The detailed settings rundown for every common laser material lives on the laser cutting materials guide, which breaks down power, speed, and air-assist by material.
For wood specifically, lighter species engrave cleaner than dark species. Basswood and maple show high contrast; walnut and cherry already have natural color variation that competes with the engraving. The hierarchy ranking by engrave clarity is on the best wood for laser engraving guide, which tested 12 species side by side.
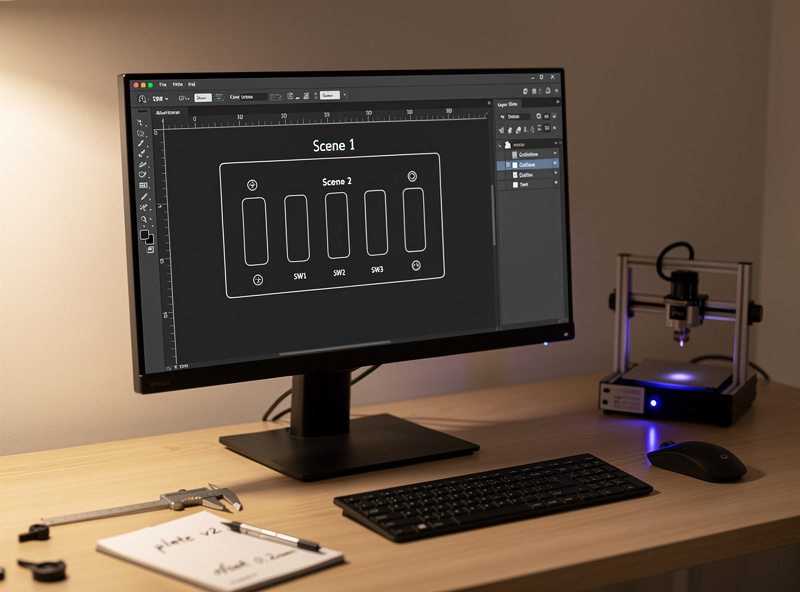
Designing the Plate (Inkscape, LightBurn, or Affinity)
Most plates take 10 minutes to design. Start with the manufacturer’s switch dimensions — Decora-style is roughly 70mm wide by 114mm tall with two screw holes 84mm apart vertically. The button cutout for a single-paddle Decora is 38mm x 70mm centered. Add labels for each button or scene with at least 12-point sans-serif text; 14-point is more legible from across a room.
Stick to two fonts maximum on a single plate. A simple sans-serif (Inter, Helvetica, Roboto) for labels plus an optional small serif (Garamond, Playfair) for accent text covers most aesthetics. Avoid script fonts — they are illegible at switch-plate scale and look amateurish when they fail. Test a sample plate from across the room before cutting six for the whole house.
For homes with multiple plates, build a parametric template once and swap labels per location. Inkscape with a plate template SVG plus an Inkscape Python plugin generates 10-12 plates from a single labels CSV in a few minutes. LightBurn’s variable-text feature does the same job inside the slicer/laser controller workflow.
Cutting and Engraving the Plate
The plate has two laser passes: an engrave for the labels and a cut for the outline plus button cutouts. Run the engrave first, then cut. Reverse order leaves charred edges from the cut interfering with the engrave area, and cleanup is harder. Air assist is mandatory on wood and acrylic — without it, smoke deposits on the engrave and dulls the contrast.
Acrylic flame-polishes after cutting if you run the diode laser at low speed (200mm/min) along the cut edge once, with the air assist off. The slight melt rounds and clarifies the edge — the difference between a plate that looks DIY and one that looks store-bought. Wood does not flame-polish; sand the cut edge with 400-grit sandpaper and finish with a beeswax-mineral oil blend instead.
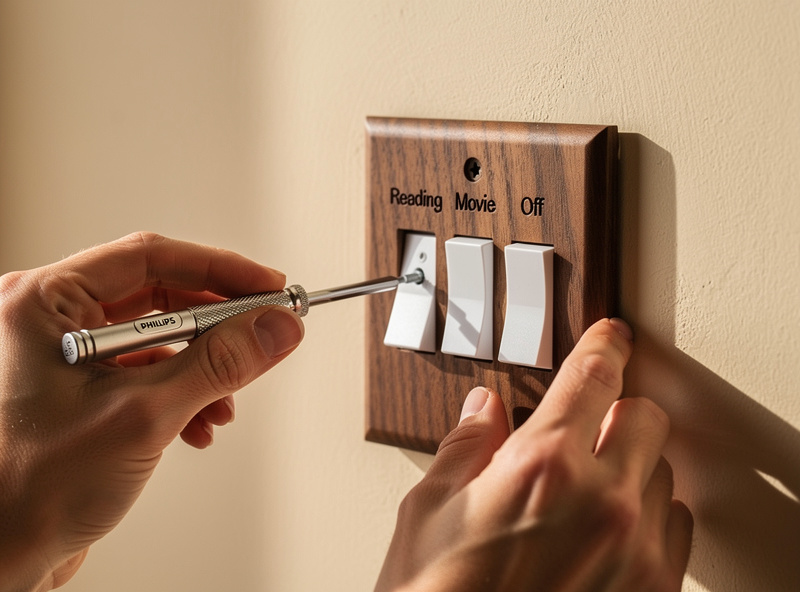
Mounting Without Damaging the Switch
Use the original switch screws. Most engraved plates print with the standard Decora 84mm screw spacing, and the OEM screws threaded into the plastic switch body work cleanly through 3mm wood or acrylic. Do not over-torque — wood plates crack at the screw hole if you tighten past finger-tight plus a quarter turn. Acrylic plates crack the moment you over-tighten.
Pre-drill the screw holes. A 3mm wood plate needs a 3.5mm pilot hole at the screw locations to prevent splitting. Acrylic plates pre-drill at the cut depth using a 3mm bit at slow RPM — fast RPM melts acrylic and binds the bit. Anodized aluminum needs a step drill to clean the screw holes after the laser cut, since the laser leaves a slight burr that resists the screw threads.
For finished look, add small foam dots (silicone bumpers) at the four corners on the back of the plate. The bumpers absorb wall texture variation and prevent rattling when family members slap the switch. Three-dollar pack of dots gives you 100 plates worth of bumpers. The full plate-mounting workflow ports cleanly to the related laser-engraved plant tags weekend project, which uses the same engrave-then-cut sequence.
Frequently Asked Questions
What material is best for laser-engraved switch plates?
Basswood and birch plywood are the wood defaults for warm interiors. Cast acrylic in white or smoke works for modern looks. Anodized aluminum is the premium pick for kitchens and bathrooms where humidity destroys wood. Avoid extruded acrylic, which turns gummy under a diode laser.
Will a laser-engraved plate fit my smart switch?
Most plates fit any standard Decora-style smart switch (Lutron Caseta, Leviton, Inovelli, Kasa) using the original screws. Decora dimensions are 70mm wide by 114mm tall with screw holes 84mm apart. Plates do not fit older toggle-style switches without modification.
Can a 5W diode laser engrave aluminum?
A 5W diode laser engraves anodized aluminum cleanly because the engrave removes the dyed anodized layer rather than the aluminum itself. Bare aluminum requires a fiber laser. Anodized 1-2mm aluminum at 80-100 percent power, 1500mm per minute speed gives high-contrast labels.
How long does it take to engrave a switch plate?
A standard four-label switch plate takes 4-6 minutes total: 2-3 minutes for the engrave, 2-3 minutes for the cut. Larger custom plates with detailed scene icons run 8-12 minutes. The bottleneck is engrave detail, not cut perimeter.
What font size works for switch plate labels?
12-point sans-serif is the minimum for legibility from across a room; 14-point is more comfortable. Stick to two fonts maximum per plate. Avoid script fonts because they are illegible at switch-plate scale and look amateurish when they fail.
Will an engraved plate void the smart switch warranty?
Most smart-switch warranties cover the switch electronics, not the included plate. Replacing the OEM plastic plate with a custom one usually does not void the warranty as long as you use the original mounting screws and do not modify the switch body itself.
Related Articles
- Laser Engraving Project Ideas: Builds by Material and Skill
- Best Wood for Laser Engraving: Hardwoods and Plywoods Tested
- Laser Cutting Materials Guide: Settings, Power, and Speed by Material
- Laser-Engraved Plant Tags: A Weekend Project for Gardeners
- Best Smart Lights 2026: Complete Buyer Guide
- Smart Bulb vs Smart Switch: Complete Comparison Guide