Laser Maintenance Guide: Keep Your Cutter Aligned and Cutting
A laser cutter stays sharp because someone maintains it, not because it left the factory good. On my bench, the machines I run get optics checked weekly and a full alignment pass monthly, and the single most common cause of a “broken” laser I diagnose for readers is a dirty lens or a mirror that drifted 2–3 mm out of true — not a dead tube.
Maintenance on a laser is not a chore you bolt on at the end. It is the thing that decides whether your machine cuts 8 mm plywood in one pass a year from now or struggles through 3 mm with three passes and a scorched edge. This guide is the master map for keeping a diode, CO2, or fiber machine aligned, calibrated, clean, and — because lasers genuinely start fires — safe. Every section here links out to a detailed walkthrough of that specific job, so treat this page as the index and the deep guides as the workshop manual.
Why maintenance is the difference between a sharp machine and a smoldering one
Most “my laser got weak” emails trace back to power that never left the tube — it got absorbed, scattered, or misaimed by dirty or misaligned optics before it reached the work. A CO2 beam loses real wattage at every fouled mirror surface, and a lens with a film of resin haze on it both robs power and heats up until it cracks. The fix is rarely a new part. It is a cleaning rag, a focus check, and an alignment pass.
The safety stakes raise the floor under all of this. A laser concentrates enough energy to ignite wood instantly, and the materials we cut outgas everything from acrylic vapor to wood smoke. A neglected machine — clogged air assist, fouled exhaust, a lens running hot — is not just a weak machine, it is a fire risk. Across the machines I run, air assist runs on every cut and the exhaust ducts outside, never recirculated. Maintenance and safety are the same discipline. If you are new to that side, start with my laser safety essentials and workshop ventilation and exhaust guides before you push a machine hard.
The maintenance schedule I run on every machine
I keep maintenance on a cadence, not a crisis. The rhythm below is what keeps the machines I run consistent enough that a materials test card I cut in January still matches the same lot in June. Daily tasks take two minutes; the monthly pass takes an hour. Skipping the small stuff is what turns the monthly pass into a repair.
| Interval | Task | Why it matters |
|---|---|---|
| Every job | Air assist on, exhaust running, bed clear of offcuts | Scrap under the beam reflects and reignites; no air assist means scorch and lens fouling |
| Daily / per session | Wipe the lens and the lowest mirror, empty the slag tray | Resin haze builds fastest on the surface closest to the work |
| Weekly | Inspect all mirrors and lens, check belt tension by feel, clean rails | Catches drift and grit before it scores a rail or skews an engrave |
| Monthly | Full mirror alignment pass, deep-clean optics, lubricate linear rails, re-square the frame | Restores full power delivery and dimensional accuracy |
| Quarterly / as needed | Check coolant (CO2), replace air-assist filter, inspect tube mounts and wiring | Coolant fouling and loose mounts shorten tube life |
| By symptom | Re-focus, re-align, replace tube or diode module | Weak cuts, ghosting, or uneven engraving each point to a specific subsystem |
One note on the by-symptom row: uneven engraving — one side of a panel darker than the other, or a fill that fades across the bed — is almost always mechanical, not optical. It is belt tension, a frame that is out of square, or focus that is not consistent across the work area. I cover the full diagnostic tree in my troubleshooting guide for burns and incomplete cuts; the maintenance fixes for it live in the calibration spokes below.
Optics: cleaning mirrors and lenses
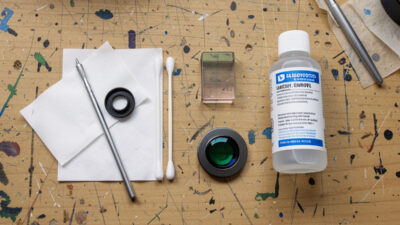
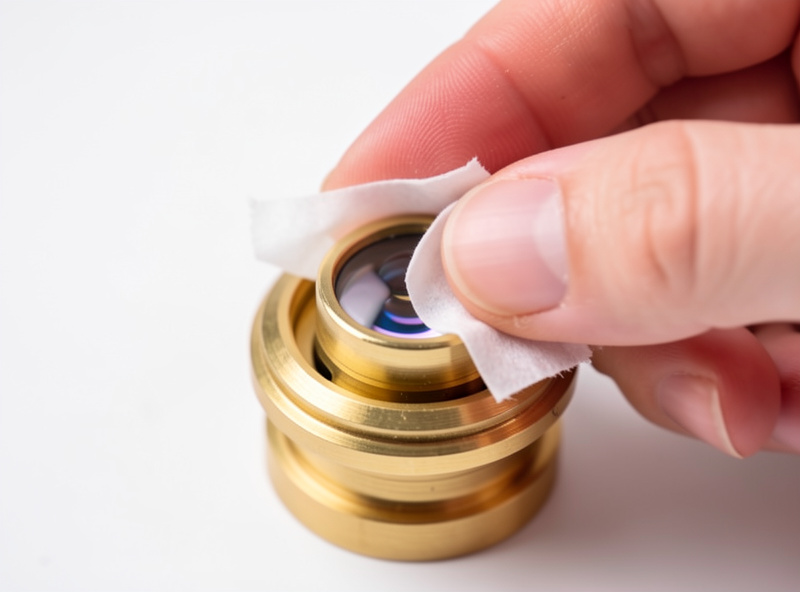
Optics are where lost power hides. On a CO2 machine the beam bounces off two or three mirrors before the focusing lens, and every one of those surfaces is a place for smoke residue to settle. A single fingerprint or a film of resin haze can drop usable power by a noticeable margin and, worse, create a hot spot that cracks the lens mid-job. I clean the lens and the lowest mirror after almost every session, because they sit closest to the smoke plume.
The method matters as much as the frequency. Lens tissue or a cotton swab, a proper optical cleaner or high-purity isopropyl, and a feather-light touch — you are lifting residue, not scrubbing a pan. Coated CO2 optics scratch easily, and a scratch scatters the beam permanently. The full step-by-step, including how to handle a ZnSe lens and which solvent to use, is in my guide to cleaning laser lenses and mirrors. Diode owners clean a different part entirely — see the diode section below.
Mirror alignment on a CO2 machine
Alignment is the CO2 ritual a diode owner never touches. The beam has to hit dead-center through every mirror and down the lens at every position on the bed — near corner, far corner, and everywhere between. When a mirror drifts, you lose power, your kerf widens, and cuts that worked last month suddenly need a second pass. The classic tell is a cut that is clean at the front-left of the bed and weak at the back-right.
I align with masking tape pulse tests, walking the beam corner to corner and adjusting each mirror’s set screws until the burn marks land in the same spot everywhere. It is fiddly the first time and ten minutes once you have done it. The complete corner-to-corner procedure, with how to read the pulse marks and which screw moves the dot which way, is in my CO2 laser mirror alignment guide. Do this before you blame the tube for weak cuts — nine times out of ten the tube is fine.
Focus calibration: the height that makes or breaks every cut
Focus is the highest-leverage setting on the whole machine. The lens concentrates the beam to its smallest, hottest point at one specific distance, and a few tenths of a millimeter off that point can be the difference between a clean cut and a charred non-cut. I never eyeball focus. I set it with the focus tool or a ramp test, and I re-check it any time I change material thickness or swap a lens.
A ramp test — engraving a line down an angled board to find where the beam is thinnest — tells you the exact focal distance for your lens, and a materials test card locks in the power and speed once focus is right. Get focus wrong and no amount of power compensates; you just burn a wider, uglier line. The full method, including how to build a ramp jig and read it, is in my laser focus calibration guide. If you want a hands-off fix, an autofocus upgrade automates this, but you still need to know the manual method to verify it.
The motion system: belts and rails
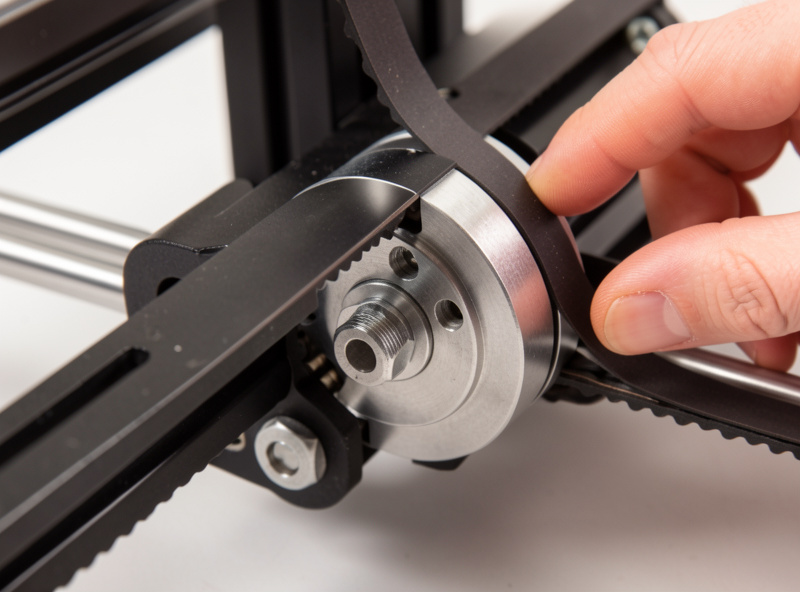
Everything optical can be perfect and your engraves still come out wrong if the gantry does not move accurately. Belts stretch with use, and a loose belt shows up as ghosting on text, rounded corners that should be sharp, or an engrave that is dimensionally off in one axis. The fix is tension — not too tight, not too loose, and equal on both sides of a dual-belt gantry.
I check belt tension weekly by feel and adjust it the moment text starts to ghost. A belt should feel like a firmly plucked guitar string, not a slack rubber band and not a piano wire. Over-tightening wears bearings and motors as surely as a slack belt smears your work. The exact tensioning procedure for the common gantry styles is in my belt tension adjustment guide. Clean and lightly lubricate the linear rails on the same schedule — grit on a rail scores it and adds drag the motor has to fight.
Squaring the frame
If your rectangles come out as parallelograms or a cut square measures different diagonals, the frame is out of square. It happens after a machine ships, after a hard crash, or just from being moved around a workshop. A laser that is not square will never engrave a true grid no matter how perfect the optics and belts are, because the X and Y axes are not meeting at a right angle.
Squaring is a measure-and-adjust job: cut a test square, measure both diagonals, and adjust the frame or belt seating until the diagonals match. It is the foundation everything else sits on, which is why I re-check it monthly and always after moving a machine. The full procedure — including the diagonal-measurement trick that catches errors a tape measure on the sides misses — is in my frame squaring guide.
The CO2 tube: lifespan and replacement
A CO2 glass tube is a consumable. It does not last forever, and its output fades gradually as the gas mix degrades, so a tube that cut 8 mm plywood in one pass when new may need two passes after a couple of thousand hours. Desktop CO2 glass tubes are commonly rated in the 1,500–10,000 hour range depending on quality and how hard they are run, and a tube run hot with poor coolant fails far sooner than one kept cool and within its duty cycle.
The skill is knowing when fade is the tube versus dirty optics or misalignment — because a fouled mirror mimics a dying tube exactly. I rule out optics and alignment first, every time, before I spend money on glass. When the tube genuinely is done, replacement is a careful job involving coolant, mounts, and high voltage. The full diagnosis-and-replacement walkthrough is in my CO2 tube lifespan and replacement guide. Diode modules degrade too, just differently — see below.
Diode optics are a different animal
Diode machines have no mirrors and no glass tube to align or replace. Their maintenance centers on the laser module itself: the small protective lens or window on the front of the diode head, which fouls with smoke and resin just like a CO2 lens but is far more exposed. A hazed diode lens is the number-one cause of a diode that “lost power,” and the fix is a careful clean, not a new module.
The catch is that diode lenses are tiny, fixed, and easy to damage, so the cleaning method is specific. The cooling fan and the module’s airflow also need to stay clear, because a diode that overheats throttles its own output to protect itself. The full method — how to clean the lens without scratching the coating and how to keep the module cool — is in my diode laser module cleaning guide. If you are weighing diode against CO2 in the first place, my diode vs CO2 vs fiber comparison lays out the tradeoffs.
Air assist and fume extraction upkeep
Air assist and exhaust are maintenance items, not set-and-forget hardware. A clogged air-assist nozzle stops blowing debris out of the kerf, which means more scorch, more flare-ups, and a lens that fouls in a fraction of the time. I check airflow at the nozzle weekly and clear it whenever cuts start charring at the edges. A dedicated air-assist pump runs on every machine I own, on every cut — it does more for cut quality than raw wattage does.
Exhaust needs the same attention. An inline blower loses pull as the ducting and any filter stage load up with sticky engraving residue, and weak extraction means fumes hang in the room instead of leaving it. If you run a charcoal stage for fume polish, that media is a consumable too. The hardware side of both is in my air assist setup guide and my ventilation and exhaust build. And the hard line never moves: never PVC, never vinyl, never unknown coated stock — that is chlorine gas, and it corrodes the machine and harms your lungs no matter how good your exhaust is, as I cover in why you never laser PVC.
Maintenance burden by machine class
One reason I run diode, CO2, and fiber side by side is that their maintenance loads are genuinely different, and that should factor into what you buy. A diode is the lowest-upkeep machine on the bench; a CO2 rewards a disciplined optics-and-coolant routine with clean cuts a diode cannot match on acrylic; fiber sits in between for marking work. Here is how the routine maintenance compares across the classes I run.
| Maintenance task | Diode | CO2 | Fiber |
|---|---|---|---|
| Mirror alignment | None (no mirrors) | Monthly + after crashes | None (galvo, sealed) |
| Lens / optics cleaning | Module window, frequent | Lens + mirrors, frequent | F-theta lens, occasional |
| Beam-source replacement | Diode module (degrades slowly) | Glass tube (consumable) | Fiber source (very long life) |
| Coolant / chiller | None (fan-cooled) | Required, check regularly | None / sealed |
| Belt & frame upkeep | Yes | Yes | Yes (gantry models) |
| Overall upkeep load | Low | Moderate–high | Low |
If your machine choice is still open, the maintenance column is worth weighing alongside cut quality — my best laser engraver picks by use case, the OMTech Polar 350 review, and the Atomstack X20 Pro review all factor upkeep into the verdict. The broader operating picture lives in my beginner’s guide and the complete laser workflow.
Frequently Asked Questions
How often should I clean my laser lens?
Clean the lens and lowest mirror after almost every session if you cut wood or acrylic, since resin haze builds fastest on the surface closest to the smoke. Inspect weekly and deep-clean monthly. A hazed lens robs power and can crack from a hot spot mid-job.
My laser suddenly cuts weaker. Is the tube dying?
Usually not. The most common cause of sudden weak cuts is a dirty lens or a mirror that drifted out of alignment, not a dead tube. Clean the optics and run a CO2 mirror alignment pass first. Only suspect the tube once optics and alignment are ruled out.
Why is one side of my engraving darker than the other?
Uneven engraving across the bed is almost always mechanical, not optical. The usual causes are loose belt tension, a frame that is out of square, or focus that is not consistent across the work area. Check belts and squaring before touching power settings.
Do diode lasers need the same maintenance as CO2?
No. Diodes have no mirrors to align and no glass tube to replace. Their maintenance centers on cleaning the small protective lens on the front of the module and keeping the cooling fan and airflow clear. Overall upkeep is much lower than a CO2.
How long does a CO2 laser tube last?
Desktop CO2 glass tubes are commonly rated in the 1,500 to 10,000 hour range depending on quality and how hard they are run. A tube kept cool with clean coolant and run within its duty cycle lasts far longer than one run hot. Output fades gradually before failure.
What is the single most important laser maintenance habit?
Running air assist and ducted exhaust on every cut. Air assist keeps the lens clean and cuts crisp while suppressing flare-ups, and outside-vented exhaust removes fumes that are genuinely harmful. They protect both the machine and you, and they prevent the fires neglected machines cause.