Laser Engraver Air Assist Setup: Pumps, Nozzles, and Installation
A proper air assist upgrade adds a dedicated pump pushing 10–30 L/min of air through a nozzle at the laser head — and it reduces char on wood and leather by 60–70% compared to running without one. I’ve retrofitted air assist on the Atomstack X20 Pro and upgraded the stock pump on the xTool S1, and the difference in cut edge quality on every material is the single biggest improvement either machine ever got from any hardware change.
This guide covers pump selection, nozzle sizing, plumbing the air line, and the installation sequence I use across diode and CO2 machines. If you’re running a diode laser without air assist right now, stop, read this, and fix it before your next job.
Why Air Assist Changes Everything About Cut Quality
When a laser beam strikes wood or leather, it vaporizes the material and leaves combustion gases and carbon particulate in the kerf. Without airflow, those gases and particles sit in the cut zone and absorb energy that should be going into the material — the beam starts burning through smoke instead of cutting wood. The result is wider kerfs, more char, more smoke staining on the material surface, and incomplete cuts on anything thicker than 3mm on a diode.
A stream of air through the nozzle clears that debris continuously. The beam keeps coupling to clean material on every pass. Char is minimized because combustion products are blown out rather than re-deposited. Cut quality improves, pass count decreases for the same depth, and the lens stays cleaner between sessions because less particulate reaches it. On my Atomstack X20 Pro — which shipped with no air assist at all — adding a 30 PSI diaphragm pump and a brass nozzle converted it from a machine that needed masking tape on every wood engrave to one that cuts hardwoods clean-edged on most stock without tape.
Air assist also has a safety function: clearing combustion products from the kerf reduces the sustained burn risk when cutting. Material that would otherwise smolder in an unventilated kerf is blown clear. That doesn’t replace fire-watch discipline or exhaust ventilation — it complements them. ANSI Z136.1, the U.S. consensus laser-safety standard, lists laser-generated air contaminants among the hazards that ventilation engineering controls must manage, so I treat air assist as part of that capture stack rather than a standalone fix. The full upgrade guide covers where air assist fits in the priority stack.
Pump Types: Diaphragm vs Compressor
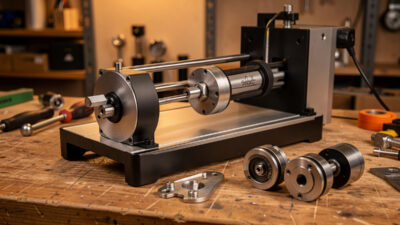
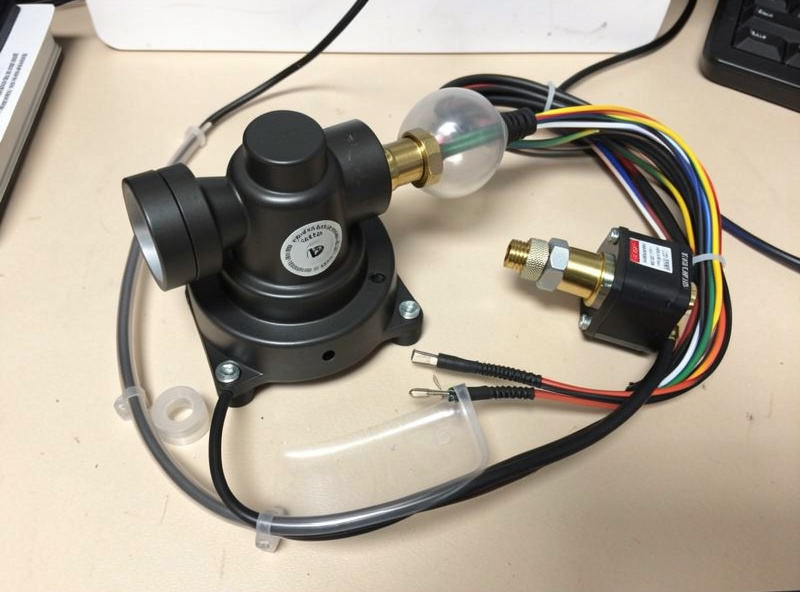
The two practical choices for laser air assist are a purpose-built diaphragm pump or a small air compressor. Each fits a different workshop situation.
Diaphragm pumps designed for laser use — the 20–30 L/min units commonly sold as laser accessories — run continuously, are quiet enough for a home shop, and don’t require a tank. They produce steady pressure around 20–40 PSI at typical flow rates. These are what I use on my Atomstack X20 Pro and as the secondary pump on the xTool S1 when I want lower pressure for engraving than the stock internal pump produces. The Sculpfun 30 L/min pump is a common example — adequate for diodes up to 20W class and the default recommendation if you don’t want compressor noise in the room.
A small pancake compressor (4-gallon, 150 PSI tank) gives you adjustable pressure via a regulator, eliminates pump fatigue on long sessions, and provides enough flow for CO2 cutting of thick acrylic where you want 40–60 PSI. On my OMTech Polar 350, I run a pancake compressor at 30 PSI for general CO2 work and 50 PSI for thick cast acrylic. The compressor cycles on and off to maintain tank pressure — that’s noisier than a diaphragm pump but manageable. Critical addition: a moisture trap inline between the tank and the machine. Moisture in the air line frosts acrylic surfaces and causes inconsistent depth on leather.
Nozzle Selection: Diameter, Material, and Standoff Distance
The nozzle is where air meets material, and the geometry matters. Most aftermarket nozzles for diode lasers come in 1.0mm and 1.5mm orifice sizes. The 1.0mm nozzle produces a more focused stream with higher velocity — better for cutting because it clears the kerf aggressively. The 1.5mm produces softer, broader airflow — better for engraving where you want to clear fumes without blowing char back onto the surrounding surface.
Brass nozzles are the standard. They handle the heat at the cut zone, thread onto standard M6 fittings, and are cheap enough to replace when they accumulate slag from cutting coated metals. Some higher-end diode head assemblies use integrated nozzles that thread directly onto the laser module — the xTool S1 uses this approach with its optional air-assist nozzle kit. On machines where the nozzle sits at fixed distance from the lens, you want the nozzle exit about 5–8mm above the material surface, angled slightly forward of the beam path so the airstream hits the cut zone without deflecting the beam.
Standoff distance from material surface to nozzle exit affects how much air actually reaches the kerf. Too far and the stream disperses; too close and it creates turbulence that can push material around on lightweight stock like thin card. For most wood and leather work I run 5mm clearance between nozzle tip and material surface, which hits the kerf with a focused stream without turbulence.
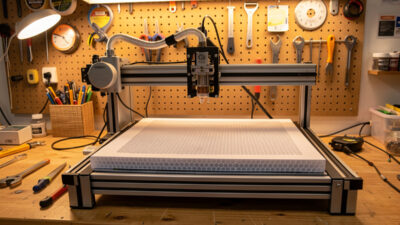
Installation Sequence for Open-Frame Diode Lasers
For open-frame machines like the Atomstack X20 Pro that shipped without air assist, the installation sequence is straightforward. The laser module typically has a threaded port for an air-assist fitting, or the nozzle clamps around the module body with a set screw — check the manufacturer’s documentation for your specific module first.
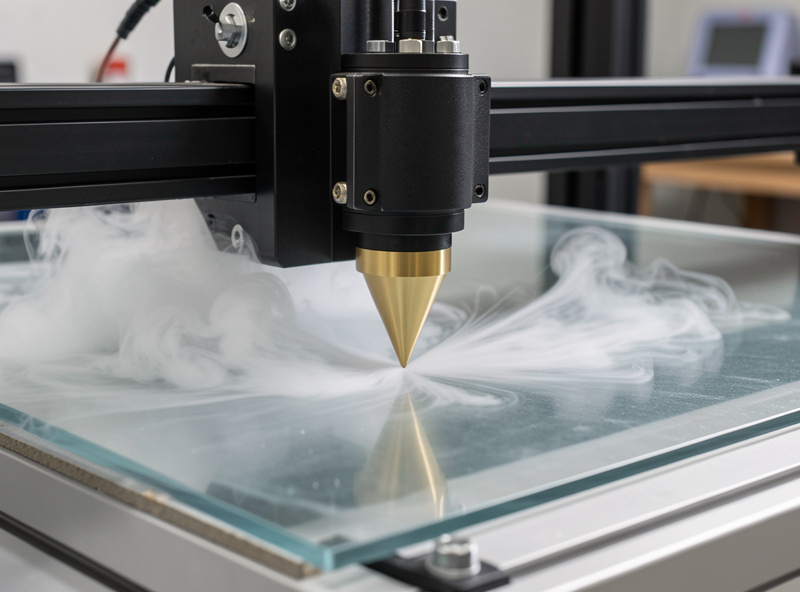
Step one: mount the pump externally, ideally below the machine so the air line runs upward (reduces condensate entering the laser module). Route the silicone tubing from pump to the module fitting and secure with zip ties — no kinks or tight bends. Step two: connect the pump to switched power if your controller has a relay output for accessories, or wire to a separate switched outlet. Running air assist manually (pump on, then fire laser) is fine; automating it prevents the common mistake of forgetting to turn on the pump before a job. Step three: run a test fire at low power on scrap and watch the airstream hit the material. You should see the smoke column deflected forward and away from the lens — that’s the air assist working. If smoke goes sideways or backward toward the operator, the nozzle angle needs adjustment.
The Atomstack X20 Pro’s optional air-assist kit installs in about 20 minutes and uses the machine’s own 24V power rail via a PWM-switched relay — cleaner than running a separate pump wall wart. I used the third-party brass nozzle fitting because the stock plastic one cracked after heat cycling; spend the extra dollar on brass from the start.
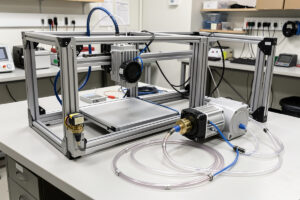
Upgrading Air Assist on the xTool S1
The xTool S1 ships with an internal air-assist pump that’s adequate for general engraving but undersized for cutting passes on hardwoods above 4mm. The stock pump runs at roughly 15 L/min — functional but not aggressive. For higher-pressure cutting work I bypass it with an external 30 L/min diaphragm pump connected to the machine’s air-assist port on the back panel.
xTool’s air-assist port accepts a standard 6mm OD silicone tube. Connect the external pump to that port, set the machine’s air-assist setting to “external” in xTool Creative Space (or disable the internal pump relay in LightBurn), and run the external pump at whatever pressure your material requires. I run 25 PSI for hardwood cutting, drop to 15 PSI for engraving to reduce surface ash displacement. The xTool S1’s enclosed lid helps contain the airstream — the air assist is more effective in an enclosed machine than on an open-frame diode because the turbulence can’t escape laterally.
Air Assist on CO2 Machines
The OMTech Polar 350 ships with an air-assist pump adequate for wood and thin acrylic. Where the stock pump falls short is on thick cast acrylic at full power — the 50W tube generates enough energy to melt the acrylic edge faster than the stock pump can clear the melt pool, leaving micro-weld marks on the cut face. A pancake compressor at 30–40 PSI resolves this on 6mm cast sheet; 50 PSI for 10mm and above.
On CO2 machines, the air-assist nozzle is integrated into the head and not field-replaceable without a lens tube swap. CO2 head nozzles are cone-shaped brass units that thread onto the lens tube — standard sizes are M22 or M24 depending on the manufacturer. OMTech uses a cone nozzle that I haven’t needed to modify, but I upgraded from the stock internal pump to the pancake compressor after three months of regular acrylic work. The difference on 6mm cast sheet was a clean optical-quality edge versus a slightly frosted one — visible immediately.
Air Pressure Settings by Material
| Material | Mode | Recommended Pressure | Notes |
|---|---|---|---|
| Hardwood (birch, maple) | Cutting | 25–35 PSI | Higher pressure for thicker stock |
| Hardwood | Engraving | 10–15 PSI | Lower reduces ash displacement |
| Leather (veg-tan) | Engraving | 12–20 PSI | Avoid blowing burn ash onto face |
| Leather | Cutting | 25–30 PSI | Clears kerf from thick hides |
| Cast acrylic | Cutting (CO2) | 30–50 PSI | Higher for stock above 6mm |
| Cast acrylic | Engraving (CO2) | 15–20 PSI | Lower prevents surface frosting |
| MDF / plywood | Cutting | 25–40 PSI | MDF outgases formaldehyde; keep exhaust running |
| Paper / card | Cutting | 5–10 PSI | High pressure moves lightweight stock |
Troubleshooting Air Assist Problems
Common problems and their solutions from my bench log:
Smoke going sideways or backward toward the operator: nozzle angle is wrong. The airstream should deflect forward and slightly away from the laser module. Adjust the nozzle position — most brass nozzle clamps allow angular adjustment.
Acrylic surface frosting during cutting: moisture in the air line. Add a moisture trap between pump/compressor and machine. Drain the compressor tank after each long session — moisture accumulates at the bottom.
Cut quality inconsistent (sometimes clean, sometimes scorched): pump losing pressure during long sessions. Check the pump temperature — continuous-duty rated pumps handle this; intermittent-rated pumps overheat and lose pressure after 20–30 minutes. If overheating is the problem, add an external fan on the pump or switch to a compressor.
Air assist connected but no airflow at the head: check the internal valve inside the machine if applicable. The xTool S1 has a solenoid valve that gates air assist — if LightBurn’s air assist setting is disabled for a layer, the valve won’t open even if the pump is running. Enable air assist on each layer in LightBurn’s cut settings editor.
What pump pressure do I need for laser engraver air assist?
For diode lasers cutting wood and leather, 20-35 PSI from a 20-30 L/min diaphragm pump covers most material thicknesses. For CO2 machines cutting thick acrylic (6mm and above), 40-50 PSI from a pancake compressor gives cleaner edges. Engraving requires lower pressure than cutting — 10-20 PSI reduces ash displacement without losing fume clearance.
Can I use a fish tank pump for laser air assist?
No. Aquarium pumps typically produce under 5 PSI and 5 L/min — far too little pressure to clear the kerf on a laser engraver. You need a minimum of 10-20 L/min at 15-30 PSI for effective fume clearance on wood and leather. Use a purpose-built laser diaphragm pump or a small compressor with a regulator.
Do I need air assist for laser engraving or just cutting?
Air assist improves both engraving and cutting, but the impact is most dramatic for cutting. For engraving, air assist reduces fume deposits on the lens and clears combustion products from the engraved surface. For cutting, it is critical — without it, combustion gases absorb beam energy in the kerf, causing incomplete cuts and heavy char on wood and leather.
What is a moisture trap and do I need one for laser air assist?
A moisture trap is an inline filter that removes condensed water from compressed air before it reaches the laser head. You need one if using a compressor — compressed air contains moisture that frosts acrylic surfaces and causes inconsistent engraving depth on leather. Diaphragm pumps running room air have much less moisture than compressors but still benefit from a trap in humid climates.
How do I install air assist on an Atomstack X20 Pro?
The Atomstack X20 Pro has a threaded port on the laser module for an air-assist fitting. Mount a 20-30 L/min diaphragm pump below the machine, run silicone tubing from pump to the module port with no kinks, and connect the pump to switched power. Run a low-power test fire on scrap and confirm smoke deflects forward and away from the lens before any production run.