Laser Engraving Stone: The Complete Guide to Slate, Tile, Granite and Marble
Laser engraving stone is one of the most satisfying things you can do with a hobby laser, and it is also one of the most misunderstood. The headline that nobody tells you up front: you are not really cutting or vaporising stone the way you cut wood. On most stone you are creating a controlled, frosted contrast — the laser heats the surface mineral and changes how it reflects light, leaving a permanent matte mark against the polished or natural surface. Get that one idea straight and stone stops being intimidating. I have run slate, tile, granite, and marble across both my diode and my CO2, and the method that actually produces clean, repeatable marks is more about surface prep and contrast than raw power.
This guide is the gateway to the whole stone-and-tile cluster on the site. It covers what is physically happening when a laser hits stone, which machine class you actually want for each material, the surface tricks that make a faint mark turn jet-black, and how to seal the result so it survives outdoors. From here you can branch into the deeper material-specific builds — slate, ceramic tile, granite, marble, travertine — each with its own settings and quirks. If you have never run anything but wood, stone is the most rewarding next step, because the contrast you get on a polished black tile or a piece of grey slate looks like it came off a commercial machine when you do it right.
What a Laser Actually Does to Stone
A laser does not carve stone like a CNC bit. With the exception of a few softer materials, you are not removing meaningful depth — you are inducing a surface colour and texture change. On dark slate and dark granite, the heat micro-fractures and lightens the surface minerals, so the engrave comes out as a pale, frosted mark on a dark background. On polished light stone like white marble or pale tile, the laser can darken the surface instead, and the trick becomes coaxing enough contrast out of it. This is fundamentally a contrast game, not a depth game, and it is why stone engraving rewards a careful eye more than a powerful machine.
It helps to think of the stone surface as a piece of film you are exposing. The minerals near the surface have a specific way they reflect and scatter light, and the laser’s heat alters that scatter — roughening a polished face so it goes matte and pale, or, on certain light stone and glazes, sintering and darkening it. Different stones carry different minerals, so the same power and speed give a brilliant white frost on one slate and a dull grey on another. That variability is not a flaw in your machine; it is the nature of a natural material, and it is exactly why the materials-test-card habit matters more on stone than on engineered sheet goods like plywood or cast acrylic. You are not dialling in “the slate setting”; you are dialling in the setting for the specific piece of slate on your bed today, and the difference between two lots can be larger than you expect.
Because you are working the surface and not boring into the body of the stone, two things follow that catch beginners out. First, focus matters enormously — a stone surface that is even slightly out of focus smears the frost and kills the crisp edge, so you focus precisely every time and you keep the surface flat and level under the head. Second, the engrave is shallow and the contrast can be fragile until you fix it, which is why so much of stone work is really about surface prep before the burn and sealing after it. The actual laser pass is the quick part; the prep and the finish are where the quality lives.

Which Machine: Diode vs CO2 for Stone
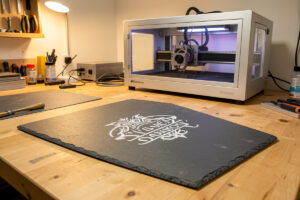
Here is the genuinely useful news for a budget builder: a diode laser engraves stone beautifully. The blue diode light couples well into dark mineral surfaces, and slate, ceramic tile, and granite all mark cleanly on a 40W-class diode with air assist running. This surprises people who assume stone needs a serious machine — it does not. On my xTool S1 I get a sharp, high-contrast frost on dark slate that I would happily sell, and the same is true for dark ceramic and most granite. If your only laser is a diode, you can absolutely run this entire cluster.
So where does CO2 earn its keep? On polished, light, and harder stone, and on speed. My OMTech Polar 350 puts down a deeper, faster mark on polished marble and pale tile than the diode manages, and on a glossy surface that the blue diode struggles to grip, the CO2’s 10.6-micron wavelength couples more readily into the glaze or the polish. CO2 is also simply faster across a large piece, which matters once you are running production. Neither machine class needs a fiber laser — fiber is a metal-marking tool and belongs to a different part of the workshop entirely. If you have read the broader diode vs CO2 vs fiber breakdown, the stone story is the clearest real-world example of “diode is fine, CO2 is faster and reaches the awkward materials.” The decision tree is simple: dark, matte, or natural stone, run the diode you already own; polished, light, or production-volume, the CO2 pays for itself.
The Stone Materials Worth Engraving
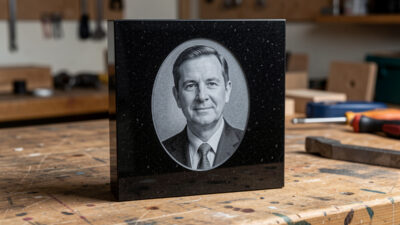
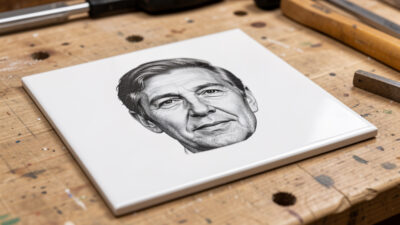
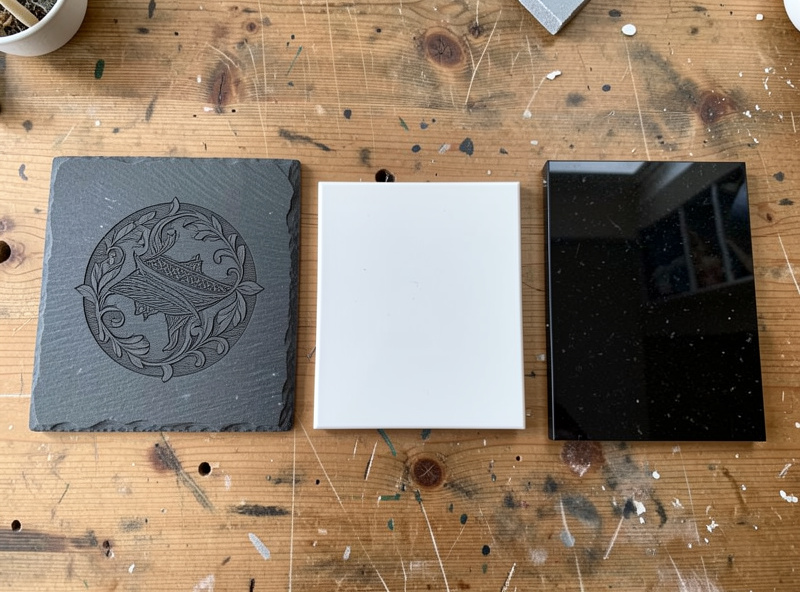
Not all stone behaves the same under a laser, and choosing the right material for a project is half the battle. Slate is the friendliest and most forgiving — cheap, flat, dark, and it frosts to a beautiful pale contrast with almost no effort, which is why it is the material I steer every beginner toward first. Ceramic tile is the next step and a workshop favourite because the glaze and the body react differently to the heat, and with the paint-fill trick a plain white tile becomes a jet-black photographic engrave. Granite gives the most “premium memorial” look — dense, dark, and it frosts to a crisp light grey that reads as permanent and serious.
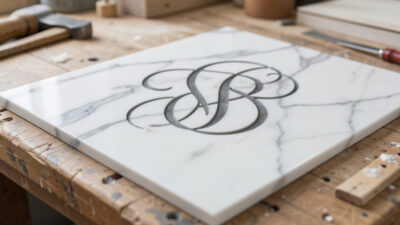
Marble is the prima donna of the group: stunning when it works, but the veining and the varying hardness across the surface mean your contrast shifts as the head crosses the stone, so it rewards patience and a sealed finish. Travertine is the soft, porous oddball — it engraves with real depth because it is genuinely softer, so it behaves more like cutting than frosting, and the porous surface drinks colour fill if you want to add it. Each of these has its own dedicated build in this cluster, because the settings and the prep that nail slate will be wrong for marble. If you are starting out, begin with slate, move to tile, and only tackle marble once you can read your own contrast confidently.
The Surface Tricks That Make Stone Pop
This is the part that separates a faint, disappointing mark from a black-and-white photo on tile. The two workhorse techniques are the surface coating and the post-engrave fill. The most famous is the “soap trick” on slate: you wipe a thin film of dish soap over the surface before engraving, let it go tacky, and engrave through it. The soap layer manages the heat at the surface and gives you a noticeably whiter, more even frost with far less of the patchy grey you get on bare slate. It washes off afterwards and costs nothing — it is the single highest-value habit in stone work, and I cover the full method on the dedicated slate laser engraving build.
The second technique is the opposite approach: instead of frosting the surface light, you engrave a recess or a roughened area and then fill it with colour. On ceramic tile this is how you get a true jet-black photo engrave — a thermal-bonding coating or a paint layer fuses into the lasered area and wipes clean off the unlasered glaze. On porous stone like travertine and natural slate, a paint fill rubbed into the engraved recess and wiped back gives you crisp coloured lettering. These fill techniques are powerful enough to deserve their own walkthrough, and they turn the cheapest blank into something that looks bespoke. The combination — coat to brighten the frost, or fill to add deliberate colour — is the whole toolkit for controlling contrast on stone.
Stone Is Inert — But the Dust and the Fumes Are Not
Stone itself will not outgas chlorine the way PVC does, and that is a relief — there is no vinyl-grade hard ban here. But “inert material” does not mean “no precautions,” and this is where I get loud, because the influencer demos skip it. Laser-engraving stone produces fine mineral dust and a sharp, sometimes metallic smell as surface minerals are altered, and you do not want to breathe either. Air assist stays on, the ducted exhaust stays running, and the enclosure stays closed — the same fume discipline I run on every material, because the bench does not get safer just because the material is a rock.
The other live risk is the surface coating you choose. The soap trick is harmless, but some marking sprays and thermal coatings have their own ventilation requirements, and an unknown coated tile is the same hard stop as any unknown coated stock — you do not laser a surface whose coating you cannot identify, because you have no idea what it releases. And the universal rule still holds: never run the job unattended. A focused beam, a hot surface, and any flammable masking or coating residue is still a fire to respect. If you are still building out your extraction, the workshop ventilation and exhaust walkthrough is the place to start, and the broader laser safety essentials rundown covers the fire and fume discipline that applies to every job on the bench.
A Repeatable Stone Engraving Workflow
Every clean stone engrave I run follows the same loop, and once you internalise it the material stops fighting you. Start by selecting the material to suit the project — dark slate or granite if you want a frosted light mark, light tile or marble if you are planning a paint fill or a dark photographic engrave. Clean the surface thoroughly; any oil, dust, or fingerprint changes how the heat couples and shows up as a blotch. If you are using the soap method or a marking coating, apply it now and let it set to the right tack.
Then — and this is non-negotiable — run a materials test card on an offcut or the corner of the blank. Stone varies lot to lot and even across a single tile, so you cut a small power-and-speed grid, find the cell that gives the whitest frost or the cleanest fill with no cracking, and only then commit to the real piece. Focus precisely, level the surface, confirm air assist and exhaust are running, and frame the job before you fire. After the engrave, wash off any coating, fill if the project calls for it, and seal — a sealer is what turns a fragile surface frost into a mark that survives years outdoors on a memorial or a garden marker. Design-to-finish, it is the same disciplined loop I cover in the complete laser workflow guide, just tuned for the way stone holds a mark.
Designing for Stone Specifically
Stone rewards bold, high-contrast designs and punishes fussy detail, much like engraving a working sign. A clean name, a date, a simple line drawing, or a well-prepared grayscale photo all read beautifully; hairline serifs and tiny detail get lost in the frost. For photographic engraves on tile, the prep is most of the job — you adjust the image so the lasered areas carry the contrast, and the dedicated tile build walks through that. For lettering on slate and granite memorials and signs, a heavier font weight survives the surface texture far better than a delicate one. The same grayscale-photo prep discipline I use for glass frosting applies directly to tile, since both are contrast media rather than depth media.
Think about the finished context, too. A garden marker or a memorial lives outdoors, so the design needs to hold up sealed and weathered; a coaster or a decorative tile lives indoors and can carry finer work. Because stone is a contrast medium, I always preview the inverse in my head — on dark slate the engrave is the light element, so I design as if I am drawing with light, not ink. That mental flip is the single most useful design habit when you move from wood, where the engrave is the dark mark, to dark stone, where it is the bright one. In practice I keep a small library of designs already inverted for dark stock, so I am not flipping polarity by hand under time pressure and risking a ghost engrave on an expensive blank.
Sealing and Finishing: Making the Mark Last
The engrave is only half the job on anything that will leave the workshop. A bare surface frost on slate or granite looks great fresh off the bed, but it is a shallow surface change, and on an unsealed piece it can dull, collect grime, or weather unevenly over time. For anything destined for daily handling or the outdoors — coasters that get wet, garden markers, memorials, house number plaques — sealing is what carries the mark from “looks good in the photo” to “still looks good in three years.” A penetrating stone sealer or a matte enamel applied lightly over the engrave deepens the contrast and locks it in, and on coasters a food-safe-adjacent sealer keeps the frost from absorbing wine and coffee rings.
How you seal depends on the look you want. A penetrating sealer soaks in and leaves the natural matte stone surface, which is what I reach for on slate coasters and natural-edge pieces where you do not want a plastic sheen. A surface sealer or a clear matte spray sits on top and gives a slightly more uniform, protected face — better for a piece that will live outdoors and take weather. The one mistake to avoid is a heavy gloss coat over a frosted engrave: gloss fills the micro-texture that creates the frost contrast and can actually wash out the mark, turning your crisp white engrave grey. Test the sealer on a scrap engrave first, exactly like you test settings — the sealer changes the appearance as much as the laser pass does, so it is part of the recipe, not an afterthought. On painted-fill tile and travertine, the fill itself is part of the seal, but a light clear coat over the finished piece still protects the colour from rubbing off at the edges.
Common Stone Engraving Mistakes
The faults that ruin a stone piece are predictable once you know them. The most common is a weak, patchy frost — almost always either out-of-focus engraving, too much speed, or skipping a surface prep like the soap trick on slate. The fix is rarely “more power”; cranking power on stone tends to over-cook the surface, widen the mark, and on some stone actually reduce contrast as it darkens an area that should stay light. If your frost is faint, slow down and prep the surface before you reach for the power slider. The second classic is cracking, which shows up on thin tile and on stone with internal stress when you put too much heat into a small area or run multiple passes that build up thermal shock. Lower power, single clean pass, and let a large solid fill breathe rather than hammering it.
Then there are the avoidable ones. Engraving an unknown coated or glazed tile without testing the corner first — some glossy glazes resist the laser entirely and some coatings outgas, so you always test an offcut. Forgetting to level the piece, so the engrave is sharp on one side and smeared on the other as the focus drifts across an uneven stone — shim it flat and confirm focus across the whole field. Skipping the seal on an outdoor piece and watching it weather to nothing in a season. And the one that catches people moving from wood: forgetting that on dark stone you are engraving the light element, so an inverted or wrong-polarity design comes out as a faint ghost instead of a bold mark. Every one of these is a test-card-and-checklist problem, which is exactly why the workflow loop above exists. Stone is forgiving once you respect the prep and unforgiving the moment you wing it.
Stone Materials at a Glance
| Material | Best Machine | Mark Type | Difficulty | Best For |
|---|---|---|---|---|
| Slate | Diode or CO2 | Light frost on dark | Easy | Coasters, signs, beginners |
| Ceramic tile | Diode or CO2 | Frost or paint-fill | Easy–Medium | Photo engraves, decor |
| Granite | Diode or CO2 | Light grey frost | Medium | Memorials, premium signs |
| Marble | CO2 preferred | Darkened mark | Hard | Plaques, premium gifts |
| Travertine | Diode or CO2 | Depth + colour fill | Medium | Coasters, rustic decor |
Frequently Asked Questions
Can you laser engrave stone with a diode laser?
Yes. A 40W-class diode engraves slate, ceramic tile, and most granite cleanly with air assist running, because the blue diode light couples well into dark mineral surfaces. CO2 is faster and reaches polished light stone more easily, but a diode handles the bulk of stone work well.
Do you need a fiber laser to engrave stone?
No. Fiber lasers are for marking metal and are the wrong tool for stone. Stone engraving is done on diode or CO2 machines. Fiber belongs to a separate metal-marking part of the workshop and offers no advantage on rock.
What is the soap trick for engraving slate?
Wiping a thin film of dish soap over slate before engraving and letting it go tacky gives a whiter, more even frosted mark with less patchy grey. The soap manages surface heat during the burn and washes off afterwards. It is the single highest-value habit in stone work.
Are you cutting into the stone or just marking the surface?
On most stone you are inducing a surface colour and texture change, not removing depth. The laser frosts dark stone to a pale mark or darkens light stone. Softer stone like travertine engraves with real depth, but slate and granite are surface-contrast work.
Is laser engraving stone dangerous?
Stone will not outgas chlorine like PVC, but it produces fine mineral dust and fumes you should not breathe, so air assist and ducted exhaust stay on. Never run the job unattended, and never laser a coated stone whose coating you cannot identify.
Do you need to seal engraved stone?
Seal any stone piece that will live outdoors, like a memorial or garden marker. A sealer turns the fragile surface frost into a durable mark that survives weather for years. Indoor decorative pieces can often go unsealed.