MOPA Laser Stainless Color Marking: Settings That Work
To get colors on stainless with a MOPA fiber laser, you defocus slightly, drop power into the low-teens percent range, push frequency high (often 200–600 kHz), and slow the scan so heat builds a thin oxide layer. Color is interference from that oxide, not pigment.
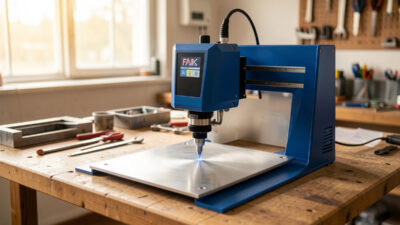
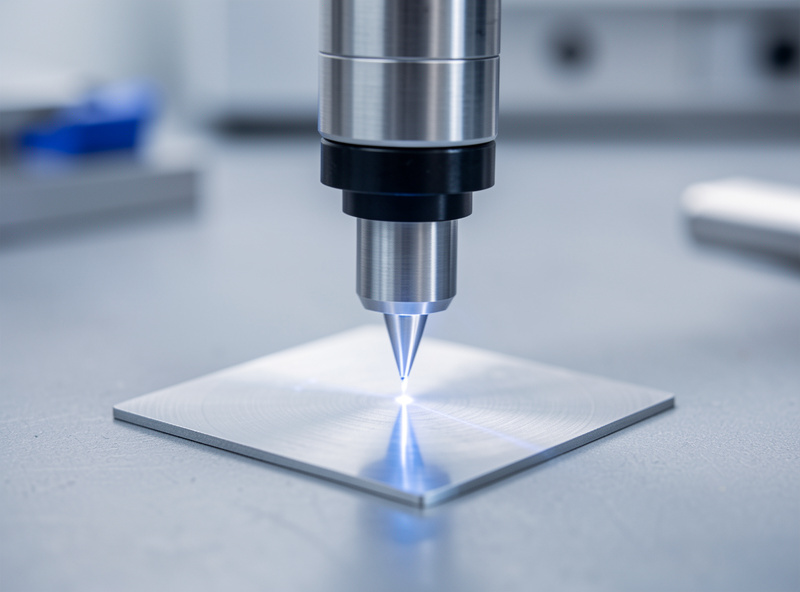
I run a desktop MOPA marker next to my CO2 and diode machines, and color marking is the one trick the MOPA does that my Q-switched experience never matched. When people ask me how the “rainbow stainless” effect happens, the honest answer is that it has almost nothing to do with engraving and everything to do with controlled, gentle heating. You are not removing metal. You are growing a transparent oxide skin a few hundred nanometers thick and letting light interference do the coloring. Get the thickness right and you get blue, purple, gold, or a deep black. Overshoot and you are back to gray ablation. This guide is how I tune mine, what locks in repeatability, and where the honest limits are.
Why MOPA does color and a standard fiber laser largely cannot
The short answer: MOPA lets you set pulse duration (often 2–500 ns) independently of frequency, and short, tightly controlled pulses at high repetition rates are what deposit gentle, even heat. A fixed-pulse Q-switched fiber can mark and ablate, but it cannot dial in the thin, consistent oxide that color depends on.
MOPA stands for Master Oscillator Power Amplifier. The practical thing it buys you is an adjustable pulse width. On my bench that single parameter is the difference between “I can make color” and “I can only make gray.” A standard Q-switched source hands you a pulse duration that the cavity decides, usually long and energetic, which dumps too much heat per pulse and burns straight past the thin-oxide window into ablation. The MOPA gives me short pulses I can stack at high frequency, so the metal warms in a controlled, cumulative way instead of getting hammered. That control over heat input, not raw power, is the whole game. I always tell people the MOPA is not a “better” laser for cutting or deep marking; it is the right tool specifically because it heats gently and predictably. For the bigger picture on where fiber sits against my other machines, I keep my diode vs CO2 vs fiber breakdown handy.
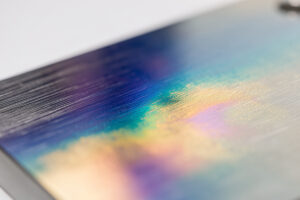
Color is a thin-oxide interference layer, not pigment
Every color you see on marked stainless is structural, not a dye. A transparent chromium/iron oxide film a few hundred nanometers thick forms on the surface, and white light reflecting off the top and bottom of that film produces thin-film interference. Thickness sets the color: thicker film shifts you through gold, red, purple, blue.
This matters because it changes how you think about tuning. You are not “applying blue.” You are controlling how thick an oxide layer grows, and the thickness decides which wavelengths cancel and which reinforce. It is the same physics as oil on a wet road or a soap bubble. On my bench that mental model is what stopped me chasing settings randomly. If a sample comes out gold and I want blue, I do not change “the color” knob, because there isn’t one. I add a little more heat into the surface to grow the film thicker, by slowing down, nudging frequency up, or adding a pass. The corollary is that color is fragile. Because it is a few-hundred-nanometer skin, it is sensitive to viewing angle, and it can shift or dull with abrasion, heat, or harsh cleaning. I do not sell MOPA color work as a durable outdoor finish; I treat it as decorative and indoor. If a customer needs hard-wearing contrast, I steer them to black anneal or a deep engrave instead, the same way I treat my stainless tumbler engraving settings as a separate discipline.
The settings that grow color: defocus, low power, high frequency, slow speed
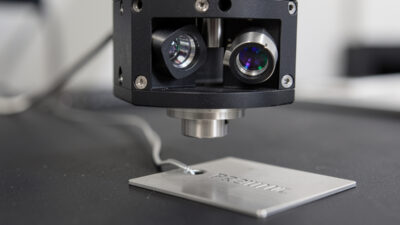
The recipe I start from on stainless: defocus 2–4 mm above sharp focus, power down around 8–20 percent, frequency high (200–600 kHz for most colors), pulse width on the shorter end (often 2–50 ns), and speed slow enough to accumulate heat. Then I adjust one variable at a time.
The reason defocus helps is that a slightly larger, softer spot spreads the heat and keeps you out of ablation. High frequency means pulses land close together in time, so heat accumulates rather than punching individual craters. Low power keeps each pulse from overheating the surface. Slow speed and a tight hatch (line interval) let neighboring lines share heat for an even film. Pulse width is the fine control: shorter pulses tend to favor the bright interference colors, longer pulses push toward black. I cannot stress enough that these are starting points, not gospel numbers — lens focal length, your specific stainless grade and surface finish, and your source all move the window. A confidently wrong number wastes more material than a careful test. So I lock everything except one parameter, run a grid, and read the result. For the metal-marking foundation under all of this, my fiber laser metal marking guide is the hub I send people to first, and choosing the machine itself is covered in my best fiber laser for metal rundown.
Black, white, and color regimes
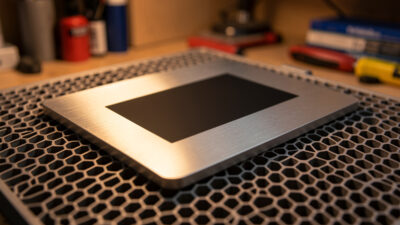
The three regimes come from how much heat you put in and how. Color sits in a narrow mid-heat window (high frequency, low power, slight defocus). Black usually wants longer pulse width and slightly more heat to grow a thicker, light-absorbing oxide. “White” or frosted is a roughened, near-focus ablation regime with higher power and lower frequency.
Thinking in regimes keeps me from getting lost. Black anneal is my go-to for anything that needs to survive handling, because it is a deeper, more bonded oxide and it reads as solid black under most lighting. I reach for longer pulse widths and a slower, denser fill to get it even. White or frosted contrast is the opposite end — I bring the focus back to sharp, raise power, and let the surface micro-roughen so it scatters light. Color lives in between and is the touchiest, which is exactly why repeatability needs a process, not luck. Here is the regime map I work from, in ranges, because exact values depend on your lens, grade, and source:
| Target result | Approx. frequency | Pulse width | Power | Speed / focus |
|---|---|---|---|---|
| Gold / bronze | 200–400 kHz | 4–20 ns | Low (8–15%) | Slow, slight defocus |
| Red / purple | 300–500 kHz | 4–30 ns | Low (10–18%) | Slower, more heat |
| Blue / teal | 400–600 kHz | 2–20 ns | Low (10–20%) | Slow, tight hatch |
| Black (anneal) | 2–60 kHz | 100–500 ns | Low-mid (15–30%) | Slow, dense fill |
| White / frosted | Low (20–80 kHz) | Mid-long | Higher (30–50%) | Near focus, faster |
Treat every cell as a place to start a test grid, not a final answer. The fiber operators and industrial side who run deep-cut galvo work live in completely different power and speed territory; color marking is a low-energy surface trick by comparison.
Repeatability: lock focus, frequency, pulse width, speed, and hatch
Color only repeats when five things are locked: exact focus height, frequency, pulse width, scan speed, and hatch/line interval. Change any one and the oxide thickness drifts, so the color shifts. I record all five in my test logs for every result I want to reproduce, plus the stainless grade and lot.
This is where most people lose color work. They nail a beautiful blue once, do not write down the focus height, and never see it again. Color is unforgiving precisely because it depends on a nanometer-scale film. My discipline is simple: when a sample comes out right, I save the named parameter set in LightBurn-class software, photograph it with the settings in frame, and note the material lot. Focus height is the sneakiest variable — a millimeter of defocus drift moves the spot size and the heat density enough to walk the color a full step. I use a fixed focus gauge and check it every session. Hatch matters too: a looser line interval leaves striping in the film, so I keep it tight and consistent. None of this is exotic; it is just the same logging habit I apply to every machine on my bench.
The test-card discipline
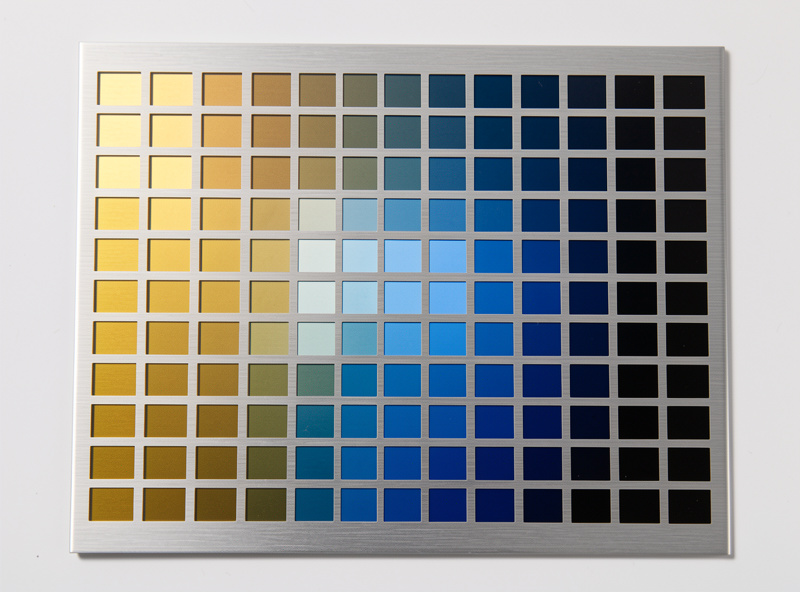
Before I run any real piece, I burn a parameter grid on the same stainless lot. A typical card sweeps frequency on one axis and speed or pulse width on the other, holding focus and power, so I can read the color map directly. Ten minutes of grid testing saves a ruined workpiece.
I run a power/speed-style materials test card for every new material lot across all my machines, and on the MOPA it is non-negotiable because the color window is so narrow. Different stainless grades and even different surface finishes from the same grade will shift the result, so I never trust a card from last month’s steel. The card gives me a visual matrix: I scan it, find the cell with the color and evenness I want, read off the parameters, and lock them in. It also exposes the edges of the window, where color tips into gray or black, which tells me how much margin I have before drift ruins a part. If you are coming from anodized aluminum work, the logic is the same disciplined approach I use in my anodized aluminum engraving guide, just with a tighter tolerance.
Safety: air assist, ducted exhaust, never unattended
Marking stainless is lower-fume than cutting, but it is not zero. I run air assist on every job, vent through ducted exhaust to the outside — never recirculated — keep an ABC/CO2 extinguisher and a fire blanket within reach, and I never run a job unattended. Metal oxide fume and any surface contaminants belong outside, not in your lungs. The 1064nm beam is also invisible, so I treat the ANSI Z136.1 laser-safety standard and a 1064nm-rated enclosure window as mandatory, not optional.
Even though color marking uses low power, the surface still throws fine particulate and oxidized fume, and you do not always know what residue or coating is on a piece of stainless before you mark it. That is why my hard ban on PVC, vinyl, and unknown-coated stock applies here too — chlorine gas is non-negotiable and it does not care that you are “only marking.” Air assist keeps the optics clean and pushes fume toward the extraction. My exhaust ducts straight outside; I have never trusted a recirculating filter as the only line of defense on metal work. And the unattended rule is absolute across every machine I run, fiber included: a fault, a slipped clamp, or a flare-up happens in seconds. I keep fire suppression in arm’s reach and treat it like a seatbelt, which is the same standard I lay out in my laser engraver fire suppression guide.

If you want a tested starter MOPA source and a simple focus gauge to lock your color work, I keep a current shortlist here: MOPA fiber laser markers on Amazon. As an Amazon Associate I earn from qualifying purchases.
Can a standard Q-switched fiber laser make stainless colors?
Largely no. Color needs an adjustable pulse width to deposit gentle, even heat that grows a thin oxide. A fixed-pulse Q-switched source dumps too much heat per pulse and tends to ablate past the thin-oxide window into gray instead of color.
Why are MOPA stainless colors not durable outdoors?
The color is a thin oxide film a few hundred nanometers thick, so it is sensitive to abrasion, heat, viewing angle, and harsh cleaning. I treat it as decorative and indoor. For hard-wearing contrast I use black anneal or a deeper engrave instead.
What settings start the color window on stainless?
On my bench I start with slight defocus, low power near 8 to 20 percent, high frequency around 200 to 600 kHz, short pulse width, and slow speed with a tight hatch. Then I adjust one variable at a time using a test grid.
How do I get repeatable colors?
Lock five things: exact focus height, frequency, pulse width, scan speed, and hatch interval. Change any one and the oxide thickness drifts and the color shifts. I record all five plus the stainless grade and lot in my test logs for every result.
Is marking stainless with a fiber laser safe indoors?
Only with proper extraction. I run air assist, vent ducted exhaust to the outside and never recirculated, keep a fire extinguisher and blanket within reach, and never run unattended. I never mark PVC, vinyl, or unknown-coated stock because of chlorine gas risk.