Laser Engraving Anodized Aluminum: Fiber and Diode Settings
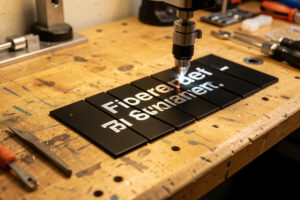
Laser engraving anodized aluminum is a dye-removal job, not a cut. The beam vaporizes the thin colored anodic layer to reveal bright metal underneath. A fiber does it best at 20-40% power and 800-1200mm/s; a diode manages dark anodized stock at slow speeds.
This is the one specialty material on my bench where the machine you own decides whether the job is trivial or impossible. I run a desktop fiber marker specifically for metal work, and on anodized aluminum it produces a permanent, crisp silver-on-color mark in a single fast pass. My diode can fake it on black anodized tags if I crawl the speed, but understanding why is the difference between a clean mark and a wasted afternoon.
Why Anodized Aluminum Marks When Bare Aluminum Won’t
Anodized aluminum has a colored, porous oxide layer on top of reflective metal. Lasers ablate that dye layer easily, exposing bright aluminum for high contrast. Bare aluminum, by contrast, reflects nearly all laser light, so a diode or CO2 does almost nothing to it. Only a fiber laser couples into bare metal.
The key insight is that you are never actually engraving the aluminum on an anodized part, you are removing color from it. The anodizing process grows a hard oxide layer and dyes it, so the laser just needs enough energy to vaporize that dye and oxide, not to gouge metal. That is why anodized marking is fast and clean and why over-powering it is pointless: once the dye is gone, more power only risks melting or warping the surface. If you want to actually cut into or deeply engrave bare metal, that is a different job that needs a fiber laser and the kind of settings I cover for stainless tumblers.
This also explains a confusion I see constantly: people buy “aluminum” blanks expecting them to mark on a diode and get nothing. The fix is to confirm the stock is actually anodized and dyed, not raw or merely brushed. A quick tell on the bench is that genuine anodized stock has an even, slightly matte color that goes all the way to the edges where it was dipped, while a painted or powder-coated lookalike will chip to bare metal if you scratch a hidden corner with a blade. Anodized marks by dye removal; paint marks by burning the coating off and usually looks rough and uneven by comparison. When I get an unlabeled silver-colored blank, I assume it is bare aluminum and reach for the fiber, because a diode will simply waste its time on it.
Fiber Laser Settings for Anodized Aluminum
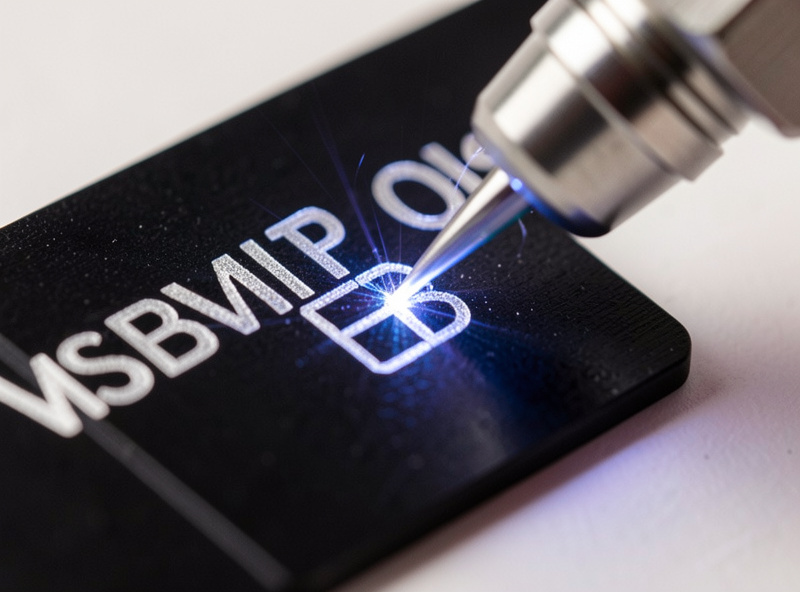
On a fiber marker, start anodized aluminum at 20-40% power, 800-1200mm/s, with a line interval around 0.01mm for solid fills. Use multiple fast passes to build contrast rather than one slow high-power pass. Frequency in the 20-60kHz range works well; lower frequency hits harder per pulse.
These numbers get you in the ballpark, but the only honest way to dial a specific anodized lot is a materials test card, a grid of power-and-speed squares run on a scrap of the same stock. Anodizing thickness varies between suppliers and between black, red, and blue dyes, so a setting that gives a bright clean mark on one black tag can leave a faint gray smudge on the next batch. I keep my fiber fast and let two or three quick passes build the contrast, because that gives a brighter, more even silver than a single slow pass that dumps heat and can discolor the surrounding finish. Fiber operators running industrial galvo systems push these numbers far higher, but on a desktop marker the conservative, multi-pass approach is what holds up.
Two fiber-specific settings make or break an anodized mark, and neither is power. The first is focus. A fiber is far less forgiving of a focus error than a diode, so I set the focal point dead on the surface with the red-dot guide and re-check it whenever I change part thickness, because even a millimeter off softens the mark noticeably. The second is fill direction and interval. For a solid silver block I run a bidirectional fill at roughly 0.01mm interval and, on larger fills, rotate the fill angle 90 degrees between two passes, a cross-hatch, which evens out the slight directional banding a single-angle fill can leave. For fine text I drop to a single fast pass to keep the lines crisp rather than letting multiple passes thicken them. The habit that saves the most stock here is marking the focus height and the working frequency on a label stuck to each color of blank, because black, red, and blue anodizing genuinely want slightly different settings and guessing wastes tags.
Can a Diode Laser Engrave Anodized Aluminum?
A diode can bleach dark anodized aluminum at high power, around 90-100%, and slow speeds near 100-200mm/s, lightening the dye for a visible mark. It works only on dark colors and cannot touch light, clear-anodized, or bare aluminum. The contrast is softer than a fiber’s bright-silver result.
I have done this on black anodized stock when the fiber was tied up, and the result is usable but clearly second-best, a muted gray-on-black rather than the bright silver a fiber gives. The diode is bleaching and partially burning the dye rather than cleanly vaporizing it, so the edges are softer and the contrast lower. If anodized marking is an occasional thing for you and you already own a diode, it is worth knowing the trick. If it is a recurring job, the physics is telling you to get a fiber. My fiber laser for metal guide walks through which desktop fiber actually earns its place, and the broader diode vs CO2 vs fiber breakdown puts it in context.
Fiber vs Diode on Anodized Aluminum
The two machine classes give genuinely different results on anodized stock, and the table below is how I decide which to reach for. Fiber wins on contrast, speed, and color range; diode is the fallback you already own.
| Factor | Fiber Laser | Diode Laser |
|---|---|---|
| Mark color | Bright silver | Muted gray |
| Works on dark anodized | Yes | Yes |
| Works on light/clear anodized | Yes | No |
| Works on bare aluminum | Yes (engrave) | No |
| Typical power | 20-40% | 90-100% |
| Typical speed | 800-1200mm/s | 100-200mm/s |
| Fume | Very low | Low (dye burn) |
Fume and Safety on Anodized Marking
Anodized aluminum marking is the cleanest specialty job for fume because almost nothing burns; the dye layer is microscopically thin. Air assist still runs on every pass to keep the lens clear and the mark crisp, and the never-unattended rule never lifts. Bare-metal engraving with a fiber produces more particulate and warrants the same exhaust discipline.
I will not pretend anodized marking is the fire hazard that fabric or thick wood is, because it genuinely is not, the energy is going into vaporizing a thin coating, not combusting a bulk material. But the discipline does not change with the material: air assist on, exhaust running, extinguisher within reach, and I never walk away from a running machine. The one place I am actually stricter on a fiber than on a diode is the eyes: a 1064nm fiber beam is invisible and reflects readily off a shiny anodized or bare metal surface, so I match my eyewear to the ANSI Z136.1 optical-density guidance for 1064nm and never run the marker with the door open. And because anodized marking is a favorite for permanent identification plates, the dye-removal mark is the same physical approach the MIL-STD-130 marking spec recognizes as durable, which is exactly why it does not wear or fade. The general material-safety framework I apply to everything is in my laser safety essentials, and anodized aluminum sits comfortably in the safe-to-run column right next to the bigger specialty materials guide that ties the whole lineup together. If your metal work is more about the glass-and-mirror side of decorative marking, my mirror engraving settings cover that reflective-surface problem in detail.
Sourcing Anodized Blanks and Test Stock
As an Amazon Associate I earn from qualifying purchases.
For dialing in settings and for production I keep a stash of anodized aluminum blanks in black and a couple of colors, because cheap consistent stock is exactly what you want for burning test cards without flinching. If you are marking tags or dog tags at any volume, a roll of blank anodized tags saves a lot of cutting. The fiber marker itself I buy direct rather than through a marketplace, but the blanks are a genuine consumable.
Frequently Asked Questions
Can a diode laser engrave anodized aluminum?
Yes, but only dark anodized colors. A diode bleaches the dye at high power (90-100%) and slow speed (100-200mm/s) for a muted gray mark. It cannot touch light, clear-anodized, or bare aluminum. A fiber laser gives a far brighter silver result.
What fiber settings should I start at for anodized aluminum?
Start at 20-40% power, 800-1200mm/s, with a line interval near 0.01mm for solid fills, in the 20-60kHz frequency range. Use two or three fast passes to build contrast rather than one slow high-power pass, and confirm on a test card.
Why won’t my laser mark bare aluminum?
Bare aluminum reflects almost all laser light, so diode and CO2 do nothing to it. Anodized aluminum marks because the laser only has to remove the thin colored oxide layer. Engraving bare metal requires a fiber laser that couples into the reflective surface.
Is laser marking anodized aluminum permanent?
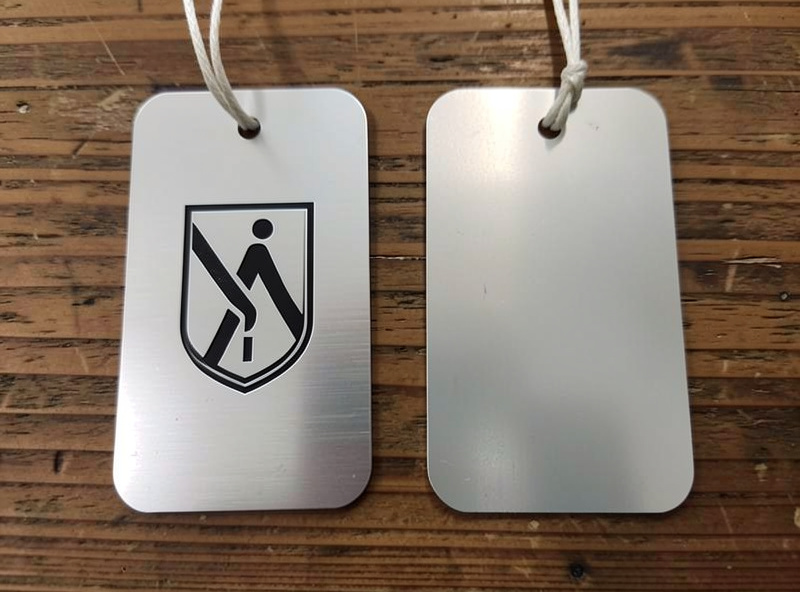
Yes. The mark is made by permanently removing the colored anodic layer to expose the bright metal underneath, so it does not wear, fade, or rub off. This is why anodized aluminum is a favorite for tags, plates, and identification marking.
Does anodized aluminum produce dangerous fumes?
Anodized marking produces minimal fume because only a microscopically thin dye layer is vaporized, not bulk material. Still run air assist on every pass to keep the lens clear, and keep exhaust running as standard practice. It is one of the cleaner specialty materials to laser.