Laser Engraving Mirror Settings: Front vs Back-Engrave
Good laser engraving mirror settings run roughly 15-25% power and 150-250mm/s on a diode or CO2, but the real decision is which side you engrave. Front-side frosts the glass; back-side burns through the silvered backing for a see-through reverse mark.
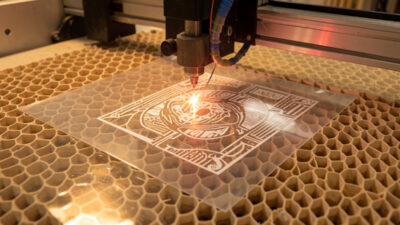
Mirrors trip up people who already know how to frost a drinking glass, because a mirror is two materials in one: a sheet of glass with a thin metallic coating on the back. That coating changes everything. I run mirror jobs across both my diode and my CO2 depending on the effect I want, and the difference between a crisp decorative mirror and a chipped, hazy mess comes down to understanding what each side actually does under the beam.
Front-Engrave vs Back-Engrave: What Each Does
Front-engraving a mirror frosts the top glass surface, producing a matte white mark identical to clear-glass frosting. Back-engraving fires through the glass to ablate the silver backing, leaving a transparent window you view from the mirror face. Back-engraving needs roughly 10-20% more power to punch through both layers.
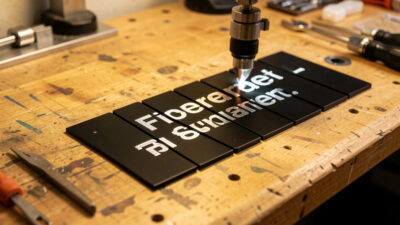
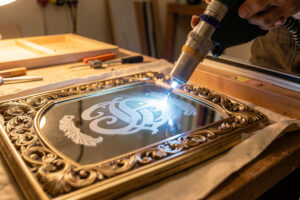
On my bench I default to back-engraving for anything decorative, like a monogram or a line drawing, because the result looks like the design is floating inside the mirror when light hits it from behind. Front-engraving is for when I want a simple frosted mark sitting on the surface, the same effect as engraving any clear glass. The trick most people miss is that a back-engrave is a mirror image: you have to flip your artwork horizontally in LightBurn before you run it, or the text comes out backwards when you turn the mirror around. I have ruined a mirror or two forgetting that flip, so it lives on a sticky note above my machine.
Diode and CO2 Settings for Mirrors
For front-frosting a mirror, start at 18-22% power, 200mm/s, single pass on a 40W diode. For back-engraving the silver, raise power to 30-45% at 150mm/s so the beam reaches and removes the backing. CO2 lasers do both faster but the same logic applies: low power frosts, higher power clears the backing.
These are starting points, not gospel, and the reason I never trust a number off the internet for a specific mirror is that backings vary wildly. A cheap craft mirror has a thin aluminum backing that clears at low power; a quality silvered mirror has a thicker, tougher coating that fights back. That is exactly why I run a materials test card on every new mirror lot before I commit a real piece, a small grid of power-and-speed squares so I can read off the cleanest setting. The same clear-glass frosting physics that drive my glass frosting guide apply to the front face; the back-side backing removal is the part that is unique to mirrors.
Two settings details decide more than raw power does on a mirror. The first is focus: a back-engrave fires through several millimeters of glass before it reaches the silver, so I set my focal point on the backing plane, not the front surface, by adding the glass thickness to my normal focus offset. Get that wrong and the beam is defocused by the time it reaches the coating, and you fight it with power you do not need. The second is line interval. I run a tighter interval on mirrors than on plain glass, around 0.08mm on the diode, because a back-engrave that looks solid from the laser side can show fine scan lines once you flip the mirror and view it through the glass with backlight. Tighten the interval before you reach for more power, every time.
Why Mirrors Chip and How to Stop It
Mirrors chip when the beam dumps too much heat too fast, fracturing the glass in large flakes instead of a fine frost. The fix is lower power with more passes, plus a thin layer of dish soap or wet paper towel over the surface to pull heat away. A clean frost should feel like fine sandpaper, not jagged flakes.
The chipping problem is worse on mirrors than on plain glass because you are often pushing higher power to reach the backing, and that extra energy wants to crack the glass. My rule is to never solve a weak mark by cranking power; instead I add a second pass at the same low power. Two gentle passes give a clean, even result where one hot pass gives you a halo of chips. The dish-soap trick genuinely works, a smear of plain washing-up liquid over the engrave area acts as a sacrificial heat sink, and it wipes off afterward with a damp cloth. It looks like a hack, but it is the single biggest quality difference on glass and mirror work.
There is a second chipping trap that catches people specifically on mirrors: the edges. The glass is most fragile at the cut edge of the blank, and an engrave that runs close to the rim will spall and flake far more readily than the same mark dead center. I keep decorative artwork at least 8-10mm in from any edge, and when a design genuinely has to reach the border I drop the power another few percent for the edge passes only. I also let a mirror reach room temperature before I run it, because a cold blank straight off a winter workbench is under more thermal stress and chips more easily than a piece that has sat in the shop an hour. None of this shows up in a settings chart, but it is the difference between a clean batch and one cracked piece in five.

Fume, Backing Coatings, and Safety
Engraving glass throws fine particulate that you do not want in your lungs, and mirror backings can include paint or lacquer layers over the silver that produce additional fume. Run air assist on every pass and ducted exhaust to the outside, never a recirculating fan in the room. Treat any unknown backing coating as suspect until tested.
The backing is the part to respect. Most mirror backings are aluminum or silver with a protective paint or copper layer, which is fine, but I have seen cheap decorative mirrors with mystery coatings, and an unknown coating is the same hard stop on my bench as any unidentified material: it does not run until I know what it is. The general material-safety discipline I apply to everything is laid out in my laser safety essentials, and the broader question of which materials belong nowhere near a laser is covered in my PVC dangers writeup. Glass and mirror particulate is not toxic the way chlorine gas is, but it is still abrasive dust you exhaust rather than breathe.
One safety line I never relax on mirrors: laser eyewear rated for my machine wavelength. A mirror is a reflector by definition, and a back-engrave bounces a non-trivial fraction of a 450nm diode beam straight back up off the silver toward your face. I match my glasses to the ANSI Z136.1 optical-density guidance for the wavelength I am running, with the lens marked per ANSI Z87.1, and I keep the enclosure lid closed even on a quick frost. The reflective nature of the workpiece is exactly why mirror jobs are the one glass task where I am most strict about eye protection.
Sourcing Mirror Blanks and Supplies
As an Amazon Associate I earn from qualifying purchases.
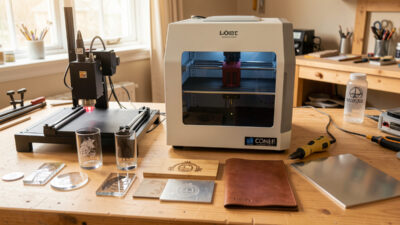
For practice and production I keep a stack of small craft mirror blanks on the bench, because they are cheap enough to burn through on the test-card stage and consistent in backing thickness, which matters when you are dialing in back-engrave power. For clean masking and protecting the front face during a back-engrave, a roll of laser-safe transfer tape keeps soot and chipping off the good surface and peels away without residue. Neither is the laser itself, which I buy direct, but these are the consumables a mirror job genuinely eats through.
Where Mirrors Fit in the Specialty-Materials Lineup
Mirrors are one of several glass-family specialty materials, each with its own quirks. For the full decision layer of which machine handles each odd material, my specialty materials guide is the hub that ties them together, and the clear-glass frosting techniques are the natural companion read since the front-face method is identical. If you are weighing whether a laser or a router is the right tool for a given sign or decorative piece, my laser versus CNC breakdown sorts that out.
Frequently Asked Questions
Do I need to mirror my artwork before back-engraving?
Yes. Back-engraving views the design from the front face through the glass, so any text or asymmetric artwork must be flipped horizontally in LightBurn first. Skip the flip and your text comes out reversed when you turn the mirror around.
What power and speed should I start at for a mirror?
For front-frosting, start at 18-22% power and 200mm/s on a 40W diode, single pass. For back-engraving the silver backing, raise to 30-45% power at 150mm/s. Always confirm on a test card, since mirror backings vary in thickness.
Why does my mirror chip instead of frosting cleanly?
Chipping means too much heat too fast. Lower the power and add a second pass instead, and apply a thin layer of dish soap or wet paper over the surface as a heat sink. A clean frost feels like fine sandpaper, not jagged flakes.
Can a diode laser back-engrave a mirror?
Yes. A 40W-class diode can ablate the silver backing at roughly 30-45% power and 150mm/s, though it may need a second pass on thicker backings. CO2 does it faster, but both work because you are removing the soft metal coating, not cutting glass.
Is mirror engraving safe without ventilation?
No. Glass engraving throws fine abrasive particulate and mirror backings can add paint or lacquer fume. Run air assist on every pass and ducted exhaust to the outside, and treat any unknown backing coating as suspect until you have identified it.