Laser Marking vs Engraving vs Etching: The Real Difference
Short version, because the internet refuses to say it plainly: laser marking changes the color or contrast of metal without removing material, laser engraving ablates metal away to leave a recess you can feel, and laser etching is a shallow melted layer in between. Three different processes, three different machines, three different reasons to pick one.
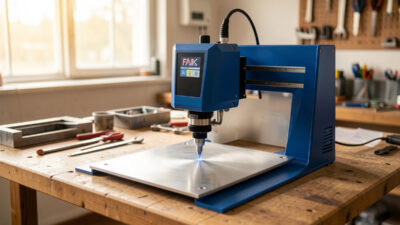
I run four laser classes on my bench side by side — an xTool S1 enclosed diode, an Atomstack X20 Pro I enclosed myself, an OMTech Polar 350 CO2 with a chiller and honeycomb, and a desktop fiber/MOPA marker for metal. The fiber is the one that earns its keep on steel and titanium, and it’s also the machine that taught me how loosely the words marking, engraving, and etching get thrown around. Influencer demos use them as interchangeable buzzwords. They are not interchangeable. The difference is physical, it’s measurable, and it decides whether you keep a part’s finish and strength or chew a trench into it.
What “marking, engraving, etching” actually mean
The cleanest way to separate the three is by what happens to the material. Marking removes essentially nothing — you’re altering the surface chemistry or color. Engraving removes material, full stop. Etching sits in the muddy middle, melting a very thin top layer. In my test logs the depth difference spans roughly three orders of magnitude, from sub-micron to tenths of a millimeter.
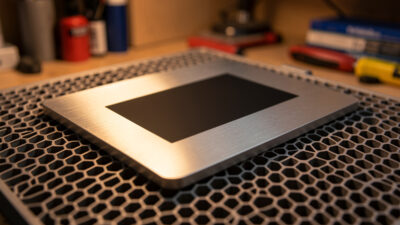
Laser marking changes color or contrast with little or no material removed. On metal this is almost always done with a fiber or MOPA laser: you tune power and speed and frequency so the beam heats the surface just enough to oxidize it (heat-tint annealing) without ablating it. The result is a dark or colored mark that’s flush with the surface — run your fingernail across it and you feel nothing. On plastics the same word covers foaming or carbon migration, but on metal think annealing and oxidation. The finish stays intact, the part keeps its dimensions, and corrosion resistance on stainless is largely preserved because you haven’t broken through the passive layer the way you do when you cut a recess.
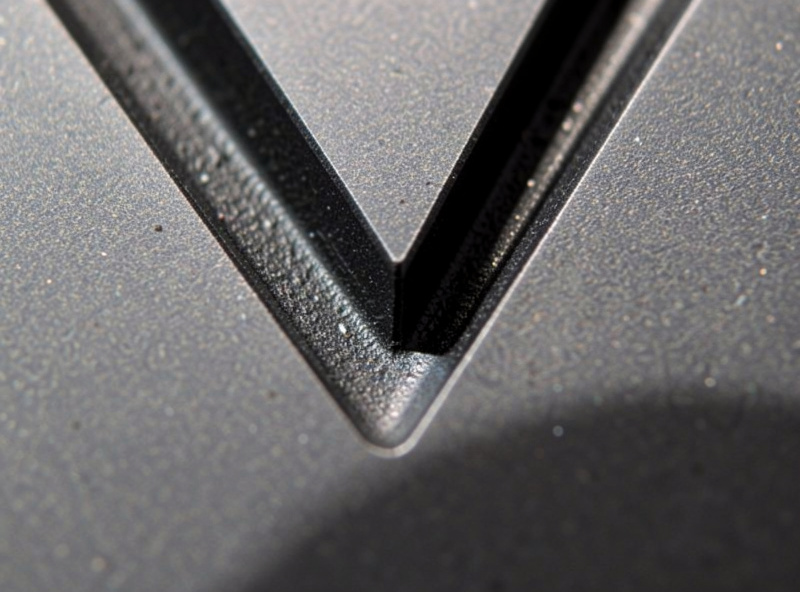
Laser engraving ablates material and leaves a recess. The beam vaporizes metal pass after pass until there’s a groove deep enough to feel — and on a real engraving job you absolutely can feel it, sometimes 0.1 to 0.5 mm or deeper if you keep stacking passes. This is a fiber laser job on metal; CO2 and diode machines engrave organics like wood, leather, and anodized aluminum, but they don’t ablate bare steel. Engraving trades the surface finish for permanence: the recess survives sandblasting, wear, paint, and abrasion because the geometry itself is changed, not just the color.
Laser etching is where the language breaks down. Strictly, etching means chemical or acid removal — you mask a part, expose it to an etchant, and the acid eats the unmasked metal. That’s a finishing-trade process, not a laser one. But in laser marketing “laser etching” almost always means a shallow melt: the beam melts and slightly raises or roughens a very thin top layer, shallower than engraving, often only microns deep. The chemistry and finishing trade reports keep these separate; laser vendors collapse them. So when a product page says “laser etching,” nine times out of ten it means fast, shallow, low-contrast melt-marking — not acid, and not a deep tactile recess.
The centerpiece: the three processes side by side
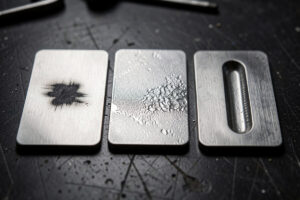
BLUF: if you only memorize one thing, memorize this table. It’s the chart I wish I’d had before I burned through a box of test coupons learning the difference. The single biggest predictor of which process you want is whether the part needs to keep its surface finish — that one question routes you to marking, etching, or engraving faster than any spec sheet.
| Process | What happens to the material | Depth | Can you feel it? | Durability | Typical machine | Best use |
|---|---|---|---|---|---|---|
| Marking | No removal — surface oxidizes or anneals; color/contrast change only | Sub-micron, surface only | No — flush with the surface | Excellent if finish stays sealed; can rub on soft anneals over years | Fiber / MOPA | Tools, medical, jewelry, anything that must keep its finish and strength |
| Etching (laser, the loose term) | Thin top layer melts; slightly raised or roughened | A few microns to ~0.05 mm | Barely — a faint texture, not a groove | Good; faster than engraving but shallower so it wears sooner | Fiber / MOPA (CO2 / diode on coatings) | Fast, high-throughput shallow contrast where depth doesn’t matter |
| Engraving | Material ablated and removed; a real recess is cut | ~0.1 to 0.5 mm or deeper with stacked passes | Yes — you feel the recess with a fingernail | Best — survives abrasion, sandblasting, paint, and wear | Fiber (deep work) | Serial numbers, tool ID, parts that get handled, sandblasted, or worn |
Depth, feel, and durability — the honest comparison
BLUF: the trade is always finish-versus-permanence. A flush anneal mark survives indefinitely as long as the surface stays sealed; a deep engraved recess survives almost anything but destroys the original finish. In my logs a deep engrave runs five to ten times slower than a contrast mark for the same area.
Feel is the field test I trust most. Drag a fingernail across the mark. Nothing? It’s a true mark — annealing or oxidation, no material gone. A faint drag, like fine sandpaper? That’s etching, a shallow melt. A clear catch and a groove? That’s engraving. I’ve handed parts to people who swore a dark fiber mark was “engraved” until they ran a nail over it and felt nothing — the contrast fooled them, but the surface was untouched.
Durability follows depth, mostly. A deep engrave is the most abuse-tolerant because the geometry is changed — you can sandblast a part and still read the recess. But there’s a catch on stainless I learned the hard way: cutting a recess breaks the passive oxide layer, so a deep engrave on stainless can corrode at the cut edges if it’s exposed to salt and never re-passivated, while a clean anneal mark leaves that passive layer intact and actually resists corrosion better. If you do engrave stainless that will see salt, re-passivate the cut edges per ASTM A967 before the part goes into service. So “deeper is more durable” is true for abrasion and false for corrosion. Pick for the failure mode you actually face.
Which machine class does which
BLUF: for bare metal, fiber and MOPA do all three — they’re the only hobby-accessible class that puts enough peak power into a small enough dot to mark steel. CO2 and diode machines engrave organics and coatings, not bare metal. That single fact eliminates most of the confusion.
On my bench the division is clean. The desktop fiber/MOPA marker handles every metal job: annealing for marks, low-power fast passes for “etching,” and stacked high-power passes for deep engraving. MOPA specifically — adjustable pulse duration — is what unlocks the color heat-tint marks and the cleanest annealing on stainless. The xTool S1 and Atomstack X20 Pro diodes and the OMTech Polar 350 CO2 are organics machines: wood, leather, acrylic, slate, and anodized or coated aluminum where the laser burns or removes a coating rather than ablating bare steel. If someone tells you their diode “engraves stainless,” they’re either using a marking spray that burns onto the surface or they’re seeing a faint discoloration, not a recess.
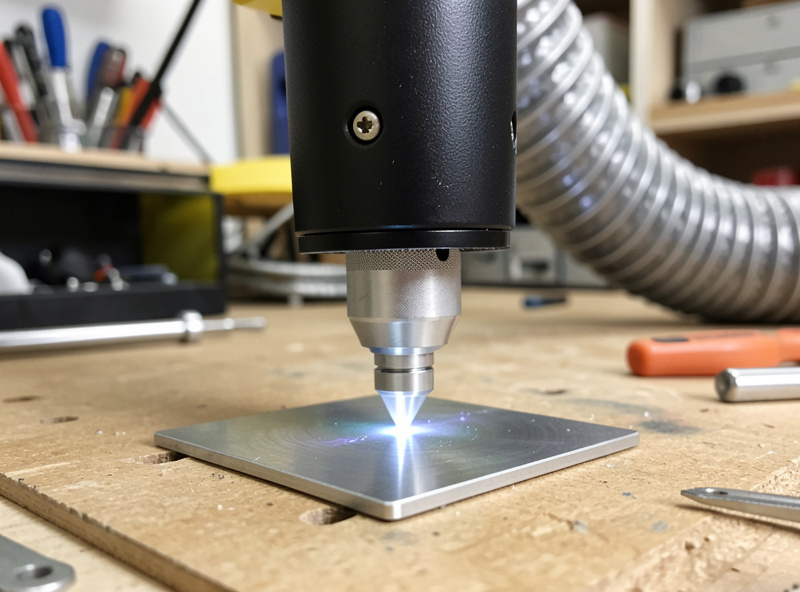
That’s also why deep engraving on metal is firmly a fiber job. No diode or CO2 in the hobby range removes meaningful amounts of steel. If you need a tactile recess in metal, you need fiber, and you need patience — depth comes from passes, and passes cost time.
When to pick each one
BLUF: choose marking when the finish and strength must survive, engraving when the mark must survive handling and wear, and etching when you want fast shallow contrast and depth is irrelevant. The wrong choice either destroys a part you needed intact or wears off a mark you needed to last.
Reach for marking when removing material is a problem. Surgical and medical instruments need to keep their corrosion resistance and can’t harbor bacteria in a recess, so they’re annealed, not engraved — the relevant standards push exactly this. Cutting tools and gauges need their dimensions and hardness untouched. Jewelry needs the finish flawless. In all of these you want a flush, sealed, color-contrast mark and nothing removed.
Reach for engraving when the mark gets abused. Tool identification that survives a workshop, serial numbers on parts that get sandblasted or painted, anything handled hard for years — you want a recess deep enough that wear can’t erase it. Accept that you’re giving up the original finish and, on stainless, that you may need to passivate the cut.
Reach for etching — the loose, shallow-melt kind — when you want speed and contrast and don’t care about depth or feel. Batch-marking blanks, decorative work, anything where throughput beats permanence. It’s the middle setting: faster than engraving, more tactile than a pure anneal, and good enough for a lot of jobs that don’t need to survive a decade of abrasion. If you want to stock a basic fiber-friendly metal sampler to test these settings yourself, you can browse a fiber laser metal test coupon set and run your own power and speed card before committing to a process. As an Amazon Associate I earn from qualifying purchases.
Safety doesn’t change with the process
BLUF: marking, engraving, and etching all aerosolize metal and burn off surface contaminants, so the safety floor is identical and non-negotiable. Air assist on every job, ducted exhaust to the outside, fire kit in reach, and never — ever — run a job unattended.
The process you pick changes the depth, not the hazards. I run air assist on every cut and mark to clear fume and debris off the surface and keep it out of the optics. My enclosures duct exhaust outside, never recirculated — metal-marking fume and any coating burn-off goes out the wall, not back into the room. A fire kit stays within reach of the bench because lasers start fires, and I never leave a running job, not for a marking pass, not for anything. And the PVC ban still applies even on metal work: never put PVC, vinyl, or unknown-coated stock anywhere near the beam, because chlorine gas from chlorinated plastics will wreck your lungs and corrode the machine. If you don’t know what the coating is, you don’t run it. I also wear OD-rated goggles matched to 1064nm and treat the ANSI Z136.1 laser-safety standard as the floor — a fiber beam bouncing off polished steel is an invisible eye hazard the marking videos never mention.
Bottom line
So when a reader asks me “is laser etching the same as engraving?” — no, and that’s the whole point of this article. Etching, in laser-speak, is a shallow melt; engraving is a real cut; and the vendor who uses them interchangeably either doesn’t know or doesn’t want you to. A common follow-up is “which lasts longer, a mark or an engrave?” — for abrasion, the engrave; for corrosion on stainless, the flush mark, because the engrave breaks the passive layer. And the question I get most: “can my diode engrave metal?” — no, not bare metal; it’ll burn a marking spray onto the surface, which is a coating mark, not metal removal.
Decide by the question that actually matters: does the part need to keep its finish and strength? Then mark it. Does the mark need to survive handling and wear? Then engrave it. Do you just need fast shallow contrast? Then etch it — knowing “etch” here means a shallow melt, not acid. Match the process to the failure mode, run a power and speed test card on a scrap from the same lot before you touch the real part, and keep the safety floor identical no matter which of the three you choose.