Laser Engraving Fabric Settings: Engrave and Cut Cloth
Good laser engraving fabric settings run low and fast: roughly 15-30% power and 300-500mm/s for a tonal distressed engrave on natural fibers. The two hard rules: tape it flat so it cannot lift, and never laser fabric of unknown composition.
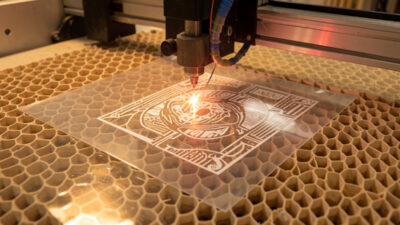
Fabric is where a diode owner gets the best return on every watt, because you are not vaporizing a dense material, just scorching surface fibers for tonal contrast or slicing a thin sheet. Denim and canvas take a faded engrave that genuinely looks like years of wear. But fabric is also the material on my bench most likely to flare, so the safety discipline tightens, not loosens, when I load a sheet of cloth.
Laser Settings for Engraving Fabric
For a tonal engrave on natural fabric, start at 15-30% power and 300-500mm/s on a 40W diode. You are lightly scorching the top fibers for contrast, not burning through. Build the effect up with a second pass rather than blasting it dark in one, because once fabric burns through there is no undo.
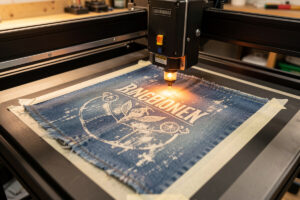
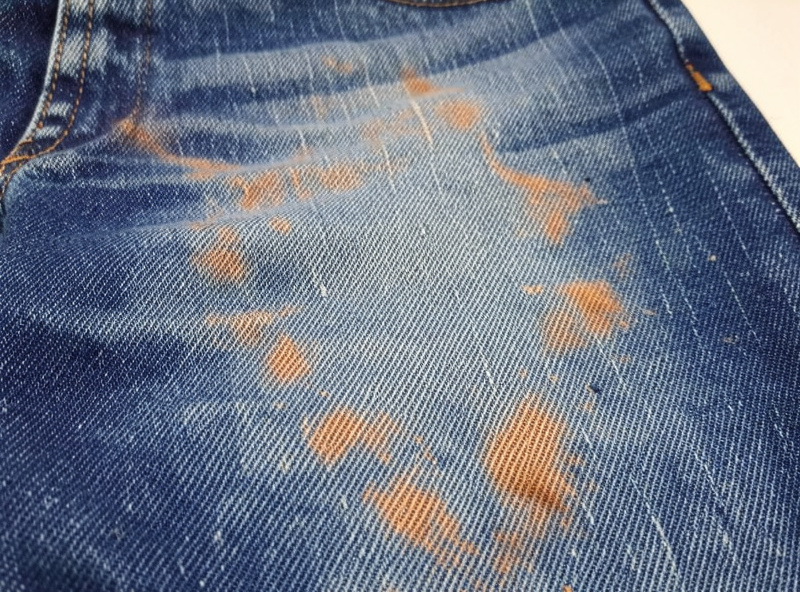
The look you are after on most fabric engraves is a subtle, weathered tone, like the faded patch on a well-worn pair of jeans. Natural fibers, cotton, denim, canvas, linen, felt, all scorch to a controlled brown that reads as deliberate distressing. I keep the power low on the first pass and check the result, because fabric is unforgiving: an over-dark engrave looks scorched and cheap, and a hole is permanent. Denim is my favorite to work with because the indigo dye sits on the surface and the laser lifts it to expose the lighter cotton underneath, giving a crisp two-tone effect at very low power. For the wider organics lineup and which machine suits each, my specialty materials guide ties it together.
Cutting Fabric and Felt Cleanly
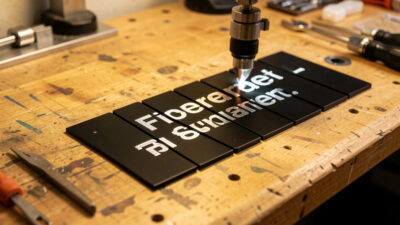
Cutting fabric and felt takes a single pass at moderate power, around 40-70% at 100-200mm/s on a diode, depending on thickness. The beam seals the cut edge as it goes, which on synthetics means a fused edge that resists fraying, and on natural fibers a lightly charred clean line.
One of the genuine advantages of laser-cutting fabric over scissors is that the beam cauterizes the edge, so felt appliqué and canvas patches come off the bed without the fraying you fight when you cut by hand. Felt is a joy to cut, it severs in one clean pass and the edge stays crisp. The thing to watch is that a sealed synthetic edge is melted plastic, so I only cut synthetics I have positively identified as safe, and I keep the speed up so the heat does not spread into a wide stiff melt zone. For anything I am unsure about, the cut does not happen until I know the fiber content.
Diode or CO2 for Fabric?
A diode handles fabric engraving and cutting well for the thin, natural materials most people work with, at the low powers fabric needs. A CO2 laser cuts thicker stacks and felt faster and with a cleaner edge, and couples into a wider range of fibers, but for most fabric work a diode is entirely sufficient.
I reach for my diode on the vast majority of fabric jobs because fabric does not need much power, and the diode’s tight blue spot gives a crisp tonal engrave on denim and canvas. Where the CO2 earns its place is volume and thickness: cutting a deep stack of felt for layered appliqué, or slicing heavyweight canvas where the diode would need multiple slow passes. The CO2’s 10.6-micron wavelength also couples into a slightly broader range of materials, but honestly, for the gift-and-craft fabric work that most home operators do, a diode covers it. If you are still deciding between machine classes for the materials you run, my breakdown of where each laser earns its keep across the specialty lineup is the place to start, and the same low-power, fast-speed, tape-it-flat logic applies regardless of which box you own.
One subtlety that trips people up: fabric engraving is a surface-tone job, so focus matters more than power. A slightly defocused beam spreads the heat and gives a softer, more even tonal engrave on textured fabric, while a tightly focused beam can cut individual fibers and look harsh. I sometimes deliberately defocus a hair for a smoother distressed look on canvas, the opposite of what you want on hard materials. It is the kind of counterintuitive trick you only learn by running the material, and it is exactly why the test card matters even on something as forgiving as fabric.
Hold It Flat or Watch It Burn
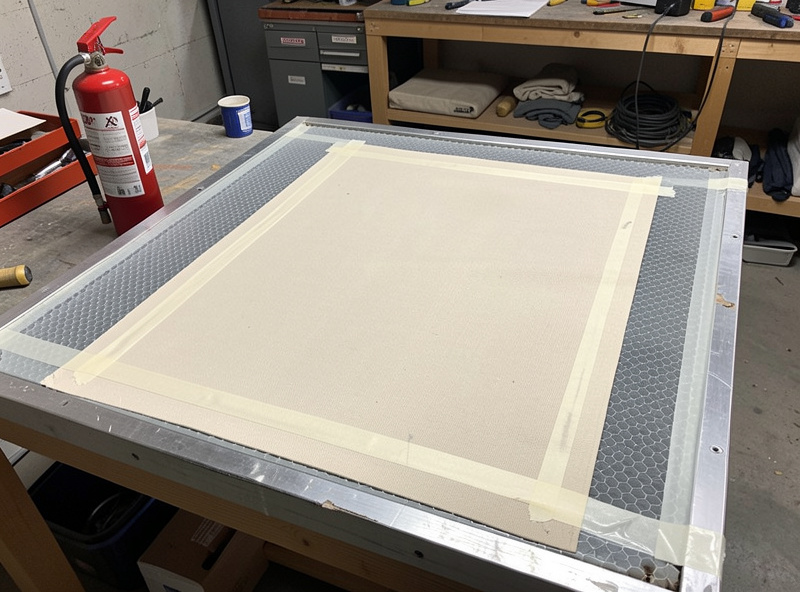
Loose fabric lifts in the air-assist stream, and a lifted edge near a hot beam is a fire waiting to start. Tape or weight every fabric piece flat against the bed before running, and never walk away from a fabric job, not even for thirty seconds. Of every material I run, dry cloth is the one most likely to flare.
This is the rule I am most rigid about with fabric. A corner that lifts into the focal point can ignite, and a flame on dry cloth spreads fast. I tape the fabric down at every edge with low-tack masking tape or pin it under a honeycomb hold-down, run air assist to keep the beam path clear, and I physically stay at the machine the entire time with the extinguisher and fire blanket within reach. The never-unattended rule is not a suggestion on fabric, it is the whole game. The complete fire-and-fume discipline I run on every material is in my laser safety essentials.
The Coatings You Cannot See
The real fabric danger is not the fiber, it is the coating you cannot see. Poly-blends with flame-retardant finishes, vinyl-backed upholstery, and waterproof laminates can outgas chlorine or other toxics. Never laser fabric of unknown composition; when in doubt, burn a corner scrap by hand and smell it first. The same flammability that the 16 CFR 1610 clothing-textile standard classifies, fast-igniting raised-fiber fabrics versus slow-burning flat weaves, is exactly the property that decides how readily a fabric flares under a laser, which is why a quick hand burn tells you more than any settings chart.
This is the same discipline I apply to any unidentified material on the bench: it does not run until I know what it is. Pure natural fibers are safe; the problem is the modern fabric that looks like cotton but carries a synthetic finish, or the upholstery fabric with a vinyl backing that is effectively PVC. PVC near a laser means chlorine gas, which corrodes the machine and harms your lungs, and the full reasoning is in my PVC dangers writeup. My field test for an unknown fabric is to snip a corner and burn it by hand: natural fibers smell like burning paper or hair, while a sharp, acrid, chemical smell is the signal to stop. If I cannot identify it with confidence, it does not go near the laser. The burn test also tells you about melt behavior: cotton and linen leave a soft gray ash, wool self-extinguishes and smells like burning hair, while synthetics shrink away from the flame and harden into a plastic bead. That bead is your warning that the material will melt rather than scorch under the laser, which both ruins the look and, if it is the wrong synthetic, can release fumes you do not want in the room. None of this replaces knowing the fiber content outright, but when a thrift-store remnant has no label, the hand burn is the difference between a safe run and a corroded machine.
Sourcing Fabric and Hold-Down Supplies
As an Amazon Associate I earn from qualifying purchases.
For consistent results I work with known natural materials like wool felt sheets, which cut beautifully and carry no mystery coating, and I buy them in known compositions so there is never a fiber-content guess. To keep pieces flat without adhesive residue on the good face, a roll of low-tack masking tape is the cheap insurance that stops a lifted edge from becoming a fire. The laser itself I buy direct, but felt and tape are genuine fabric-job consumables.
Projects Fabric Engraving Is Made For
Fabric engraving shines on a specific set of projects: distressed denim patches and jackets, personalized canvas tote bags, felt ornaments and appliqué, embroidered-look monograms on natural cloth, and custom patches cut clean without fraying. The tonal, faded aesthetic is the whole point, so lean into it rather than fighting for deep contrast.
The projects I come back to are the ones where the laser’s particular look is a feature, not a compromise. A faded monogram on a canvas tote reads as intentional, vintage styling. Denim patches with a distressed laser-engraved design look like genuine wear that no embroidery machine can fake. Felt cuts cleanly into ornaments and layered shapes that would fray if cut by hand. The mistake is trying to make fabric do what wood or acrylic does, a bold, deep, high-contrast mark, when the material’s strength is exactly the soft, weathered tone it produces at low power. Once you stop fighting the material and design for the faded look, fabric becomes one of the most rewarding specialty materials on the bench. Pair it with the cut-edge sealing the laser gives, and you can produce finished patches and appliqué pieces in a single operation that would take several steps by hand.
Where Fabric Fits in the Specialty Lineup
Fabric is one of the easier specialty materials for a diode owner once the safety habits are locked in, sitting alongside organics like bamboo and cork in the diode-friendly column, and the same unknown-coating caution I apply here is the one that governs odd reflective stock like an unlabeled mirror backing in my mirror engraving guide. The decision layer of which machine handles each odd material lives in the specialty materials hub, and the master materials guide is the wide-angle reference for everything else I run.