Edge-Lit Acrylic Night-Light: A CO2 Laser Build
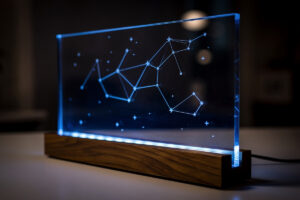
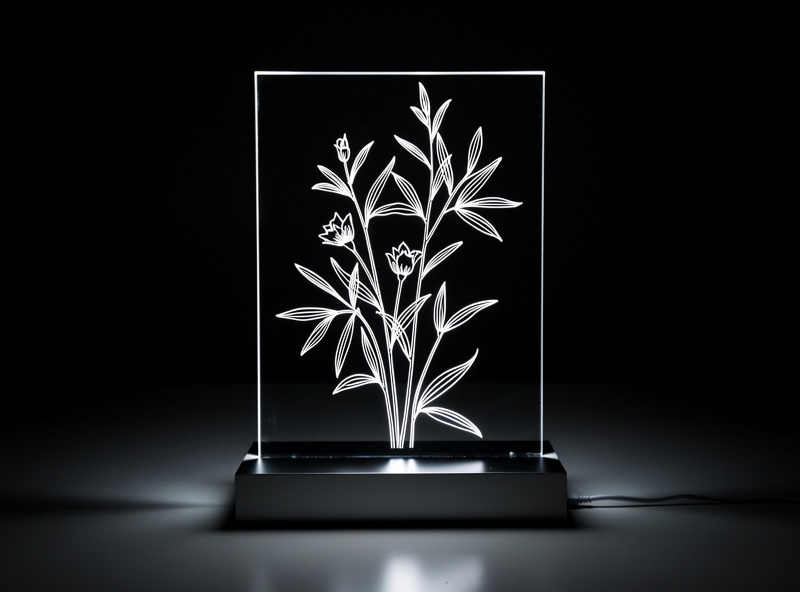
An edge-lit acrylic night-light is the single most impressive beginner-accessible project a laser makes: a sheet of clear acrylic, engraved on one face, that glows along the engraved lines when an LED base lights its edge. The artwork appears to float in mid-air while the acrylic itself stays nearly invisible. It is a CO2 project — a blue diode beam barely couples with clear cast acrylic — and getting the engrave depth and the base fit right is the whole game.
This build covers why you need cast acrylic and a CO2 laser, how deep to engrave for an even glow, cutting the panel and the base slot to a press fit, and choosing the LED base. It is one of the standout intermediate builds on the laser project ideas hub, and it leans hard on getting your acrylic cutting settings dialed in first.
Why Cast Acrylic and a CO2 Laser
Edge-lit panels require clear cast acrylic cut on a CO2 laser. Cast acrylic engraves with a bright, frosty white mark that catches and scatters light perfectly for edge-lighting, while extruded acrylic engraves greyer and duller. And the CO2 is non-negotiable for the clear material — a diode’s blue beam passes straight through clear acrylic instead of cutting it.
The physics here matters and it is exactly the kind of right-machine-for-the-material decision the whole site is built around. A diode laser emits blue light, and clear acrylic is transparent to that wavelength, so the beam does not couple — it passes through with almost no effect, which is why diode owners trying to cut clear acrylic get a slow, scorched, frustrating mess. A CO2 laser emits far-infrared light that acrylic absorbs readily, cutting it cleanly with a flame-polished edge and engraving it with a crisp frosted line. Cast acrylic specifically is the right stock because the casting process gives an even, internally consistent sheet that engraves white and bright; extruded acrylic is cheaper but engraves a duller grey that edge-lights poorly. If you are choosing between cast and extruded for any acrylic job, the acrylic settings guide covers the difference in depth, and for the broader machine-class decision the diode vs CO2 vs fiber comparison explains why each material wants a different beam.
Engrave Depth for an Even Glow
Engrave the design on the back face of the panel at a moderate, consistent depth — deep enough to scatter light brightly, even enough that the whole design glows uniformly. Too shallow and the lines barely light; too deep and you risk cracking the panel or burning through. A clean medium-depth frosted engrave is the target.
The engraved lines work by total internal reflection: light from the LED base travels through the acrylic and bounces along inside it until it hits an engraved spot, where the frosted surface scatters it out toward your eye, making that line glow. So the brightness of each line depends on how much frosted surface area it presents — which is why depth and consistency matter. I engrave on the back face so the smooth front face stays optically clear, and I keep the engrave at a moderate raster depth across the whole design so no area glows noticeably brighter than another. Run a test on a scrap strip first to dial the depth, because too aggressive an engrave on thin acrylic can stress-crack it. Fine line work and stippling actually edge-light beautifully, so detailed designs reward this project rather than fighting it. Leave the protective masking on the front face during the engrave to keep it scratch-free, and pull it only at the end.
Cutting the Panel and the Base Slot
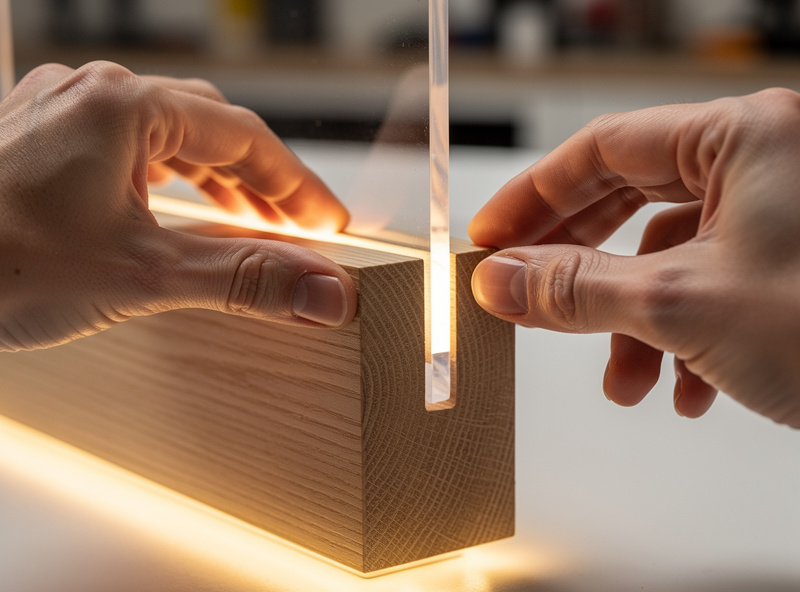
Cut the panel outline and a base with a slot sized to hold the panel in a press fit. The slot width must match your acrylic thickness closely — too tight and the panel will not seat or will crack, too loose and it wobbles and the light leaks. A press fit holds the panel upright and couples the LED light into the edge.
The base can be acrylic, wood, or a purpose-made LED stand. If you cut your own acrylic or wood base, the slot is the critical dimension: cut a test slot first and check the fit against your panel’s actual thickness, remembering that nominal “3mm” acrylic is often 2.8mm or so. You want the panel to slide in snugly and stand without rocking, with its engraved bottom edge sitting close to the LEDs so the light couples in evenly. A slot just slightly wider than the panel, with the kerf accounted for, gives the right press fit. If you are stacking multiple panels for a layered effect, cut parallel slots. The bottom edge of the panel should be flame-polished or left as a clean CO2 cut so light enters evenly rather than scattering at a rough edge.
Choosing the LED Base
Use an LED base designed for edge-lit acrylic — a small stand with a row of LEDs in the slot, usually battery or USB powered, often with color-changing options. The LEDs must sit in the slot directly under the panel’s edge so their light couples into the acrylic; a generic light shining on the panel face will not produce the edge-lit glow.
Purpose-made acrylic light bases are inexpensive and save you wiring your own, and the color-changing ones add a lot of appeal for a night-light. The key requirement is that the light enters through the bottom edge of the panel, not its face — edge-coupling is what makes the engraved lines glow while the sheet stays dark. If you build your own base, a strip of LEDs recessed into the slot pointing up into the panel edge does the same job. Diffused warm-white LEDs suit a calm night-light; RGB bases suit a feature piece. Because the acrylic itself is nearly invisible when lit, the base is also the visible “object” on a shelf, so a clean wooden base often looks more finished than a plain acrylic one. Match the base length to your panel width so the whole bottom edge is lit evenly with no dark gaps.
Finishing and Display
Finish by removing all masking, cleaning the panel with a microfiber cloth and acrylic-safe cleaner, and seating it in the base. Display it somewhere dim — edge-lit pieces are dramatic at night and subtle in daylight, which is exactly what makes them work as a night-light or a personalised gift.
Handle the finished panel by its edges; fingerprints on the clear faces show under the light. An acrylic-safe cleaner avoids the hazing that some household cleaners cause on acrylic. Because the engraved artwork is the whole point and the sheet disappears when lit, these make outstanding personalised gifts — a name, a date, a line-art portrait, or a constellation all edge-light beautifully. The same care that goes into a clean engrave on the cutting board or coaster projects applies here, just aimed at optical clarity instead of food safety. Seat the panel, switch on the base, and the design floats in light.
Disclosure: Some links below are affiliate links. If you buy through them I may earn a small commission at no extra cost to you. I only point to materials and parts I actually use on my own bench.
For the panels, sheets of clear cast acrylic sheet in 3mm are what edge-light best — buy cast, not extruded, for the bright frosted engrave. For the light, a set of LED bases for edge-lit acrylic with color-changing options saves wiring your own and couples the light correctly into the panel edge.
Further Reading
- Laser Engraving Project Ideas: The Project Hub
- Acrylic Laser Cutting Settings: Cast vs Extruded
- Diode vs CO2 vs Fiber Laser
- Glass Laser Engraving: The Frost Technique
- Laser-Cut Christmas Ornaments
- Custom Laser-Engraved Wood Signs
Frequently Asked Questions
Can a diode laser make edge-lit acrylic?
No, not with clear cast acrylic. A diode’s blue beam passes straight through clear acrylic instead of cutting or engraving it. Edge-lit panels need a CO2 laser, whose infrared beam acrylic absorbs and frosts cleanly.
What acrylic should I use for edge-lit panels?
Clear cast acrylic. It engraves a bright frosty white mark that scatters light perfectly for edge-lighting. Extruded acrylic engraves a duller grey and edge-lights poorly, so cast is worth the slight extra cost.
How deep should I engrave an edge-lit panel?
A moderate, consistent depth on the back face: deep enough that the frosted lines scatter light brightly, even enough that the whole design glows uniformly. Test on a scrap strip first, since too deep can stress-crack thin acrylic.
How does an edge-lit acrylic night-light glow?
Light from the LED base travels inside the acrylic by total internal reflection until it hits an engraved spot, where the frosted surface scatters it out toward your eye. Only the engraved lines glow; the sheet stays clear.
Why does the light need to enter the panel edge?
Edge-coupling is what makes the engraved lines glow while the sheet stays dark. A light shining on the panel face just illuminates the whole sheet. The LED base seats the panel so light enters the bottom edge.