Masking Acrylic Before Laser Cutting: The Clean-Part Method
Masking is the cheapest upgrade to your acrylic results, and most beginners either skip it or do it wrong. That thin paper or plastic film on a sheet of cast acrylic isn’t just shipping protection — whether you leave it on, peel it, or replace it with transfer tape decides whether your finished part comes off the bed clean or smeared with a milky film of deposited smoke. After running both filmed and bare acrylic through my OMTech Polar 350 more times than I can count, my masking routine is as fixed as my air-assist habit.
My routine comes down to three rules I never break: leave the film on for cutting and peel it after; for engraving, remove the film only over the engraved area; and if a sheet arrives bare, apply paper transfer tape before you cut. Below is the full reasoning — how masking protects the surface, paper versus plastic film, the transfer-tape substitute, and the cases where masking actually hurts you. It pairs naturally with the cast versus extruded decision, since the sheet you buy and how you mask it together determine how clean the finished part looks. This piece deep-dives one habit from the wider laser cutting acrylic guide.
What Masking Actually Does
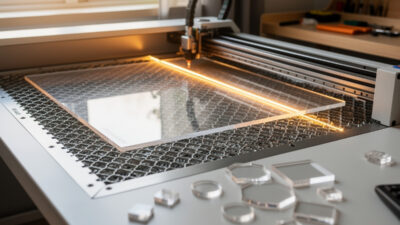
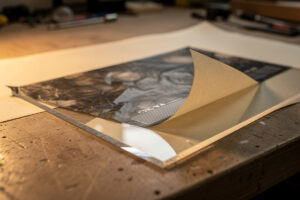
When a laser cuts or engraves acrylic, it vaporises material and that vapour redeposits as a fine smoke residue on the surrounding surface. On bare acrylic that residue lands directly on the part, leaving a hazy, sticky film — especially around engraving, where there’s the most vapour and the least airflow clearing it. Masking puts a sacrificial layer between the smoke and the acrylic, so the residue lands on the film and peels away with it.
For cutting, the benefit is mostly along the cut line and on the top face near it. For engraving, masking is even more valuable because raster engraving generates a broad cloud of fine residue across the whole engraved zone. The difference between a masked and unmasked acrylic engrave is dramatic: masked comes off crisp and clean, unmasked needs scrubbing with isopropyl alcohol that never quite restores the original clarity. Air assist helps clear smoke but it doesn’t replace masking — the two work together, and neither replaces proper extraction. Masking keeps the residue off the part; ducted ventilation keeps it out of your lungs. I run all three on every acrylic job, because they each solve a different part of the same smoke problem.
Paper Film vs Plastic Film vs Transfer Tape
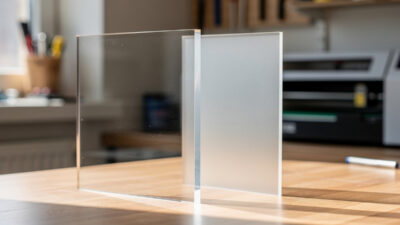
Cast acrylic ships with one of two factory films, and you can add a third yourself. Paper film is the most laser-friendly: it stays put, doesn’t melt at the kerf, takes smoke residue well, and peels cleanly. Plastic (polythene) film protects the surface fine for handling but can melt and fuse slightly at the cut edge, occasionally leaving a thin lip you have to pick off — it’s not a dealbreaker, but paper is cleaner to cut through. Paper transfer tape, the low-tack masking sign-makers use, is what I apply to any sheet that arrives bare or that I’ve already peeled.
If you’re buying acrylic specifically for laser work and have the choice, paper-masked cast acrylic is the nicest to run. When I can’t get it, I peel whatever film is on and re-mask with paper transfer tape, because consistency in the masking makes my engrave results consistent too.
| Masking | Laser behaviour | Best for |
|---|---|---|
| Paper film (factory) | Cuts clean, no melt, peels easily | Cutting and engraving |
| Plastic film (factory) | Can melt slightly at kerf | Handling protection; OK for engrave |
| Paper transfer tape (added) | Clean cut, low-tack, easy peel | Bare sheets, re-masking, sign work |
| No masking | Smoke deposits on surface | Only when masking would trap heat |
Masking for Cutting vs Masking for Engraving
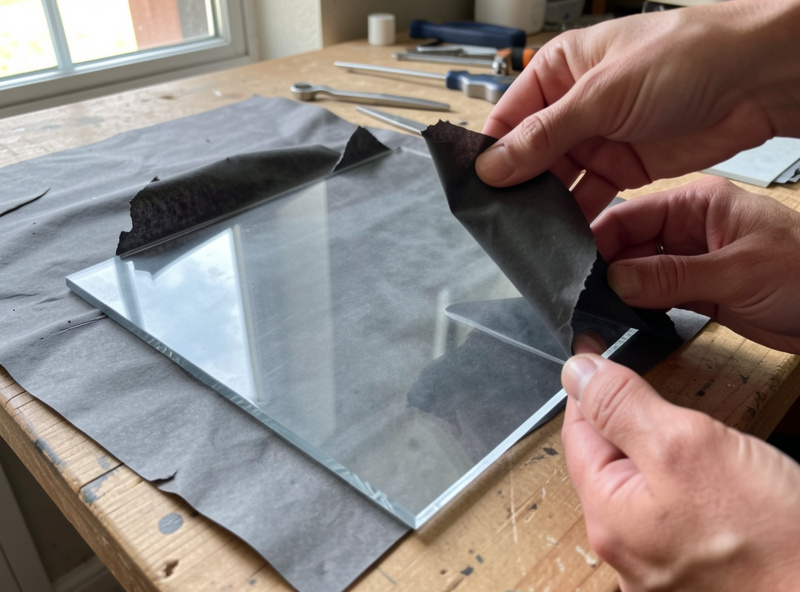
The two jobs want slightly different handling. For cutting, I leave the film on both faces and cut straight through it. The film protects the top surface from edge smoke and the part drops out clean; I peel both films once the part is off the bed. The only time I peel first is if the plastic film is fusing badly at the kerf, which is rare with paper.
For engraving, it’s more nuanced. The engraved frost has to form on bare acrylic, so the film must come off the area you’re engraving — but I leave the film on everywhere else for protection and to catch the broad engraving smoke. The clean approach: peel only the film over the design, run the raster, and the surrounding masked area stays pristine. For a part that’s both engraved and cut, the order of operations matters, and here is the exact sequence I run:
- Mask the whole sheet — factory paper film, or paper transfer tape if it arrived bare.
- Peel only the engrave area. Lift the film just over the region you’ll raster, leaving everything else covered.
- Run the engrave first. The frost forms on bare acrylic while the surrounding masking catches the broad engraving smoke.
- Cut last, with the outline still masked. Cut straight through the remaining film so the cut-line smoke lands on the masking, not the part.
- Peel everything after the part drops out. The whole sheet comes off clean in one go.
Get that order wrong — cut first, or engrave through film that should have been peeled — and you either smear the engrave or lose the cut-line protection. This is the same engrave-then-cut logic I use when matching the acrylic laser cutting settings to a two-operation job, and it’s exactly the workflow behind clean edge-lit panels, where a smeared engrave would ruin the glow.
When Masking Hurts You
Masking isn’t free of downsides, and there are real cases to skip it. On very fine, detailed engraving, thick or fibrous paper masking can blur tiny details or shed fibres into the frost. On deep multi-pass engraving, masking can scorch and the burnt paper can stick into the engraved channel, leaving residue that’s worse than the smoke would have been — for deep engraves I often run bare and clean afterwards. And on some flame-polish-edge jobs where you’re cutting clear acrylic for a perfectly polished edge, the film makes no difference to the edge itself (it only protects faces), so it’s purely a face-protection decision.
The judgement call: mask when surface cleanliness matters and the engrave is shallow; consider running bare when you’re deep-engraving or chasing fine detail and would rather clean the surface than fight masking residue. The worst result I’ve pulled off the bed was a deep multi-pass nameplate I’d left masked — the paper charred into the channels and bonded there, and digging it out left the engrave looking dirtier than if I’d never masked at all. Now anything past a light frost gets engraved bare and wiped afterwards. As with everything on the bench, a quick test on a scrap of the same sheet tells you which way to go before you commit the real part — thirty seconds of test cut saves an hour of cleanup or a ruined panel.
The Masking Supplies I Keep on Hand
The one consumable I never run out of is paper transfer tape, because it rescues any bare or re-used sheet. A wide roll of paper transfer masking tape covers full sheets in a couple of passes and peels clean off the finished part. I also keep a bottle of 99% isopropyl alcohol for the times I run bare and need to wipe smoke residue off the surface afterwards. Both are cheap, and between them they cover every masking situation an acrylic job throws at you.
As an Amazon Associate I earn from qualifying purchases. These are the masking supplies I actually use; the links never change which approach I recommend for the job.
Frequently Asked Questions
Should I remove the masking before laser cutting acrylic?
No, leave the film on to cut and peel it after the part is off the bed. The film catches the smoke residue along the cut line so the surface stays clean. Only peel first if a plastic film is fusing badly at the kerf, which is uncommon with paper masking.
Do I need to mask acrylic for engraving?
For shallow frosted engraving, yes. Engraving throws a broad cloud of fine smoke that deposits a hazy film on bare acrylic. Peel the masking only over the area you engrave so the frost forms on bare surface, and leave the rest on to protect against the residue.
What kind of tape can I use to mask acrylic?
Paper transfer tape, the low-tack masking sign-makers use, is ideal. It cuts clean, does not melt, and peels off without residue. Apply it to any sheet that arrives bare or that you have already peeled. Avoid high-tack tapes that leave adhesive behind.
Is paper or plastic masking film better for laser cutting?
Paper film is better for laser work. It stays put, does not melt at the cut edge, takes smoke residue well, and peels cleanly. Plastic film protects fine for handling but can melt slightly at the kerf and leave a small lip you have to pick off.
When should I not mask acrylic?
Skip masking on deep multi-pass engraving, where burnt paper can stick into the channel, and on very fine detail where fibrous masking blurs the frost. In those cases run bare and wipe the surface with isopropyl alcohol afterwards. Test on a scrap first to decide.