Laser Engrave Acrylic vs Cut Depth: Controlling the Result
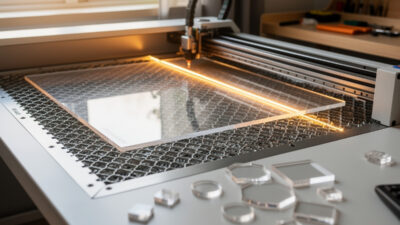
One of the most useful things to understand about acrylic is that “engraving” and “cutting” aren’t two separate operations — they’re the same melt-and-vaporise process at different intensities, and the depth you achieve is a continuum you control. Beginners think of frosted engraving, deep engraving, and cutting as three unrelated jobs; they’re actually one process dialled to three points on a power-versus-speed curve. Once you see it that way, you stop guessing and start placing your settings deliberately. After running stepped depth tests across my OMTech Polar 350 on everything from nameplates to backlit signs, this is how I think about acrylic depth.
Hold three numbers in your head and the whole thing clicks: shallow frosted engraving is a surface ablation at low power and high speed; deep engraving cuts 1–3 mm with more power, slower speed, and multiple passes; cutting is the same energy concentrated to go all the way through. Below I’ll map the whole depth spectrum and how to hit each point reliably — one fork of the broader laser cutting acrylic guide.
Engraving and Cutting Are One Continuum
Every acrylic operation removes material by heating it past its melting and vaporisation point. How much material you remove per pass depends on the energy density you deliver, which is set by power, speed, focus, and pass count. Low energy density ablates a thin frosted layer; high energy density vaporises a deep channel; concentrate enough energy in a single line and you separate the sheet entirely — that’s a cut.
The practical consequence is that you tune all three the same way: by controlling energy per unit length. Drop the speed or raise the power and you go deeper; raise the speed or drop the power and you stay shallow. Cutting is just engraving taken to the point of full penetration along a vector path instead of a raster fill. Seeing it as one continuum is what lets you predict the result instead of copying numbers off a forum and hoping.
Frosted Surface Engraving: The Shallow End
Frosted engraving is the everyday acrylic engrave — the white-on-clear look you see on award plaques and signs. It’s a shallow surface ablation that roughens the top layer just enough to scatter light into a bright frost. You want low power and high speed with a tight line interval, just enough to mark a clean frost without melting the surface into a glossy re-flow.
The classic frosted-engrave mistakes are going too deep (the frost turns glossy and loses its bright white as the surface melts and re-flows) and using too loose a line interval (you see scan lines instead of a solid frost). On my Polar 350 I run frosted fills at modest power and high speed and check that the result is matte white, not glassy. If it’s gone glossy, I back off the power. Masking matters here too — covered in the masking guide — because frosted engrave throws the most surface smoke.
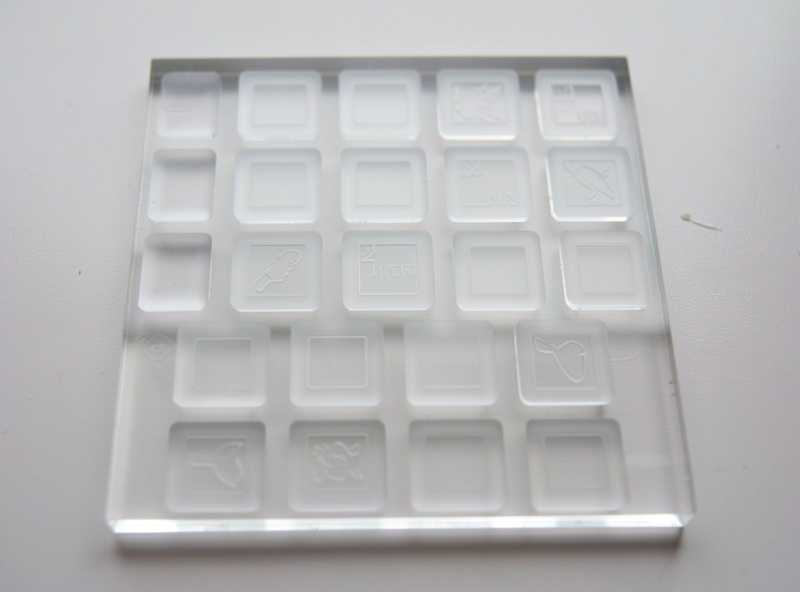
Deep Engraving: Cutting Into the Surface
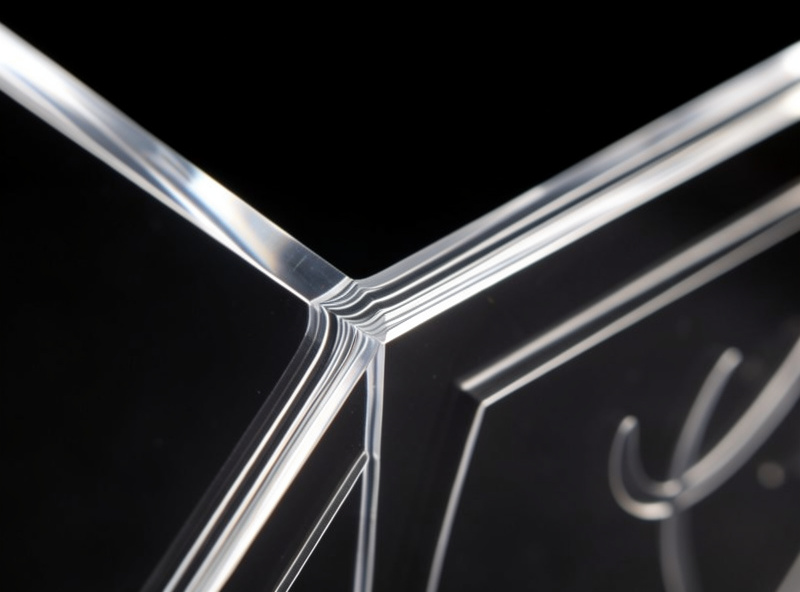
Deep engraving cuts 1–3 mm into the acrylic for tactile signage, stamps, moulds, and the backlit channels that make light glow through from below. This needs the opposite of frosted: higher power, slower speed, and usually multiple passes, each pass deepening the channel by roughly half a millimetre. The walls of a deep engrave melt and re-flow, so they come out smoother and clearer than the matte frost of a shallow engrave — which is exactly why deep-engraved channels transmit light so well for backlit work.
The trade-off is heat. Deep engraving dwells a lot of energy in one place, so flame-up risk rises and you must keep air assist flowing and never walk away. Masking often hurts here because burnt paper sticks into the channel, so I usually run deep engraves bare and clean afterward. Multiple lighter passes beat one heavy pass: they manage heat better and give a cleaner channel wall than trying to reach full depth in a single slow crawl. The first deep engrave I tried in a single brutal slow pass bubbled and flamed at the surface before it ever reached depth — the heat had nowhere to go. Splitting the same job into three passes at higher speed gave me the depth I wanted with a glassy channel and no flare-up, and that’s been my approach ever since. For the way deep engraving feeds edge-lit and backlit pieces, the edge-lit technique guide picks up where this leaves off.
Cutting: Full Penetration
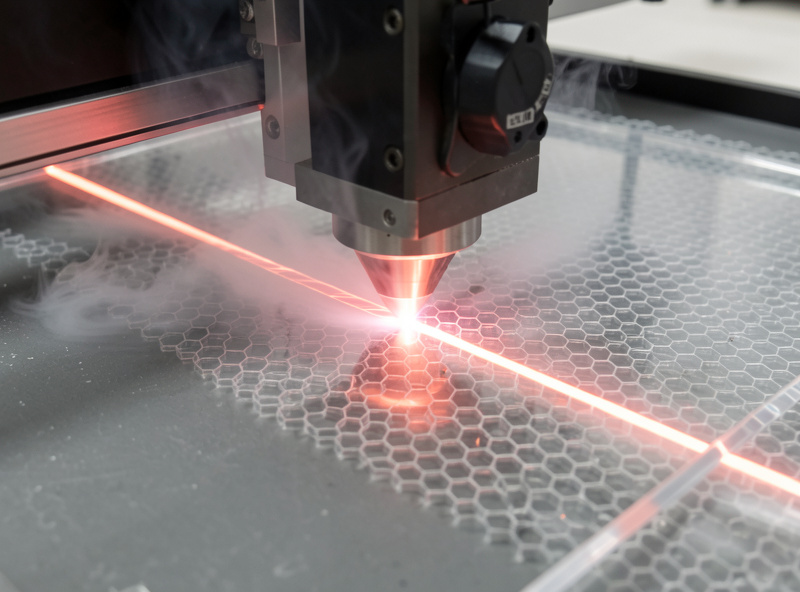
Cutting is the deep end of the same curve — enough energy concentrated along a vector line to vaporise all the way through the sheet. Acrylic strongly prefers a single slow pass for cutting rather than multiple fast ones, because each extra pass re-melts already-cooled material at the kerf and dulls the edge. Set the power high enough and the speed slow enough to clear the full thickness in one pass, with low air assist (5–10 PSI) to keep the edge polished rather than frosted.
The depth-control insight carries straight over: if a cut isn’t clearing the full thickness, you’re under-delivering energy — slow down or add power, don’t add passes. And if the edge is frosting, your air is too high or the sheet is extruded. The exact per-thickness cutting numbers live on the acrylic laser cutting settings page; this guide is about understanding why those numbers sit where they do.
| Operation | Power | Speed | Passes | Result |
|---|---|---|---|---|
| Frosted engrave | Low | High | 1 | Matte white surface frost |
| Deep engrave | High | Slow | 2–3 | 1–3 mm smooth channel |
| Cut | High | Slow | 1 | Full-through polished edge |
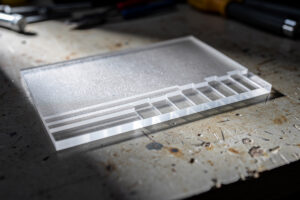
The Depth Test Tile That Settles Every Job
Rather than guess, I cut one depth test tile per new sheet lot: a small grid of fills at stepped power and speed, plus a couple of cut lines at different speeds. Light the tile, run a fingernail across the engraves, and you can read the whole depth curve at a glance — which settings give a bright frost, which give a clean deep channel, which cut through cleanly. It takes two minutes and saves ruining a real part. This is the same materials-test-card discipline I run on every material; on acrylic it’s especially worth it because the difference between a perfect frost and a melted mess is a narrow power band.
The tile I run is deliberately simple. I lay out a row of small filled squares stepping power down from high to low, a second row stepping speed up, and below them two or three short cut lines at descending speeds. I cut it on a corner offcut of the exact sheet I’m about to use, then read it three ways: eyeball the frost rows for the cleanest matte white, run a fingernail along the deep-engrave squares to feel which gave a smooth 1–3 mm channel, and check which cut line dropped its slug cleanly. Whatever wins each test is the setting I commit to the real part — no guessing, no copying a stranger’s numbers for a sheet I’ve never run.
For tooling up an acrylic engrave-and-cut workflow, the consumables I lean on are the sheet and the masking. A pack of cast acrylic sheets for test tiles and parts and a roll of paper transfer masking tape for the frosted-engrave jobs cover most of what a depth-controlled workflow needs.
As an Amazon Associate I earn from qualifying purchases. These are the materials I keep on my bench for acrylic depth work; the links never change the method I recommend.
Frequently Asked Questions
What is the difference between engraving and cutting depth in acrylic?
They are the same melt-and-vaporise process at different energy densities. Frosted engraving ablates a thin surface layer at low power and high speed; deep engraving removes 1 to 3 mm with high power, slow speed, and multiple passes; cutting concentrates enough energy along a line to go fully through.
Why is my acrylic engraving glossy instead of frosted?
You are running too much power for a surface engrave, so the top layer melts and re-flows into a glossy finish instead of a matte frost. Drop the power and raise the speed until the result is a clean white frost. Glossy means too deep for frosted work.
How do I deep-engrave acrylic for backlighting?
Use high power, slow speed, and 2 to 3 passes, deepening the channel by about half a millimetre per pass. The re-flowed channel walls come out smooth, which is what lets light transmit through cleanly. Keep air assist on and never leave the deep engrave unattended.
Should I use multiple passes to cut acrylic?
For cutting, a single slow pass is better than multiple fast ones, because each extra pass re-melts cooled material at the kerf and dulls the edge. For deep engraving, multiple lighter passes are better than one heavy pass because they manage heat and give cleaner walls.
Do I mask acrylic for deep engraving?
Usually no. On deep multi-pass engraving the masking paper can scorch and stick into the channel, leaving residue worse than smoke. Run deep engraves bare and clean the surface afterward. Mask for shallow frosted engraving, where surface smoke is the main concern.
How do I know what depth settings to use?
Cut a depth test tile on the same sheet lot: a grid of fills at stepped power and speed plus a few cut lines. Reading the tile shows which settings give a bright frost, a clean deep channel, and a full cut, so you place the real job from data instead of guessing.