Combining 3D-Printed Jigs with Laser Engraving: Hybrid Project Examples
A 3D-printed jig for laser engraving solves the single hardest problem in non-CNC laser work: holding small parts in exactly the same position, run after run. With a printed jig, batch consistency on 50-piece engraving runs jumps from “roughly aligned” to ±0.1 mm, and setup time per batch drops from 8–12 minutes of manual squaring to under 30 seconds of part-drop. The jig itself takes 90 minutes to print in PLA and costs $0.70 in filament.
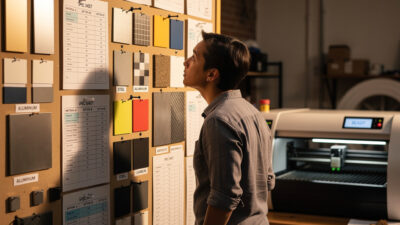
The trick most laser owners miss is that they think of the jig as a finished part rather than a fixture system. A modular jig — base plate plus swappable inserts — handles dozens of part shapes without reprinting the base. This guide covers the design pattern, the filament that holds up to laser scatter heat, the fastener system that makes inserts reliable, and the workflow for capturing a new part shape into a printable jig in 15 minutes. For a broader look at what 3D printers do best alongside other shop tools, see the 15 practical 3D printing projects reference.
Why a Jig Beats Tape and Magnets
Painter’s tape, double-sided adhesive, and magnets are the field-expedient holding methods most beginners use. Each fails predictably:
- Tape — leaves residue under engraving heat, lifts during long jobs, can’t reposition without re-aligning.
- Magnets — only work on ferrous bed surfaces and only with ferrous parts; deflect under laser draft induction at high power.
- Adhesive squares — single-use, contaminate the workpiece, leave brown burn rings on porous materials.
A printed jig fixes all three. The part drops into a printed pocket sized to its outline, sits flat against the print bed reference plane, and removes cleanly after the cut. Index marks on the jig align with the laser bed grid, so once you set jig position once, you reproduce identical alignment on every subsequent run.
Filament Choice for Laser Jigs
The filament has to survive close proximity to the laser focal point — backscatter heat reaches 60–80 °C on the jig surface during 6 mm-deep wood cuts. PLA softens at 55–60 °C and starts to deform within 8–12 hours of cumulative laser-near time. PETG glass-transitions at 80 °C and survives indefinitely.
- PLA — fine for occasional use (under 4 hours/week of laser time), free option if you have leftover spool
- PETG — the right default; survives heat, prints reliably, doesn’t off-gas problematically when slightly scorched
- ABS — good thermal performance but warps badly and the smell is bad inside an enclosed laser cabinet
- Polycarbonate — overkill for jigs, expensive, not worth the print difficulty
- Nylon — absorbs ambient moisture and changes dimensions; bad for a precision fixture
For high-power laser work (40 W+ CO2), step up to PETG and oversize the jig wall thickness to 4 mm to add thermal mass. Lower-power diode lasers (5–10 W) tolerate PLA jigs with no problems.
The Modular Jig Design Pattern
A modular jig has three parts: a base plate, swappable inserts, and an alignment stop. Build it once in CAD; thereafter you only design new inserts.
The base plate is a 200×200×6 mm flat slab with:
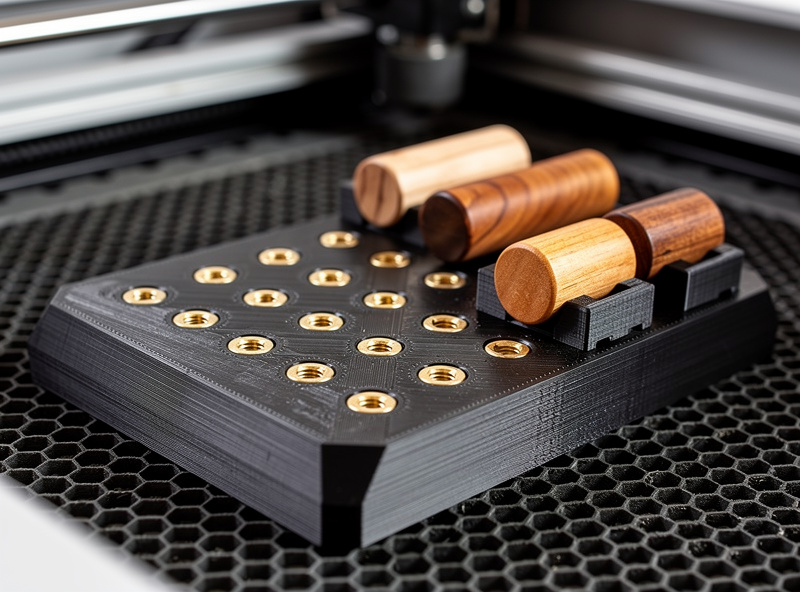
- A 20×20 mm grid of M3 threaded inserts (heat-set into the print) on a regular spacing
- Two corner reference posts that align with two corners of your laser bed
- Index ticks every 10 mm along two edges for visual alignment
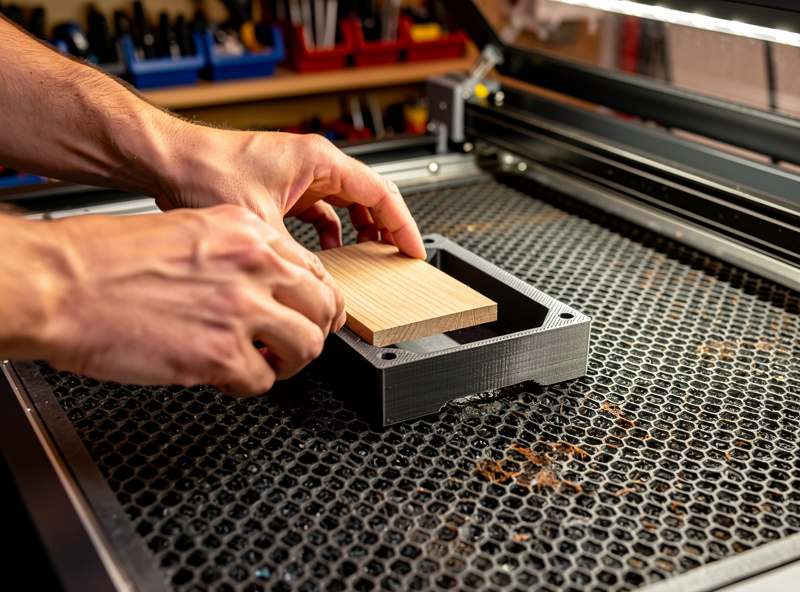
Each insert is a small printed part with: the negative pocket for the workpiece, two M3 clearance holes that align with the base plate threaded inserts, and a handle for quick removal. New inserts swap in 5 seconds without touching the base plate position.
The alignment stop is a removable rail that rests against the laser bed wall and locates the base plate by butting up to two specific posts. Setting jig position once means clamping or weighting the alignment rail; the base plate then drops in repeatably.
Capturing a New Part Shape Into a Printable Insert
The 15-minute workflow for capturing a new part:
- Place the part flat on a sheet of paper, trace the outline with a sharp pencil, and add 0.3 mm offset for clearance.
- Photograph the trace squared on a graph background.
- Import the photo into Fusion 360, Onshape, or FreeCAD as a calibration sketch.
- Trace the outline as a 2D sketch, extrude up by part thickness plus 1 mm.
- Cut the extrusion from a 30×30×8 mm rectangular insert blank.
- Add two M3 clearance through-holes aligned with the base plate threaded inserts.
- Export as STL, slice at 0.2 mm with 3 walls and 20% infill.
- Print, heat-set the inserts in the base plate if not already done, install the new insert.
For complex parts (multiple voids, thin features), use the laser itself to trace the outline once and import the SVG directly into your CAD tool. Many laser owners forget the laser is also a fast 2D digitizer when used at very low power on dark paper. For the broader 3D-printing material strategy that supports this kind of fixture work, the laser software cluster covers G-code prep workflows that pair well with printed jigs.
Real Project Examples
Three projects that show what jigs unlock:
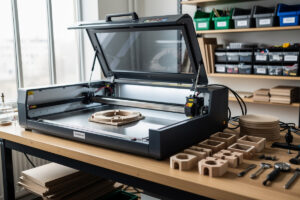
- Pen-blank engraving (50-piece batch) — printed cradle holds the wooden blank cylindrical-axis, indexed every 60° for clean radial engraving. Without the cradle, manual indexing produces visible ±2° rotation drift across the batch. With the cradle, every blank is identical.
- Leather wallet engraving — printed insert with three corner pegs holds the wallet face flat against the bed reference plane. Catches the curl that vegetable-tanned leather develops when humidity changes overnight. (For the laser settings that go with this fixture, see the leather engraving settings reference.)
- Wedding favor batch (200 pieces) — printed tray with a 10×20 grid of recesses holds 200 wooden discs flat in one go. Engraves the entire batch in 90 minutes versus 6 hours for individual placement.
These three patterns — cylindrical, flat-with-pegs, and grid — cover roughly 80% of small-part laser jobs. Once you have base plates and a small library of inserts, you spend more time designing engravings and less time fighting alignment.
Common Failure Modes
Three failures account for most jig disappointments:
- Insert pocket too tight — the part doesn’t drop in, requires force, or warps the jig over time. Fix: design with 0.4 mm offset on all sides; if too loose, reprint with 0.2 mm.
- Heat creep on long jobs — the base plate warps after 6+ hours of cumulative engraving. Fix: switch base plate to PETG with 4 mm walls and 25% infill.
- Lost insert in the trash — it happens; small printed inserts get swept up with offcuts. Fix: print every insert in a single bright color (orange, yellow) so they stand out on a wood-shavings shop floor.
For the first 90 days of jig use, photograph each insert design with the part it holds and store the photo in your shop file. Six months in, you’ll have 20+ inserts and remembering which one fits what becomes the actual problem.
When a Printed Jig Isn’t Worth It
Skip the jig for one-off jobs (anything you’ll cut once and never repeat), parts larger than 150 mm in any dimension (printed jigs flex too much at scale), and jobs where the alignment tolerance is >1 mm (tape works fine). Build the jig when you’ll repeat the same cut 5+ times, the part is small (under 100 mm), and ±0.1 mm matters to the result.
Frequently Asked Questions
Will the laser melt the 3D-printed jig?
Not at any reasonable power if the jig is the right material. PETG handles 80 degrees Celsius and survives indefinitely near a laser focal point. PLA softens at 55 to 60 degrees and is suitable for light occasional use. Direct beam contact will damage any plastic, so design pockets so the laser only ever hits the workpiece.
How accurate are 3D-printed jigs really?
A printed jig with a calibrated printer holds workpieces to roughly 0.1 millimetre repeatability run after run. That is tighter than tape or magnets and tighter than what most diode laser focus tolerance can resolve, so the jig is not the limiting factor in your engraving accuracy.
Do I need to print the whole jig in one piece?
No. The modular pattern with a fixed base plate and swappable inserts is faster to design and lets you reuse the base for dozens of part shapes. Print the base once and add small inserts as you take on new projects.
What 3D printer do I need for laser jigs?
Any FDM printer with a 200 by 200 millimetre or larger bed handles standard jigs. A 0.4 millimetre nozzle and 0.2 millimetre layers are sufficient. Resin printers are overkill and the resin durability is worse than PETG for this application.
Can I use the same jig with a different laser?
Yes if both lasers have the same bed reference origin. The jig pins to a corner of the laser bed; if the second laser uses the same corner reference and the bed is at least the size of the jig base plate, the same jig works without modification.
How do I align the jig precisely the first time?
Use the laser itself in low-power tracing mode. Place the empty jig in approximate position, trace the corner reference posts at 5 percent power, then physically nudge the jig until the trace lines hit the corner posts. Once aligned, mark the corners on the bed with masking tape for repeatable placement.
Can the jig hold metal parts for fiber laser engraving?
Yes for thin metal up to 2 millimetres. The metal sits in the printed pocket the same way wood does. For fiber laser engraving on stainless or aluminium, ensure the jig wall thickness is at least 4 millimetres to provide thermal isolation, and use PETG rather than PLA.